How to Clean a Head Shaver for a Fresh, Smooth Cut
Keeping a head shaver clean is essential for performance, skin health, and extending the life of the tool. Regular maintenance helps reduce irritation and ensures your shaver remains close and comfortable. This guide walks American users through practical steps using common cleaning tools and products designed for electric shavers.
Whether you use a lightweight electric shaver or an advanced system, proper cleaning routines minimize buildup of hair, oil, and skin debris. The steps below cover quick daily maintenance as well as deeper cleaning for weekly care.
Quick Answer
For a quick refresh, detach the head, tap out loose hairs, rinse under running water if your model allows it, brush with an electric shaver cleaning brush, apply a small amount of cleaning solution if recommended, and reassemble. For a deeper cleanse, use an automatic razor cleaning station when available.
What You’ll Need
Having the right tools handy makes cleaning faster and more effective. The list below focuses on products designed for electric shavers and head shaving systems.
- Electric shaver cleaning brush
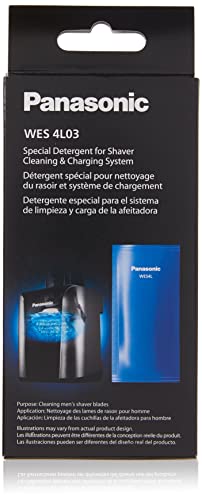
- Shaver cleaning kit with cleaning solution
- Automatic razor cleaning station for electric shaver
- Soft microfiber cloth for drying
- Optional cleaning spray or wipe recommended by the manufacturer


Before You Start
Before cleaning, power off and unplug the shaver from chargers or USB docks. Remove the head or foil assembly if your model permits, and read the user manual for any model-specific cautions. Keep blades sharp and avoid forcing parts during disassembly. Plan for a 5–15 minute cleaning window for routine maintenance and 20–30 minutes for a deeper cleanse.
Step-By-Step: How To Clean A Head Shaver
- Power off the shaver and remove it from any charging base.
- Remove the head or foil assembly according to the manual to expose internal components.
- Gently tap the head to loosen hair clippings, then use the electric shaver cleaning brush to sweep debris from foils, blades, and crevices.
- Rinse only if the manufacturer allows water exposure for your model. Use cool running water to rinse away loosened buildup.
- Apply a small amount of shaver cleaning solution or wipe, then scrub gently to break down oils and skin residues.
- Rinse again if water exposure is approved, and pat dry with a soft microfiber cloth. Let the parts air-dry fully before reassembling.
- Use the cleaning station if you have one: insert the shaver into the station and follow the device’s cycle for cleaning, drying, and sanitizing.
- Reassemble the head, plug in or place on the charger, and run a quick test shave on a small area to confirm smooth operation.
- Wipe the exterior of the shaver with a damp cloth to remove any residue on the housing.
- Schedule a deeper weekly clean if you shave frequently, pairing brushing with a cleaning solution for a thorough cleanse.
- Store the shaver in a dry, well-ventilated area to prevent moisture buildup and corrosion.
- Keep track of replacement parts like heads and foils and replace according to the manufacturer’s guidance.
Troubleshooting
| Symptom | Likely Cause | Fix | Prevention |
|---|---|---|---|
| Stiff or pulling on hair during shave | Dull blades or clogged head | Clean thoroughly; replace head if necessary | Clean after each use; schedule head replacement per guidance |
| Unpleasant odor after cleaning | Residual oils or soap buildup | Deep clean with cleaning solution; rinse thoroughly | Use manufacturer-recommended solutions |
| Slow drying after cleaning | Moisture trapped in crevices | Dry with microfiber; ensure complete air-dry before reassembly | Disassemble partially if instructed to aid air flow |
| Water exposure causing corrosion | Model not water-safe | Do not rinse; wipe with damp cloth only | Follow manual’s water exposure guidelines |
Common Mistakes
- Using harsh cleaners or applying abrasive tools on delicate foils
- Forgetting to dry parts completely before reassembly
- Cleaning with water when the model isn’t water-safe
- Ignoring manufacturer guidelines for cleaning frequency
Tips For Best Results
Consistency matters. Clean the shaver immediately after use if possible, especially after shaving scalp areas that shed more hair.
Use a dedicated cleaning brush to reach tight spots around the foil and blade edges, and keep the blades sharp by replacing worn parts on schedule.
Store in a dry area and consider using a cleaning station for regular sanitizing and drying cycles if your model supports it.
Call A Professional
Seek professional help if you notice persistent performance issues beyond routine cleaning, broken components, electrical concerns, or unusual heat during operation. Do not attempt internal repairs without proper training, as this can void warranties and create safety risks.
FAQ
How often should I clean my head shaver?
Clean after every use with a quick brush and rinse if allowed, and perform a deeper clean weekly or per the manufacturer’s schedule.
Can I use regular soap to clean my shaver?
Use only manufacturer-approved cleaning solutions or wipes to avoid damage to foils and electronics.
Is it safe to run my shaver in a cleaning station daily?
Yes, if the station is designed for frequent cycles and the model supports it; follow the device’s cycle recommendations.
What should I do if the shaver is still clogged after cleaning?
Inspect for lodged hairs in the head, replace worn blades, and consider a professional service if clogging persists.
Buying Guide
Choosing a cleaning strategy for a head shaver depends on several factors. Consider the size of the head and the ease of access to internal parts, especially for frequent users who shave heads regularly.
Size and design: A compact unit that fits your grip and storage space helps with daily use and cleaning routines. Larger cleaning stations may offer more comprehensive sanitation cycles but require more space.
Noise level: Some cleaning stations and kits operate quietly, which is beneficial for early morning routines. Look for dB ratings if available.
Energy efficiency: Energy-efficient stations save power during regular cycles and are gentler on batteries for portable shavers.
Controls: Simple, intuitive controls reduce cleaning errors. Devices with clear indicators for cleaning, drying, and sanitizing are helpful for quick routines.
Placement: Place cleaning solutions and stations on a stable, ventilated surface away from moisture. Ensure cords and hoses are organized to prevent trips and tangling.
When comparing options, consider whether you prefer a dedicated automatic cleaning station or a versatile kit with cleaning solution. A well-chosen setup can dramatically extend blade life and reduce skin irritation, making regular maintenance quick and hassle-free. Do you typically shave daily or less often? Your frequency will guide how robust your cleaning system should be.
Leave a Reply