How to Clean Unsealed Grout Effectively
Unsealed grout is more susceptible to staining and moisture than sealed grout. This guide provides practical steps to refresh dirty grout lines in kitchens and bathrooms using common tools and safe methods. Readers will learn quick strategies, choose the right tools from a curated set of options, and avoid common pitfalls that can damage grout or surrounding surfaces.
By following this structured approach, homeowners can restore whiteness and prevent future grime buildup without expensive professional treatments. The methods prioritize accessible equipment, safety, and efficient workflows for typical household layouts.
Quick Answer
Best first steps: start with a light mechanical scrub using a handheld electric grout cleaner to break up surface grime, then treat with a steam cleaner grout scraper head or a stiff nylon brush for stubborn staining. Rinse thoroughly and wipe dry to prevent new deposits. For deep or persistent stains, repeat the scrubbing and consider a second pass with a gentle cleaner.
What You’ll Need
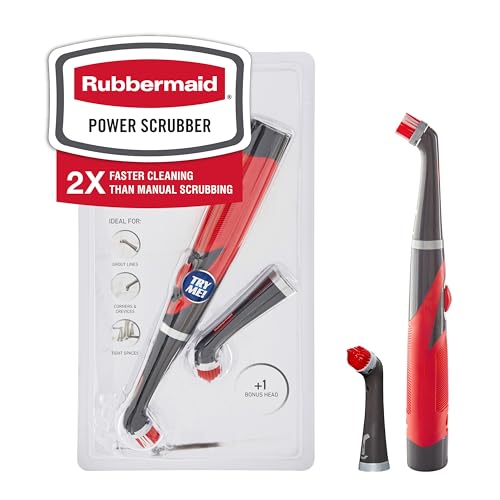
- Electric grout cleaner handheld scrubber
- Stiff nylon grout cleaning brush 2-inch wide
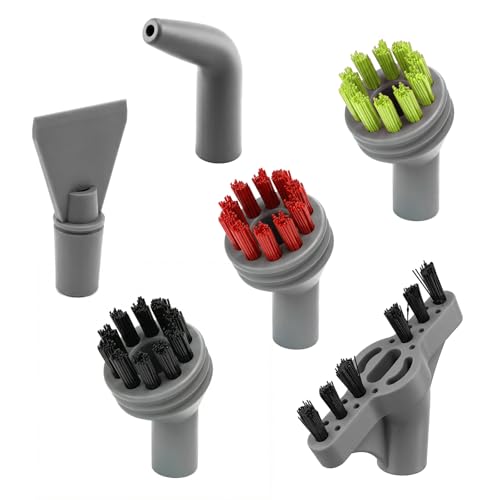
- Steam cleaner grout scraper head attachment
- All-purpose cleaner or a baking soda paste
- Spray bottle with clean water
- Microfiber cloths or towels

Before You Start
Check the surface type of the grout and surrounding tiles. Unsealed grout can be more crumbly, so test a small inconspicuous area first for colorfastness and texture. Work in a well-ventilated area and wear gloves to protect skin. Plan to allocate 30–60 minutes per area depending on size and staining. Do not use harsh acidic cleaners or abrasive pads on fragile tile, as this can erode grout and tiles.
Step-By-Step: How To Clean Unsealed Grout
- Remove surface debris from the grout lines with a dry microfiber cloth or a vacuum.
- Prepare a cleaning solution suitable for unsealed grout; a baking soda paste or a mild all-purpose cleaner works well for light stains.
- Use the electric grout cleaner handheld scrubber to agitate the grout lines, applying even pressure along the grout without digging into the joints.
- For tougher stains, switch to the stiff nylon grout cleaning brush 2-inch wide and scrub along the grout in small sections to avoid spreading debris.
- Rinse the area with clean water and wipe away loosened grime with a microfiber cloth; repeat if necessary until the water runs clear.
- If residue persists, attach the steam cleaner grout scraper head and carefully glide it along the grout to lift embedded grime; avoid overheating porcelain or ceramic tiles.
- Rinse again and dry the surface completely to prevent new staining from mineral deposits.
- Inspect the grout lines; if color remains uneven, consider repeating the process on the most stained sections.
- Dry and recheck the area after a few minutes; address any remaining spots with a targeted brush or paste treatment.
- Document areas prone to staining and plan routine maintenance to keep grout looking fresh between deeper cleanings.
- If the grout shows excessive crumbling, plan professional guidance or grout reconditioning as needed.
- Store tools clean and dry to prevent rust and preserve bristles for future cleanings.
Troubleshooting
| Symptom | Likely Cause | Fix | Prevention |
|---|---|---|---|
| grout still discolored after cleaning | embedded mineral deposits or deep staining | repeat scrubbing with nylon brush and steam attachment; consider a baking soda paste | regular maintenance to prevent buildup |
| grout softer or crumbling | unsealed grout degradation | limit aggressive scrubbing and plan regrouting if necessary | seal grout after cleaning to protect it |
| tiles show dull or scratched areas | abrasive cleaning or improper pressure | switch to gentler tools and lighter pressure | test in hidden area before full use |
| moldy smell returning quickly | moisture trapped in grout lines | ensure thorough drying and consider moisture control in the area | improve ventilation during and after cleaning |
Common Mistakes
- Overly aggressive brushing that flakes unsealed grout
- Using acidic cleaners on natural stone or glazed tiles
- Skipping a rinse step, leaving cleaner residue that attracts more dirt
- Neglecting to dry grout thoroughly after cleaning
Careful technique reduces damage and improves long-term results. Always test cleaners in a small area first and follow manufacturer guidelines for tools and attachments.
Tips For Best Results
- Work in small sections to maintain control and prevent grime from drying onto surfaces.
- For large areas, schedule short cleaning intervals to avoid fatigue and ensure consistency.
- After cleaning, consider applying a grout sealer to protect unsealed joints and simplify future maintenance.
- Keep a spare brush head on hand for quick touch-ups and easier tool maintenance.
- Use warm water for rinsing to help dissolve soaps and residues more effectively.
Call A Professional
Proceed to a professional if the grout is extensively cracked, crumbling, or if mold growth persists despite multiple cleanings. Seek expert advice when grout depth is more than a few millimeters or if tiles are loose or damaged. Signs to stop DIY work include persistent moisture in walls, musty odors after cleaning, or noticeable tile instability. A licensed pro can assess grout condition and perform regrouting or grout sealing if needed.
FAQ
Can unsealed grout be cleaned without sealing afterward?
Yes, but unsealed grout will stain more easily, so sealing after cleaning is recommended for easier maintenance.
Is a steam cleaner safe for unsealed grout?
Steam can help lift grime, but use gentle settings and compatible attachments to avoid damage.
What cleaner should I avoid on unsealed grout?
Avoid acidic cleaners like vinegar or lemon on certain grout mixes; test first and use mild cleaners instead.
How often should I clean unsealed grout?
Frequency depends on traffic and location; kitchens and bathrooms may require monthly upkeep, with deeper cleanings quarterly.
Buying Guide
Choosing the right tools for cleaning unsealed grout involves several factors. Consider the size of the area, the types of stains, and the compatibility of tools with the grout and tiles in your home. A handheld electric grout cleaner offers convenient scrubbing power, while a stiff nylon brush provides targeted action on stubborn grime. A steam cleaner grout scraper head can lift embedded deposits without excessive scrubbing.
Key buying factors include size and noise level, which affect comfort during longer cleaning sessions. Look for models with adjustable speeds and ergonomic handles. Energy efficiency matters for frequent use. Consider units with interchangeable heads to adapt to corners and edge lines. For placement, choose compact, easy-to-store options that fit in cabinets or closets.
When comparing products, weigh durability and accessories included with the purchase. A kit that covers multiple grout widths and includes a scraper head expands versatility. Read user reviews for real-world performance and check compatibility with typical bathroom or kitchen tile types. If unsure, opt for a mid-range set with a solid warranty and replacement heads available.
Leave a Reply