How to Clean a Belly Button Ring Before Insertion
Keeping a belly button piercing clean before insertion helps minimize irritation and infection. This guide outlines a simple, safe method using common piercing care products to ensure a clean, ready-to-wear ring.
Quick Answer
Before insertion, rinse the jewelry with sterile saline, wipe with 70% isopropyl alcohol prep pads, and dry with a clean, lint-free pad. If the piece is new or has never touched skin, sanitize with a piercing cleaning kit antiseptic solution and cotton swabs to remove any manufacturing residues.
What You’ll Need
- Isopropyl alcohol 70% prep pads piercing cleaning wipes
- Sterile saline solution for piercing cleaning 0.9% saline
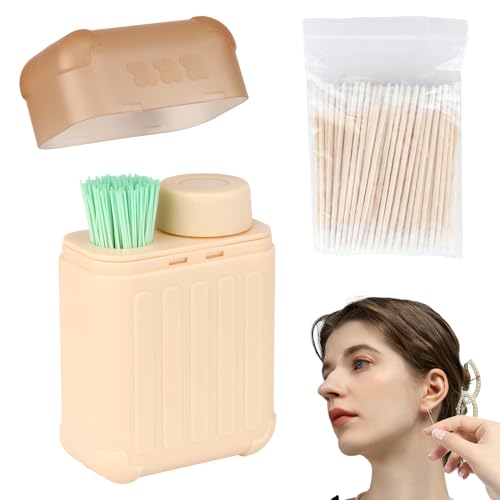
- Piercing cleaning kit antiseptic solution cotton swabs


Before You Start
Prepare a clean workstation and wash hands thoroughly with soap and water. Clean hands help prevent transferring bacteria to the jewelry or piercing site. Avoid using household cleaners or anything abrasive on the jewelry. Ensure the area around the navel is dry and free of lotions or oils that could trap bacteria. Time you’ll spend: about 5–10 minutes. If you notice redness, swelling, or discharge, stop and consult a professional before attempting insertion.
Step-By-Step: How To Clean Belly Button Ring Before Insertion
- Set up a clean workspace and lay out all cleaning supplies within reach.
- Wash hands thoroughly with soap and water for at least 20 seconds.
- Rinse the belly button jewelry under lukewarm water to remove any surface debris.
- Use a 70% isopropyl alcohol prep pad to wipe the entire surface of the jewelry, including the ends and threading if applicable.
- Let the alcohol dry completely for about 15–30 seconds to avoid trapping moisture against skin.
- Rinse the jewelry again with sterile saline solution to remove any alcohol residue and sanitize the surface further.
- Gently pat dry with a clean, lint-free cloth or sterile cotton swab. Avoid rubbing hard to prevent scratches.
- If advised by a professional, apply a thin layer of antiseptic solution from the piercing kit using a new cotton swab.
- Inspect the ring for any rough edges or irregularities that could irritate the piercing.
- Allow the jewelry to air-dry completely before attempting to insert it.
- Carefully align the jewelry with the piercing channel and insert slowly, stopping if there is resistance or pain.
- Wipe down the surrounding skin lightly with a sterile saline-soaked cotton swab after insertion to remove any oils from skin contact.
Troubleshooting
| Symptom | Likely Cause | Fix | Prevention |
|---|---|---|---|
| Jewelry feels sticky or tacky | Residue on surface | Wipe with sterile saline and dry completely | Ensure surfaces are dry before insertion |
| Discomfort or burning during insertion | Excess moisture or rough edges | Dry jewelry thoroughly; deburr edges if needed | Inspect for burrs before use |
| Redness after insertion | Irritation or infection risk | Pause and clean with saline; seek professional advice if persists | Follow professional aftercare guidelines |
| Persistent tacky odor | Residual oils or contamination | Clean with sterile saline; consider replacing with new, sterile piece | Practice strict hygiene and replace if questionable |
Common Mistakes
- Using household cleaners or vinegar on jewelry
- Inserting jewelry while still wet from cleaning solutions
- Reusing cotton swabs or pads that may shed fibers
- Skipping a final dry step, leaving moisture on the surface
Consistent, controlled cleaning helps prevent irritation and supports safer healing when re-inserting belly button jewelry.
Tips For Best Results
- Always start with clean hands and a clean workspace to reduce contamination risks.
- Prefer sterile saline for rinsing over tap water to minimize microbial exposure.
- Allow all cleaning steps to dry completely before insertion to reduce friction.
- Use the same kit and products recommended by a piercer to maintain compatibility with the jewelry material.
Call A Professional
Seek professional advice if you notice prolonged redness, swelling, warmth, pain, or discharge beyond a few days after cleaning and insertion. Stop attempts to insert the ring if you experience increasing discomfort or resistance. If you suspect an allergic reaction or infection, contact a licensed piercer or healthcare provider promptly.
FAQ
How often should I clean the belly button ring before insertion?
Clean the jewelry right before insertion following the steps described to minimize contamination risk.
Can I use alcohol to clean the skin around the piercing instead of the jewelry?
Yes, but use a mild, non-irritating cleanse and avoid alcohol on freshly pierced skin unless advised.
Is sterile saline the best option for cleaning the jewelry?
Yes, sterile saline is gentle and effective for removing debris without harsh chemicals.
Should I sterilize the jewelry after insertion?
Yes, if advised by a professional, rinse with saline and dry thoroughly to maintain cleanliness.
What if the jewelry has rough edges after cleaning?
Inspect and, if necessary, gently smooth edges with proper tools or replace the piece to prevent skin irritation.
Is it safe to reuse alcohol wipes?
Alcohol prep pads are designed for single use; use a fresh pad for each cleaning step.
When should I replace the jewelry?
Replace if there is any visible damage, wear, or persistent irritation after cleaning.
Buying Guide
When selecting items to prepare for cleaning a belly button ring, consider size compatibility with your jewelry, ease of use, and material compatibility. Key buying factors include:
- Size and compatibility: Ensure the cleaning products and antiseptics are suitable for your jewelry’s material and sizing, especially if you use hypoallergenic metals.
- Noise level: Not applicable here; this section focuses on care products rather than equipment with noise.
- Energy efficiency: Not applicable to cleaning supplies.
- Controls and ease of use: Preferring individually packaged, single-use wipes and sterile saline bottles reduces contamination risk.
- Placement and storage: Store cleaning supplies in a cool, dry place away from direct sunlight; keep away from children.
In practice, a compact kit containing 70% IPA prep pads, sterile saline, and antiseptic solution provides a reliable, compliant approach. Consider user-friendly packaging and clear labeling to minimize confusion during a routine cleaning step. If you’re unsure about product compatibility with your jewelry, consult a piercer for personalized recommendations.
Leave a Reply