How to Get Rid of Wood Rot
Wood rot undermines structural integrity and aesthetics in homes across the United States. This guide explains practical, step-by-step methods to identify, treat, and prevent wood rot using common woodworking products and safety practices. By following these steps, homeowners can restore affected areas and protect nearby timber from future decay.
Quick Answer
Identify damp areas and discolored, soft wood. Dry thoroughly, then apply a wood rot repair epoxy kit and a wood hardener consolidant for rotted wood to restore stiffness. Treat remaining fibers with a borate wood preservative treatment spray to deter future decay.
What You’ll Need
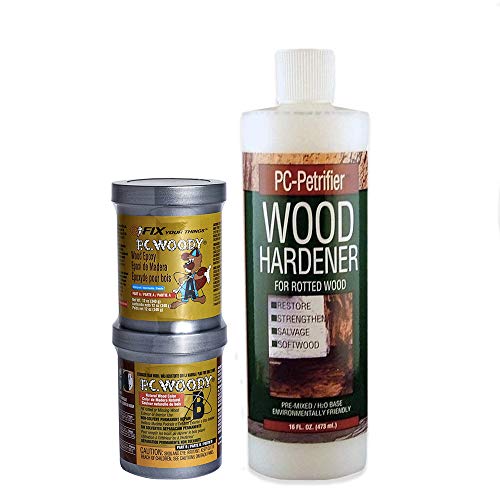
- Wood rot repair epoxy kit
- Wood hardener consolidant for rotted wood
- Borate wood preservative treatment spray
- Protective gear: respirator, gloves, eye protection
- Putty knife, sanding block, sandpaper (various grits)
- Dust mask or respirator; drop cloths and plastic sheeting
- Paint or stain and primer for finishing (optional)


Before You Start
Safety comes first. Wear a respirator when sanding and applying chemicals, and ensure good ventilation. Remove all loose, rotted wood to prevent further spread, and isolate the work area to keep pets and children away. Expect multiple steps and plan for a few hours to a full day, depending on the extent of rot. Inspect nearby wood for moisture sources—leaks, condensation, or poor drainage—and address those to avoid reinfection.
Step-By-Step: How To Get Rid Of Wood Rot
- Assess the damage by pressing with a screwdriver or awl to locate soft, crumbly wood. Mark all affected zones.
- Remove severely decayed sections using a saw, ensuring a solid, solid-edged void for repairs.
- Dry the area thoroughly. Use heat or desiccants if needed, and allow overnight air exposure to reduce moisture before repairs.
- Apply the wood hardener consolidant for rotted wood to harden powdery fibers and stabilize the surface. Follow the product’s instructions for the correct number of coats.
- Mix and apply the wood rot repair epoxy kit to fill voids and reconstruct the wood profile. Build in layers if the cavity is deep, allowing each layer to cure as directed.
- Shape the repaired surface with a putty knife and sand smooth once fully cured. Start with medium grit and finish with fine grit for a seamless blend with surrounding wood.
- For additional protection, spray a borate wood preservative treatment spray over exposed timber to deter future fungal growth.
- Prime the repaired area and apply paint or stain to match surrounding surfaces. If moisture is ongoing, install a weatherproof sealant or flashing to protect the area.
- Monitor the area over subsequent seasons. Recheck for dampness, peeling finish, or new soft spots after heavy rain and take action promptly if rot returns.
- Address underlying moisture sources: fix leaks, improve ventilation, and ensure proper drainage away from wood surfaces.
- Consider a professional assessment for structural components like joists or beams if rot is extensive or hidden behind walls.
Troubleshooting
| Symptom | Likely Cause | Fix | Prevention |
|---|---|---|---|
| Soft, spongy wood after repair | Insufficient hardener penetration or cure | Reapply wood hardener consolidant as directed | Ensure moisture is controlled before repairs |
| Cracking epoxy or epoxy peels | Noise moisture or poor surface prep | Weigh surface prep and re-sand before re-coating | Dry area thoroughly prior to epoxy application |
| New rot appearing after treatment | Ongoing moisture problem | Fix moisture source and reapply treatment | Improve drainage and ventilation |
| Spray misses target or wipes off | Incorrect spray technique or timing | Spray evenly in dry, mild conditions as per label | Test spray in a small area first |
Common Mistakes
- Underestimating rot extent and leaving hidden damaged wood in place.
- Using epoxy repair without adequate surface preparation or drying.
- Skipping moisture source repairs, leading to recurring rot.
- Failing to protect surrounding areas during chemical treatments.
Tips For Best Results
- Work on rot when humidity is low and temperatures are moderate to ensure proper curing.
- Test each product in a small area first to confirm compatibility with wood type and finish.
- Layer epoxy repairs to recreate the wood’s original profile; avoid overfilling in one go.
- Keep the area well-ventilated during and after application for safer drying and curing.
- Document repairs with photos for future inspections and potential resale disclosures.
Call A Professional
Consider a pro if any of the following apply: rot spans load-bearing members, concealed rot behind walls, or there is extensive moisture damage indicating a larger structural issue. If the timber shows significant sagging, cracking, or infestation signs such as insects, contact a licensed carpenter or contractor promptly. Persistent dampness and recurring rot after treatment warrant expert assessment.
FAQ
Q: Can I use wood rot repair epoxy kit on all woods?
A: Most epoxy kits are versatile, but always follow the product’s compatibility guidelines for softwood vs. hardwood and outdoor vs. indoor use.
Q: How long does wood hardener consolidant take to cure?
A: Cure times vary by product and conditions; refer to label directions for exact times and reapplication windows.
Q: Is borate wood preservative spray safe for indoor use?
A: Borate sprays are generally safe when used as directed; ensure proper ventilation and wear protective gear during application.
Q: When should I repaint after rot repair?
A: Repaint once the repaired wood is fully cured and dry, typically after 24–48 hours for mild conditions or longer in humid environments.
Buying Guide
Choosing the right products for wood rot repair depends on the project scope and location. Consider size and accessibility of the affected area, expected moisture exposure, and whether the work is indoor or outdoor. Evaluate product compatibility with wood type and desired finish, as well as cure times that fit your schedule. Look for a comprehensive kit that includes epoxy resin, hardener, and surface prep supplies. For long-term protection, pairing a rot repair epoxy kit with a wood preservative spray can provide additional defense against fungal growth. Compare brands based on ease of use, curing times, and customer reviews to select a reliable solution that aligns with your renovation goals.
Leave a Reply