How to Get Rid of Mold in Bathtub
Mold in bathrooms is a common issue due to humidity and moisture. This guide explains practical, user-friendly steps to remove mold in a bathtub and prevent it from returning, using common tools and mildew-resistant materials available in many American homes.
Quick Answer
Act quickly at the first sign of mold. Ventilate the area, wear protective gear, and use a scrub brush with a strong cleaner. For stubborn spots, gently remove moldy grout with a tile scraper and reseal with mildew-resistant silicone caulk to prevent future growth.
What You’ll Need
- Stiff nylon bathroom scrub brush tub grout
- Grout removal tool tile scraper bathtub
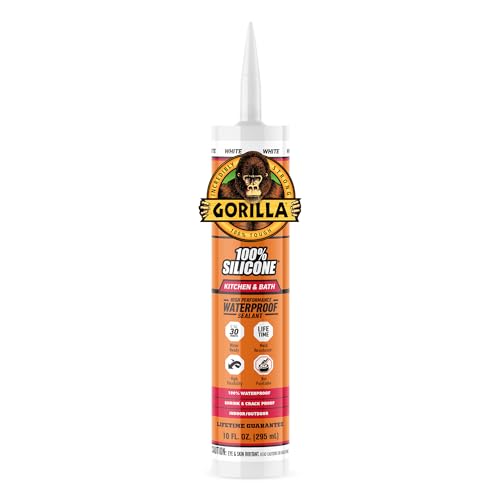
- Mildew resistant silicone caulk sealant bathroom kit
- Protective gloves and goggles
- Face mask or respirator (for heavy mold)
- Bleach-free mold cleaner or hydrogen peroxide
- Old rags or towels for drying


Before You Start
Prepare the area by ensuring good ventilation, opening a window or turning on an exhaust fan. Protect surrounding surfaces with plastic sheeting if needed. Time estimate: 1–3 hours for a typical tub with light to moderate mold. Important cautions: never mix bleach with ammonia or acidic cleaners, always wear protective gear, and avoid damp, porous materials that can spread mold spores.
Step-By-Step: How To Remove Mold From A Bathtub
- Ventilate the space and put on protective gear to guard eyes, skin, and lungs against mold spores.
- Apply a mold cleaner or hydrogen peroxide directly to the moldy areas and let it sit for 10–15 minutes to penetrate the surface.
- Scrub the tub and grout with a stiff nylon bathroom scrub brush tub grout to loosen mold and soap scum.
- For stubborn grout lines, use a grout removal tool tile scraper bathtub to carefully remove the most affected grout.
- Rinse the area with warm water and repeat if necessary until mold is visibly removed.
- Dry thoroughly using towels or a dry cloth to prevent new mold growth from remaining moisture.
- Apply a mildew resistant silicone caulk sealant bathroom kit to reseal the tub edges and grout lines, creating a moisture barrier.
- Allow the sealant to cure fully according to the product instructions before exposing the area to moisture.
- Maintain regular cleaning with a mold-inhibiting cleaner and keep the bathroom dry after showers to prevent recurrence.
- Inspect periodically for signs of new mold and re-clean as needed to stop growth in its tracks.
- Consider upgrading ventilation or using a moisture-absorbing product in the bathroom to further reduce humidity levels.
- Document any persistent mold that reappears after treatment and consider professional assessment if it spreads beyond grout lines.
Troubleshooting
| Symptom | Likely Cause | Fix | Prevention |
|---|---|---|---|
| Mold reappears within a week | Incomplete cleaning or hidden mold behind grout | Re-clean with stronger cleaner, inspect grout lines | Increase ventilation, use mildew-resistant caulk |
| Discoloration persists after scrubbing | Mold deeply embedded in grout | Remove grout with grout removal tool and regrout | Seal with mildew-resistant caulk |
| Sealant peels after curing | Too much moisture during curing or not cleaning surface | Clean surface, dry thoroughly, reapply in dry conditions | Maintain dry bathroom after showers |
| Smell of mold remains | Hidden mold behind tiles or under tub liner | Consult a professional for assessment and remediation | Improve ventilation and reduce humidity |
Common Mistakes
- Using only mild cleaners on heavy mold without mechanical scrubbing
- Failing to dry surfaces completely after cleaning
- Overlooking grout lines or tile edges where mold hides
- Rushing the caulk curing process by exposing it to moisture
Addressing mold thoroughly involves both chemical cleaners and physical removal, plus a solid sealant to block moisture.
Tips For Best Results
- Choose a cleaner labeled for mold and mildew control and test on a small area first.
- For frequent showers, consider using a humidity-sensing exhaust fan to keep humidity below 50%.
- When resealing, apply sealant in thin, even beads and smooth with a finger or caulk tool for a clean finish.
- Schedule periodic checks every 3–6 months to catch early mold growth.
Call A Professional
Call a professional if mold covers large areas, recurs after treatment, or if there is any suspicion of structural damage, persistent hidden mold, or hidden leaks behind walls. Stop signs include persistent musty odors, water stains spreading beyond grout lines, or mold returning despite cleaning and sealing efforts.
FAQ
What causes mold in a bathtub?
Mold thrives in moist, warm areas with poor ventilation, such as bathrooms after showers or baths.
How often should I reseal bathtub grout?
Typically every 1–2 years, or when visible wear appears on the grout edges.
Is hydrogen peroxide effective against mold?
Yes, hydrogen peroxide can kill many mold species when applied and left to sit before scrubbing.
Can I use a bleach-based cleaner on tub grout?
Bleach is effective on white grout but can discolor colored grout and damage some surfaces; use with caution and follow label directions.
Should I remove all grout before resealing?
For severely damaged grout, removing and regrouting is advisable before applying new sealant.
Is silicone caulk mildew-resistant?
Yes, many silicone caulks are formulated to resist mildew when properly applied and cured.
What if mold comes back after sealing?
Inspect for moisture sources, re-clean, and re-seal; persistent mold may require professional remediation.
How long does caulk take to cure?
Most silicone caulks cure in 24 hours to 48 hours, depending on humidity and product. Always follow the manufacturer’s instructions.
Buying Guide
When selecting products to help prevent or treat bathtub mold, consider size, noise level (for any powered cleaners), energy efficiency of ventilation options, ease of application, and compatibility with bathroom surfaces. Look for a comprehensive mildew-resistant sealant that adheres well to tile and porcelain, and choose a grout removal tool that fits comfortably in hand. A well-chosen grout brush and bathroom kit with included sealant can simplify maintenance. Compare products based on user reviews, ease of use, drying time, and the presence of anti-mold additives. For best results, pair cleaning products with proper ventilation and a maintenance plan that reduces moisture buildup.
Leave a Reply