How to Get Rid of Cutting in Lines When Painting
Cutting in lines while painting can create uneven edges and require extra touch-ups. This guide explains practical, step-by-step methods to achieve crisp, professional-looking edges on walls, ceilings, and trim. It covers tool selection, preparation, technique, and common issues behind imperfect lines.
Quick Answer
Use a dedicated edge-control approach: apply tape precisely along the edge, use a quality angled brush for cutting in, and finish with a wheel-edged paint edger to refine lines. Combine these with steady hand pressure and consistent paint load for the cleanest result.
What You’ll Need
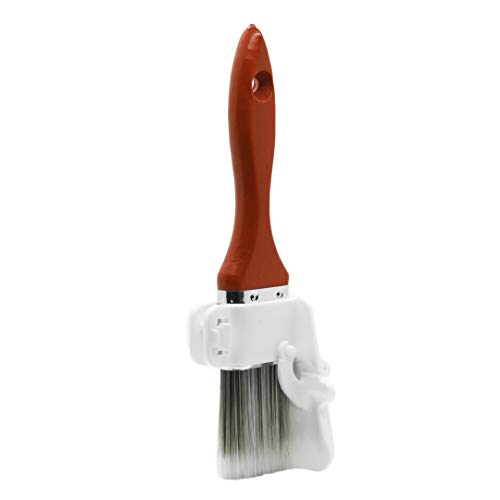
- 2 inch angled sash brush synthetic for cutting in — for precise, controlled edges along ceilings and trim
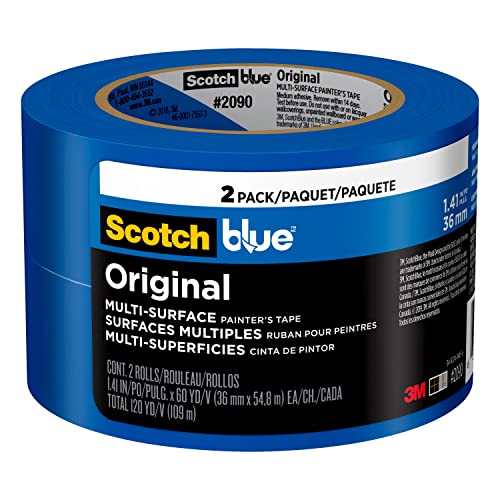
- 1.5 inch painter’s tape blue masking tape for sharp paint lines — helps shield adjacent surfaces
- paint edger tool with wheel for clean edges 2 inch — smooths and perfects straight lines at corners

Before You Start
Prepare the work area by covering floors and furniture. Clean surfaces to remove dust and oils that can affect tape adhesion. If painting over a previously glossy surface, lightly scuff or sand for better grip. Plan your cutting-in path: typically, start from the corner and work outward. Safety first— use a stable ladder and ensure good ventilation. Time estimates vary with room size, but plan for 1–2 hours of prep and 2–4 hours of actual painting for a small to medium space.
Step-By-Step: How To Achieve Crisp Cutting In Lines
- Place painter’s tape along the line you want to protect, pressing firmly to seal the edge. Run your finger along the tape to ensure good adhesion and prevent paint bleed.
- Load the 2 inch angled sash brush synthetic for cutting in with a modest amount of paint. Tap off excess on the edge of the can to avoid drips.
- Begin cutting in at a corner or edge, keeping the brush almost perpendicular to the surface for a clean, straight line.
- Keep a light, steady hand; rotate your wrist rather than your entire arm to minimize waviness along the edge.
- After the initial cut, slightly feather the paint away from the tape edge to reduce the risk of hard edges showing through once the tape is removed.
- Apply a second coat sparingly if needed, allowing the first coat to dry according to manufacturer recommendations before proceeding.
- Brush up to the taped edge without crossing it, using short, controlled strokes to maximize control over the line.
- Gently guide the paint edger tool with wheel for clean edges 2 inch along the interior corners to refine the line where tape isn’t used.
- Carefully remove the tape while the paint is slightly tacky to avoid peeling. Pull the tape back on itself at a 45-degree angle for best results.
- Inspect the edge. If any bleed shows, touch up with the angled sash brush, reinstall tape if necessary, and re-shoot the edge once dry.
- Clean brushes and edger promptly after finishing to maintain tool performance for future projects.
- Allow the entire surface to cure fully before exposing it to heavy use or cleaning. Ventilation speeds drying and reduces odor.
Troubleshooting
| Symptom | Likely Cause | Fix | Prevention |
|---|---|---|---|
| Bleed along edge despite tape | Tape may not be sealed or paint is too wet | Press tape firmly; wait for the edge to dry slightly before painting | Use high-quality painter’s tape; apply in cooler, dry conditions |
| Wavy line | Uneven brush pressure or inconsistent paint load | Reload brush regularly; practice steady, light strokes | Practice on scrap panels before applying to walls |
| Edge looks bulky or raised | Overloading brush or applying too many coats | Light coats, dry between passes | Thin paint consistency; avoid thick jams near the edge |
| Tape pulls paint when removed | Tape adhesion low or paint fully cured | Remove when tacky; re-tape if necessary | Use fresh tape and proper drying times |
| Colored bleed through white ceiling | Ink bleed through from the wall color | Edge with edge-control tools or re-cut after staining dries | Use sealing primer on contrasting colors |
Common Mistakes
- Overloading the angled sash brush, which causes drips near the edge
- Rushing the cut-in process; speed compromises control
- Not sealing tape edges properly, leading to paint creep
- Removing tape too early or at a sharp angle, which tears the edge
- Neglecting surface prep, which makes lines look uneven
Tips For Best Results
- Work in natural, indirect light to better spot paint bleed or texture irregularities
- Thin coats dry faster and reduce edge buildup; build coverage gradually
- Keep a damp cloth handy to wipe off any smudges on the edge before painting completes
- Test the edge on a hidden section or scrap board to calibrate brush load and pressure
- Use the edge-control tools consistently in the same orientation to maintain uniform lines
Call A Professional
Consider a professional if multiple areas show bleeding, if walls have significant texture, or if height and awkward angles make edge control difficult. Stop signs include ladders that feel unstable, unusually wide or complex trim, or if you are working with sensitive surfaces like wallpaper. A pro can ensure durable edges and minimize repaint cycles.
FAQ
What is the best brush for cutting in?
Many professionals prefer a 2 inch angled sash brush synthetic for cutting in for its precision and control on edges.
Do I need tape to cut in?
Tape helps protect adjacent surfaces and sharpen lines, especially along ceilings and baseboards.
How should I remove tape after painting?
Remove tape while the paint is still slightly tacky, pulling back on itself at a 45-degree angle.
Can a edger replace tape?
Edgers with wheels are great for refining lines near corners; tape remains useful for long straight edges.
How many coats are needed for a crisp line?
Typically two light coats are sufficient when cutting in; allow adequate drying time between coats.
Is primer necessary for cutting in new color?
Primer improves adhesion and color evenness, particularly when changing from dark to light colors or painting over stains.
How long should the edge dry before removing tape?
Follow paint manufacturer recommendations, usually until the edge is dry to the touch but not fully cured.
Buying Guide
Choosing the right tools for clean cutting in lines is a balance of edge control, ease of use, and surface compatibility. Consider the following factors:
- Brush size and type: A 2 inch angled sash brush with synthetic bristles provides precise control for cutting in along ceilings and edges.
- Tape quality and type: Blue painter’s tape with clean removal minimizes bleed and protects delicate surfaces.
- Edge control tools: A 2-inch wheel-edger can refine lines and handle tight corners more easily than brushes alone.
- Surface texture: For rough walls, you may need lighter coats and more frequent reloading of the brush.
- Noise and effort: Manual tools are quiet and affordable, while edgers speed up workflow on larger projects.
- Placement considerations: Access to high ceilings or corners may require a stable ladder and longer reach tools.
- Maintenance: Clean brushes promptly to preserve bristle shape and performance for future jobs.
Before purchasing, assess the space and project scope. If walls have intricate trim or irregular textures, a combination of the listed tools can yield the best results. Curious about the best combo for your room? Start with a dedicated angled sash brush, a roll of painter’s tape, and a wheel-edger to compare how each tool affects edge crispness in your environment.
Leave a Reply