How to Get Rid of Candle Wax
Candle wax mishaps are common, whether you’re cleaning a votive spill from a table, candle wax drips on fabric, or hardened wax on a wall. With the right tools and a patient approach, most wax residues lift cleanly without damage. This guide provides practical,-step by step instructions tailored for American homes and common cleanup scenarios.
Quick Answer
Start by letting the wax cool, then remove the bulk with a suitable tool, followed by gentle heat to lift remaining wax. For porous surfaces, use blotting and a gentle cleaner. Always test a hidden area first and work gradually to avoid staining or spreading.
What You’ll Need
The following tools are commonly used to remove candle wax. Use the closest equivalent if you don’t have the exact item on hand.
- Silicone wax scraper candle wax removal tool
- Heat gun for candle wax removal
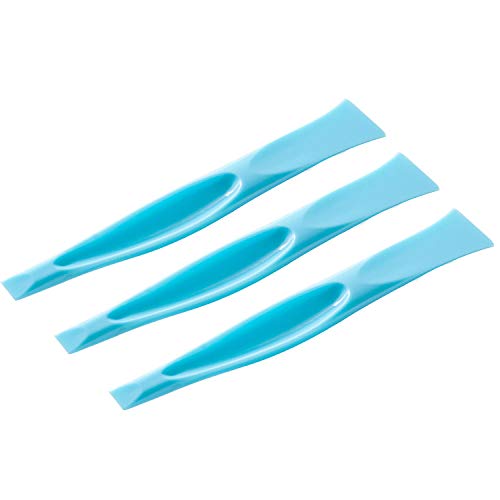
- Plastic waxing scraper for candle wax removal


Before You Start
Assess the surface to decide the safest method. For delicate fabrics, test in an inconspicuous area before proceeding. Protect surrounding surfaces with old towels or baking sheets to catch drips. Time the process so you can address the area while you’re near a sink or ventilated space. Important safety note: avoid direct flame on surfaces and keep away from children and pets. Have a damp cloth ready for quick wipe-downs after wax is loosened.
Step-By-Step: How To Remove Candle Wax
- Let the wax cool and harden completely, then gently break it away from the surface using a plastic waxing scraper or the edge of a credit card.
- For fabrics or upholstery, place a clean paper towel under the fabric, then press a new paper towel over the wax to lift it as it softens.
- Use a silicone wax scraper candle wax removal tool to lift stubborn chunks, keeping the edge at a low angle to avoid tearing.
- Warm the area with a heat gun for candle wax removal on a low setting. Move the gun in small, even sweeps to soften remaining wax without scorching the surface.
- As the wax softens, continue to blot with a clean paper towel or cloth to absorb melted wax and prevent redistribution.
- For hard surfaces like wood or tile, wipe with a mild detergent solution after the wax lifts, then rinse and dry thoroughly.
- If color stains appear on fabric, apply a small amount of mild stain remover or detergent, and launder according to fabric care instructions.
- Check the area once dry. If any residue remains, repeat the gentle heating and scraping steps in small increments until clean.
- Dispose of waste wax in a trash can lined with a bag to keep floors tidy during cleanup.
- Inspect surrounding finishes for any dulling or residue; re-wax or seal the surface if needed after it dries fully.
- Document the steps you took in case you need to repeat the process on similar surfaces in the future.
- For large spills, consider performing the cleanup outdoors or in a well-ventilated area to minimize fumes from the heat source.
Troubleshooting
| Symptom | Likely Cause | Fix | Prevention |
|---|---|---|---|
| Wax re-deposits after initial removal | Residual wax beneath surface or porous fibers | Reheat in small areas and re-blot with clean towels | Work in thin layers to avoid pushing wax deeper |
| Staining on fabric or wood | Heat softened pigment transfers | Use blotting technique and mild cleaners; avoid harsh chemicals | Test in hidden area first; use minimal heat |
| Scraper sticks or resin remains | Hard or brittle wax remains embedded | Switch to a sharper edge gently or reheat briefly | Apply heat evenly to loosen |
| Surface finish dulls after cleaning | Abrasive tools or cleaners | Switch to softer tools and milder cleaners; buff lightly | Choose non-abrasive methods for delicate surfaces |
Common Mistakes
- Using hot water on waxy fabric before removing the wax, which can set the stain.
- Applying excessive heat, which may scorch finishes or warp plastics.
- Rubbing the wax vigorously, which pushes wax deeper into fibers or pores.
- Relying on a single method for all surfaces; different surfaces require tailored approaches.
Tips For Best Results
- Work with the wax while it’s still pliable to ease removal; avoid letting it dry completely on delicate surfaces.
- Always test tools and cleaners on a hidden area first to prevent color loss or damage.
- Keep a dedicated wax removal kit with a plastic scraper, silicone scraper, and a heat source for quick cleanup.
- Use low heat settings and short intervals when operating a heat gun to minimize risk.
Call A Professional
Experts should be contacted if candle wax has penetrated into porous materials like wallpaper, untreated wood, or antique fabrics, or if a surface is damaged during cleaning. If you see bubbling finishes, cracking coatings, or persistent staining after several attempts, seek professional help to avoid further harm.
FAQ
What kind of wax removal tool works best on fabric?
A plastic waxing scraper for candle wax removal combined with blotting is effective and gentle on fabrics.
Can I use a heat gun on wood without causing damage?
Yes, set the heat gun to a low temperature and test a small area first; keep the tool moving to prevent scorching.
Is soap and water enough to finish the cleanup?
For many surfaces, a mild detergent followed by water rinsing is sufficient after wax is lifted.
How do I remove colored wax stains?
After wax is removed, apply a mild stain remover or detergent and launder according to fabric care labels.
What should I do if wax drips onto electronics?
Turn off and unplug devices, then carefully remove wax with a soft scraper and avoid moisture near electrical components.
Are there any surfaces to avoid using a heat gun on?
Avoid high heat near vinyl, delicate finishes, or painted surfaces that may blister or warp.
How long should I wait between cleanup passes?
Pause briefly to prevent heat buildup and re-evaluate the surface before reapplying heat.
Buying Guide
When choosing tools to handle candle wax cleanup, consider size, noise level, energy efficiency, controls, and placement. For small spills on fabrics, a compact plastic scraper is handy and quiet. For tougher jobs on hard surfaces, a heat gun with adjustable temperature helps speed up removal without damaging the finish. If you frequently clean wax from furniture or walls, invest in a durable silicone scraper that flexes to reach corners. Place tools within easy reach near the cleaning area to reduce the chance of spreading wax as you work. Compare products by weight, ergonomic grip, and heat settings to find a setup that fits your cleaning routine. Remember to test any tool on an inconspicuous spot first and follow safety guidelines to avoid burns or surface damage.
Leave a Reply