How to Clean Earphones From Ear Wax
Earphones and earbuds can accumulate wax, oils, and debris from daily use. Proper cleaning helps maintain sound quality, hygiene, and longevity. This guide provides a practical, step-by-step approach using common cleaning tools designed for small electronics.
Following safe cleaning practices reduces the risk of damage to drivers, cords, and seals. The methods below focus on removing wax without moisture intrusion into sensitive components.
Quick Answer
Use soft-bristle tools to gently detach surface debris, then apply silicone cleaning putty to lift wax from crevices. Finish with a soft brush or pen to dislodge remaining particles. Sanitize with a dry cloth and allow components to dry completely before reuse.
What You’ll Need
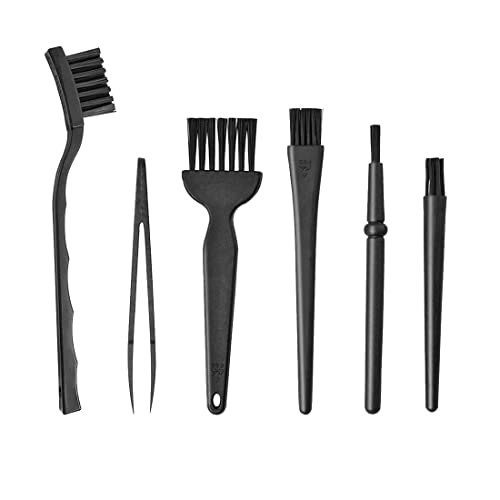
- earbud cleaning brush soft bristles
- earphone cleaning pen soft bristle brush for earbuds
- silicone cleaning putty for earphones and earbuds

Before You Start
Power down devices and remove any detachable earbuds from devices before cleaning. Work on a clean, well-lit surface. Avoid liquids near openings and delicate electronics; do not immerse earphones in water. Time estimate: 5–15 minutes per cleaning session. Critical cautions: never spray cleaner directly onto earphones; never use heat or hair dryers to dry components.
Step-By-Step: How To Clean Earphones From Ear Wax
- Detach any removable ear tips if possible, and set aside for separate cleaning.
- Use the earbud cleaning brush soft bristles to sweep away loose wax from the nozzle and mesh grills.
- Gently roll a small amount of silicone cleaning putty for earphones and earbuds over the exterior surfaces to lift wax from crevices.
- Apply the earphone cleaning pen soft bristle brush for earbuds to loosen embedded residue along seams and around the mesh.
- Wipe surfaces with a dry microfiber cloth to remove loosened particles and putty residue.
- Repeat a light brushing motion across the mesh to ensure all visible debris is removed.
- Reposition or reattach ear tips and brush again lightly to ensure a snug seal and clean inner surfaces.
- Allow any components to dry completely before reconnecting to a device or storing.
Troubleshooting
| Symptom | Likely Cause | Fix | Prevention |
|---|---|---|---|
| Wax remains visible in mesh | Wax clogged in tighter crevices | Repeat gentle cleaning with putty and brush | Clean weekly with light passes |
| Stiff or sticky residue after cleaning | Putty residue left behind | Wipe with dry cloth; avoid over-application | Use minimal putty amount |
| Scratches on surface | Aggressive brushing | Use softer strokes and lighter pressure | Use proper tools designed for electronics |
| Moisture near sound port | Excess liquid during cleaning | Stop cleaning, dry with cloth, let air-dry | Keep liquids away from openings |
Common Mistakes
- Using aggressive brushes or tools that damage delicate mesh
- Over-wetting or applying liquids directly to earphones
- Forcing wax out of mesh, which can push debris deeper
- Not drying components fully before use
Tips For Best Results
- Clean earphones regularly to prevent wax buildup and maintain sound clarity.
- Work in a well-lit area to spot small particles and hidden crevices.
- Use light touch; minimal product application reduces risk of residue.
- Store earphones in a clean case to minimize dust when not in use.
Call A Professional
Seek professional help if wax is deeply embedded, if there is visible moisture intrusion, or if cleaning does not improve sound quality after several attempts. Do not attempt to disassemble internal components yourself, as this could void warranties or cause damage.
FAQ
Can I use household cleaners on earphones?
Avoid household cleaners that can leave behind residues or corrode components; opt for dry methods or products designed for electronics.
Is it safe to wet the mesh briefly?
Keep liquids away from openings; if needed, lightly dampen a cloth and wipe the exterior, ensuring no moisture enters the mesh.
How often should I clean my earphones?
Regular light cleaning once a week helps prevent wax buildup; deeper clean every few weeks as needed.
Will cleaning affect warranty?
Using non-abrasive tools and following manufacturer guidelines generally does not affect warranty, but disassembly or improper liquids could.
Buying Guide
When choosing cleaning tools for earphones and earbuds, consider size, material, and compatibility with small electronics. A set that includes soft-bristled brushes and silicone putty provides a balanced approach to both exterior and mesh cleaning. Look for tools specifically labeled for delicate devices to minimize the risk of damage.
Key buying factors include size and portability, noise level during use, and energy efficiency of any powered cleaners. For most users, manual cleaning tools with soft bristles and putty are sufficient. Controls on the tools should be simple and intuitive, with clear instructions. Consider storage practicality; a compact kit fits easily into a bag or desk drawer.
How do you compare options? Evaluate the material quality, reusability of putty, and the precision of brush tips. Check user reviews for real-world performance on wax removal without leaving residues. Finally, ensure the kit’s components are compatible with your earbud model and warranty terms.
Leave a Reply