How to Clean a White Plastic Cooler
White plastic coolers are valued for their clean look and lightweight portability, but they can show grime, stains, and odors over time. A careful cleaning routine restores shine, prevents lingering smells, and extends the life of the cooler. This guide uses simple supplies and practical steps suitable for most households and outdoor setups.
Quick Answer
Quick cleanup plan: empty contents, rinse with warm water, scrub with a non-scratch brush and mild detergent, rinse again, wipe dry with a microfiber cloth, and air dry open to prevent mildew. For stubborn stains on white plastic, use a gentle paste of baking soda and water, then rinse completely.
What You’ll Need
- Non-scratch scrub brush for plastic cooler
- Microfiber cloth for cleaning plastic cooler
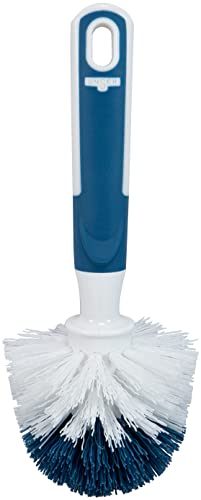
- Bottle brush for cooler interior cleaning
- Non-abrasive dish soap
- Baking soda (optional for tough stains)
- Warm water
- Soft towel or dry microfiber cloth
- Vinegar or mild cleaner (optional)


Before You Start
Prepare a clean workspace and protect nearby surfaces. Empty the cooler completely and discard any spoiled food. Rinse away loose debris with warm water. Safety note: avoid harsh solvents or bleach on plastic, which can dull the finish or leave residues. If the cooler has a gasket or drain plug, clean those parts separately to prevent moisture buildup.
Time estimate: 10–20 minutes for a routine clean; 25–40 minutes for heavy staining. Plan extra time if you’ll also dry and air out the interior thoroughly to prevent mildew.
Step-By-Step: How To Clean A White Plastic Cooler
- Remove all contents and shake out loose debris. Rinse the interior with warm water to loosen grime.
- Prepare a cleaning solution with a few drops of non-abrasive dish soap in warm water.
- Dip the non-scratch scrub brush for plastic cooler into the solution and gently scrub all interior surfaces, paying attention to corners and seams.
- For the exterior, wipe with a microfiber cloth dampened with soapy water, then rinse with a clean cloth and water to remove soap residue.
- If stains persist on the white plastic, sprinkle a light layer of baking soda onto a damp microfiber cloth or the scrub brush and gently work the area. Rinse thoroughly.
- Use the bottle brush for cooler interior cleaning to reach tight spaces, corners, and the drain area if present.
- Rinse all surfaces with clean water until no soap remains. Use the microfiber cloth to dry the interior and exterior completely.
- Leave the cooler open in a well-ventilated area to air dry fully, ideally in shade to prevent sun bleaching of the plastic.
- Optional follow-up: wipe with a diluted vinegar solution (1 part vinegar to 3 parts water) and rinse again to help neutralize odors.
- Inspect seals and gaskets; wipe them down with a damp cloth and dry thoroughly to prevent mold growth.
- Close and store once fully dry, keeping it in a cool, dry place away from direct sunlight.
Troubleshooting
| Symptom | Likely Cause | Fix | Prevention |
|---|---|---|---|
| A persistent musty smell | Moisture trapped inside | Thorough dry-out and air exposure; wipe gaskets | Dry completely after each use; store with lid ajar |
| Stubborn white stains | Food residue baked onto plastic | Make a baking soda paste, scrub gently, rinse | Rinse soon after use, avoid leaving residue |
| Scratches appearing on surface | Abrasive scrubbing | Switch to non-scratch tools; use gentler pressure | Regular light cleaning, not heavy scrubbing |
| Cloudy exterior after cleaning | Soap residue or mineral deposits | Rinse with extra water; dry with microfiber | Rinse thoroughly; wipe dry after each use |
Common Mistakes
- Using abrasive cleaners or scrub pads that scratch white plastic
- Not rinsing soap completely, leaving film and odors
- Ignoring interior nooks and the drain area where mold can form
- Leaving the cooler closed while still damp, promoting mildew growth
Keep these in mind to maintain a clean, bright appearance and extend the cooler’s lifespan.
Tips For Best Results
- Clean soon after use to prevent staining from food or beverage spills.
- Use a dedicated bottle brush to reach tight spaces and the drain area.
- Dry thoroughly with a microfiber cloth and air out with the lid open after cleaning.
- Consider a light odor-neutralizing spray or vinegar rinse after deep cleaning.
Call A Professional
If you notice persistent odors after repeated cleaning, cracks in the plastic, or seals that won’t reseal, consult a professional or contact the manufacturer for guidance. Seek help if the interior shows widespread mildew or if the cooler’s performance (cooling efficiency) declines significantly.
FAQ
Can I use bleach on a white plastic cooler?
Bleach is generally not recommended for plastic coolers as it can degrade the material and leave residues. Use mild soap, baking soda, or diluted vinegar instead.
Is it safe to put a cooler in the dishwasher?
Most plastic coolers are not dishwasher-safe; check the manufacturer’s guidelines. Hand washing with soap and warm water is safer and preserves seals.
How often should I clean my cooler?
Wipe down after each use and perform a deeper clean monthly or after heavy use to prevent stains and odors.
What helps prevent odors most effectively?
Thorough drying, regular cleaning of gaskets, and occasional vinegar rinses help neutralize odors.
Can I use scented cleaners?
Avoid strong-scented cleaners that can leave residues or alter the taste of stored beverages. Stick to mild, unscented cleaners.
What about replacing gaskets or seals?
Inspect seals and replace if they show cracks or persistent odor leakage to maintain proper sealing.
Buying Guide
When selecting a white plastic cooler, consider several factors to match your needs and usage scenarios.
Size and capacity: Choose a size that fits typical trips without occupying excessive space. A medium model works well for family outings, while larger options suit picnics or road trips.
Noise level: Most coolers operate quietly, but check for models with minimal mechanical hum if used in quiet environments like campsites at night.
Energy efficiency: If the cooler uses an active cooling unit or runs on ice, energy considerations relate to ice retention and battery use for powered models.
Controls: Manual ice compartments and drain plugs are common; advanced models may include built-in temperature controls or ice packs compatibility. Ensure controls are easy to use.
Placement: Look for a sturdy, level surface and consider weight when loaded. Keep the cooler out of direct sun to maximize insulation and reduce melting.
For best results, compare models that balance weight, insulation quality, ease of cleaning, and accessory options. A well-chosen cooler simplifies cleaning and helps maintain a bright, hygienic interior.
Leave a Reply