How to Clean the Top of Cabinets Easily and Safely
Keeping the tops of cabinets dust-free can be challenging, especially in kitchens and hallways where dust, grease, and spiderwebs tend to accumulate. This guide explains practical, safe methods using common tools designed to reach high surfaces without climbing or moving heavy furniture.
Following a simple routine can reduce buildup, improve air quality, and prevent dust from falling onto counters and food prep areas. The steps below focus on achievable techniques using extendable tools and microfiber sleeves for effective, streak-free results.
Quick Answer
Use an extendable microfiber duster or a telescoping cleaning wand fitted with a soft, washable sleeve. Gently sweep from the far edge toward the center, then wipe with a dry microfiber cloth to remove fine dust. For sticky or greasy spots, use a damp microfiber cloth then dry immediately to prevent streaks.
What You’ll Need
- Extendable microfiber duster for high cabinets
- Telescoping cleaning wand with microfiber sleeve kitchen dusting
- High reach cleaning brush with long handle for cabinets

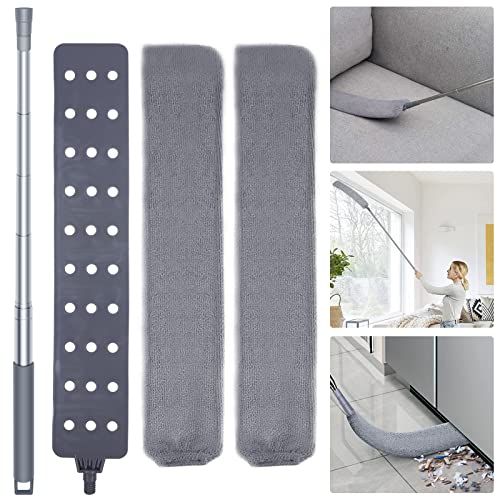
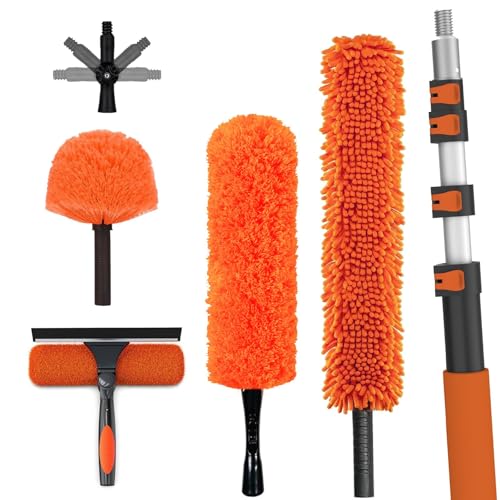
Before You Start
Prepare a stable workspace and protect nearby surfaces with a microfiber cloth or drop cloth. Wear a simple dust mask if you are sensitive to dust. Clear adjacent countertops to keep tools at hand. Time your cleaning in a single session to prevent repeated climbs. Do not use abrasive cleaners that could scratch cabinet finishes.
Step-By-Step: How To Clean The Top Of Cabinets
- Attach the extendable microfiber duster for high cabinets to reach the furthest edge of the cabinet crown.
- Begin at the far left corner and sweep in an even, slow motion toward the center to lift dust without scattering it.
- Switch to the telescoping cleaning wand with microfiber sleeve kitchen dusting for high, narrow sections if needed, keeping the wand steady.
- For stubborn cobwebs, pause at the edge and use a quick, light touch to avoid bending or loosening the cabinet trim.
- Wipe each area with a dry microfiber cloth after dusting to remove remaining particles and prevent streaks.
- Inspect seams and crevices; repeat dusting on any lingering spots with the duster, then wipe again as necessary.
- Move methodically along each cabinet, working from far edge to center, then finish with a final broad pass for even coverage.
- If there is any grease or kitchen residue, lightly dampen the microfiber sleeve or cloth with water or a mild cleaner, then dry immediately.
- Return tools to their storage spots and replace any protective cloths while the area finishes drying.
- Reassess the area after a few minutes to confirm all dust is removed and no streaks remain.
- Establish a regular schedule, such as quarterly or seasonal cleanings, to maintain high cabinets with minimal effort.
- Document any cabinet areas that require special attention in future cleanings to streamline maintenance.
Troubleshooting
| Symptom | Likely Cause | Fix | Prevention |
|---|---|---|---|
| Dust resettles quickly | Insufficient removal in a single pass | Make extra passes with microfiber tools | Dust more often with light, frequent cleanings |
| Streaks on finish | Moisture left behind | Dry the surface with a dry cloth after damp cleaning | Use only a barely damp cloth |
| Stubborn grease near vents | Grease buildup | Spot-clean with a damp microfiber cloth, then dry | Perform targeted cleanings periodically |
| Tool head snagging on trim | Rigid wand or worn sleeve | Switch to a flexible tool or replace sleeve | Inspect tools before use |
Common Mistakes
- Using abrasive brushes or cleaners on cabinet finishes
- Over-wetting microfiber sleeves, causing drips and streaks
- Skipping the dry wipe after any damp cleaning
- Flying dust by sweeping too quickly instead of controlled strokes
Steady, controlled motions and proper drying are key to a spotless, even result on top-of-cabinet surfaces.
Tips For Best Results
- Dust from the far edge toward the center in continuous passes to minimize spray and resettling.
- Choose microfiber tools with washable sleeves for repeated use and sustainable cleaning.
- Schedule high-cabinet dusting before cooking to keep airborne particles from settling on freshly cleaned surfaces.
- For tight corners, wrap a microfiber cloth around the wand tip to gain better contact.
Call A Professional
If you notice chipping paint, loose cabinet trim, or persistent residue that requires chemical cleaning beyond mild solutions, consult a professional. Seek help for structural concerns such as damaged crown molding or water stains, and avoid DIY fixes that could worsen the issue.
FAQ
What is the best tool for cleaning high cabinets?
An extendable microfiber duster or a telescoping wand with a microfiber sleeve provides safe, effective reach and lint-free results.
How often should I clean top-of-cabinet areas?
Inspect quarterly and perform a thorough cleaning seasonally, or more often in dusty or busy households.
Can I use cleaners on cabinet tops?
Use mild, non-abrasive cleaners and dry promptly to avoid streaks or finish damage.
Which surfaces require extra care?
Wood finishes, painted surfaces, and lightly glazed cabinets may need gentler tools and milder cleaners.
Buying Guide
When choosing tools to clean the top of cabinets, consider size, reach, and ease of use. A tool with adjustable length helps reach different cabinet heights without climbing. Look for soft, washable microfiber sleeves to capture dust efficiently, and ensure the cleaning wand head can maneuver around corners without scratching surfaces. Noise level matters in open-plan spaces, so test lightweight tools that glide smoothly. Energy efficiency is less of a concern for manual cleaning tools, but durable construction reduces replacement costs. Finally, consider storage footprint and whether you prefer a single, multi-tool kit or separate pieces for flexibility.
Leave a Reply