How to Clean the Inside of a Screen Protector Safely
Maintaining a clear, bubble-free screen protector is essential for preserving touch sensitivity and readability. Cleaning the inside surface, though delicate, can remove residues that affect clarity without removing the protector itself. This guide outlines a practical, step-by-step approach using common tools and the supplied kit.
Quick Answer
Gently dust, wipe with a microfiber cloth, and use a controlled blast of air to dislodge particles. Avoid liquids on the inside surface and never apply force that could lift the protector. If dust persists, repeat with fresh dust removal stickers and ensure a clean environment.
What You’ll Need
- Screen protector installation kit with dust removal stickers
- Lint-free microfiber cleaning cloth for smartphone screen protector
- Air blower anti-static dust remover for phone screen protector
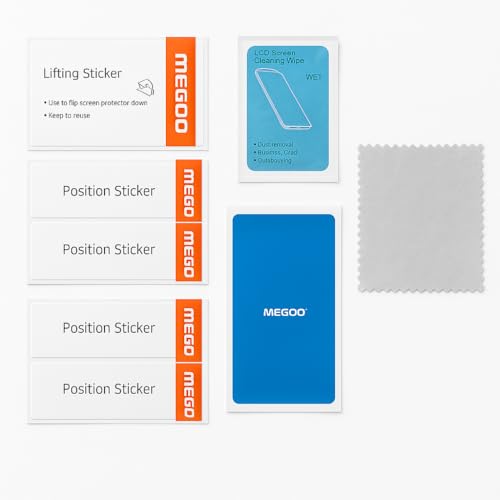


Before You Start
Prepare a clean, dust-free workspace. Wash hands and avoid touching the interior surface. Have a soft, flat surface available to place the phone screen side up during the process. Time estimate: 5–15 minutes per device. Important: keep the device powered off and unplugged during cleaning, and never spray liquids onto the screen interior.
Step-By-Step: How To Clean The Inside Of A Screen Protector
- Power off the device and place it on a lint-free mat or soft surface.
- Gently lift any corners of the screen protector if comfortable, to expose the interior surface without peeling it away entirely.
- Use the air blower anti-static dust remover to dislodge loose dust particles from the interior surface. Keep the nozzle a few inches away and avoid direct contact with the adhesive layer.
- Apply a dust removal sticker to the interior surface and peel away slowly to lift residual dust. Repeat as needed until the interior appears clean and clear.
- Wipe the interior surface with a lint-free microfiber cloth in gentle, even strokes. Do not press hard; let the cloth lift dust rather than smear it.
- If smudges remain, use a fresh microfiber section and lightly wipe in a circular motion. Avoid saturating the interior with any liquid cleaners.
- Reassess for remaining particles. If dust remains under the protector, reapply dust removal stickers and repeat the dusting process until the surface is pristine.
- Carefully re-seat the screen protector, ensuring any lifting edges are pressed evenly. Recheck for bubbles or dust pockets before final sealing.
- Test touch sensitivity after completion and confirm there are no streaks or residues left on the interior surface.
- Store any unused dust removal supplies in a clean container for future maintenance.
- Dispose of single-use tools according to local guidelines, and wash hands before touching the screen again.
- If a visible film or residue remains persistent, consider professional reapplication or replacement of the protector.
Troubleshooting
| Symptom | Likely Cause | Fix | Prevention |
|---|---|---|---|
| Dust pockets under interior surface | Dust not fully removed | Reseat with dust removal stickers and re-clean | Clean workspace; handle positive pressure environment |
| Streaks after wiping | Cloth residue or moisture | Use a fresh microfiber section; ensure no moisture on cloth | Use dry cloths; avoid liquids |
| Adhesive lifting at edges | Insufficient contact during reattachment | Press edges evenly with finger or card edge | Work slowly and avoid rushing the reapplication |
| Persistent haze | Residue beneath protector | Consider professional reseating or replacement | Maintain clean environment during future applications |
Common Mistakes
- Using liquids on the interior surface, which can leave sticky residues
- Rubbing too hard, risking micro-scratches on the protector
- Reusing dusty tools, which can transfer particles back onto the screen
- Ignoring static buildup that attracts more dust over time
Tips For Best Results
- Work in a relatively dust-free room and avoid fans or open windows during cleaning
- Pre-warm your microfiber cloth by gently brushing against a clean surface to remove loose fibers
- Keep all tools clean and dry; replace single-use stickers after each use
- Handle the device as little as possible once the interior surface is exposed
- Document any steps that work well for future maintenance cycles
Call A Professional
Consider professional help if there is extensive haze, persistent bubbles, or damage to the interior surface that cannot be cleared by standard cleaning. Stop attempting to clean if you notice peeling, cracking, or adhesive failure, which may indicate the protector needs replacement. For devices with curved edges or sensitive displays, a professional reapplication can prevent further damage.
FAQ
Can I clean the inside of a screen protector with water?
Avoid liquids on the interior surface; moisture can affect adhesion and clarity.
Is it safe to use compressed air on the interior surface?
Yes, but hold the can at a distance and avoid bursts that could push dust under the protector.
How often should I clean the inside of a screen protector?
Clean when you notice visible dust, smudges, or reduced clarity, typically every few weeks depending on usage.
What if the protector is damaged during cleaning?
Discontinue cleaning and replace the screen protector to maintain performance.
Will cleaning affect touchscreen sensitivity?
When done carefully, cleaning should not affect responsiveness; ensure no residue remains on the interior surface.
Can I reuse a dust removal sticker after cleaning?
Prefer a fresh sticker for optimal dust pickup each time you clean.
Should I remove the protector before cleaning?
For thorough interior cleaning, removing and reseating the protector is sometimes necessary to access the entire surface.
Buying Guide
When selecting tools for screen protector maintenance, consider factors such as size compatibility for your device, ease of use, and the presence of anti-static features to minimize static dust attraction. Look for a kit that includes dust removal stickers, a lint-free microfiber cloth, and an air blower designed for electronics. For best results, opt for tools that are specifically tailored for smartphones, ensuring the cloth fibers won’t shed onto the screen and that the blower provides controlled airflow. Assess user reviews for reliability and notice how well the kit preserves interior clarity after cleaning. If your setup often gathers dust, investing in an anti-static cleaning approach can reduce repeat cleanings and protect adhesive performance.
Leave a Reply