How to Clean Sprinkler Heads for a Healthy Irrigation System
Quick Answer
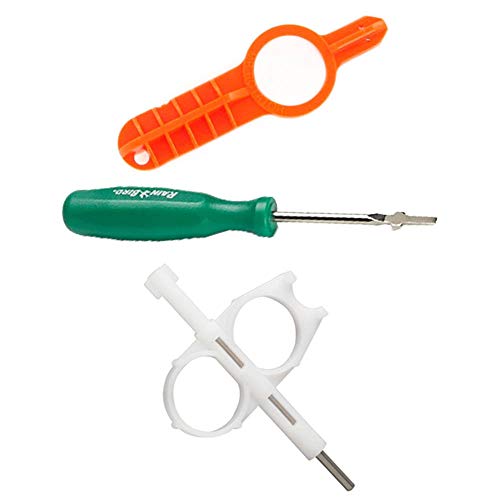
To refresh your irrigation system, start with a quick visual check, then use a dedicated sprinkler head cleaning brush and an irrigation nozzle cleaning kit to remove dirt and mineral buildup. For stubborn debris, loosen and reseat with the rotor sprinkler head maintenance wrench, and test water flow after each step.
What You’ll Need
- sprinkler head cleaning brush irrigation tool
- irrigation nozzle cleaning kit
- rotor sprinkler head maintenance wrench
- gloves and safety glasses
- garden hose with spray nozzle
- bucket or towels for drying


Before You Start
Before beginning, turn off the irrigation system at the control valve to prevent water flow. Allow heads to cool if recently used and clear the work area of obstacles. Inspect for cracked risers or damaged seals, which require immediate repair. Schedule time based on system size; a typical clean takes 30–90 minutes for a small yard.
Safety note: Do not force parts apart; use proper tools to avoid valve or head damage. Wear eye protection when removing clogs or mineral buildup.
Step-By-Step: How To Clean Sprinkler Heads
- Shut off the irrigation system and relieve pressure by opening a quick-access drain or loosening a test head near the zone.
- Inspect each sprinkler head for obvious damage and note clogged nozzles or misaligned spray patterns.
- Remove loose dirt around the head with gloved fingers or a soft brush to prevent pushing debris into the nozzle.
- Use the sprinkler head cleaning brush irrigation tool to scrub the exterior and the nozzle interior edge gently.
- Apply the irrigation nozzle cleaning kit to the nozzle orifice, following the kit’s instructions for cleaning and flushing.
- For rotor sprinkler heads, use the rotor sprinkler head maintenance wrench to loosen the nut or collar if a reset is needed.
- Rinse the head with a light stream from a hose to flush out remaining grit and verify smooth rotation in rotors.
- Re-seat or replace any damaged seals or O-rings and adjust spray direction or arc as required.
- Turn the irrigation system back on and run a test cycle to observe coverage and uniformity.
- Repeat cleaning on any additional heads that show buildup or uneven spray patterns.
- Document areas that require attention in future maintenance so routine cleaning becomes simpler.
Troubleshooting
| Symptom | Likely Cause | Fix | Prevention |
|---|---|---|---|
| Partial or no spray | Clogged nozzle or misalignment | Clean nozzle with the irrigation nozzle cleaning kit; realign head | Regular cleaning every season |
| Dribbled water or leaks | Worn seal or loose fitting | Replace O-ring; tighten collar | Check fittings during each service |
| Streaking or uneven pattern | Debris inside head or misdirected spray | Clean head, reseat, adjust arc | Protect heads from heavy soil during mowing |
| Rotor not rotating | Mineral buildup or jam | Clean head with kit; loosen with wrench if needed | Flush system after heavy use |
Common Mistakes
- Using metal tools that scratch or damage plastic sprinkler components
- Forcing parts apart when removing debris
- Neglecting to inspect seals, leading to leaks after reassembly
- Over-cleaning a head in a single session, causing unnecessary wear
Tips For Best Results
- Clean sprinkler heads during dry, calm days to prevent mud from spreading.
- Keep a maintenance log noting head type, zone, and issues observed.
- Use the rotor sprinkler head maintenance wrench only on rotor heads as needed.
- Test cycles after each adjustment to verify even distribution across zones.
Call A Professional
Consider a pro if you notice persistent leaks, cracks, or heads that refuse to reseat after cleaning. If water pressure seems off across multiple zones or if the system requires excavation for head access, professional service is advised.
FAQ
How often should sprinkler heads be cleaned?
Clean heads at least once per season, or more often in areas with hard water buildup or sandy soil.
Can I use household cleaners to clean sprinkler heads?
No; use dedicated irrigation cleaning tools to avoid damage and avoid residue that could clog nozzles.
What if a head is stuck and won’t turn?
Turn off water, allow to cool, then use the rotor head maintenance wrench carefully or consult a pro if stubborn.
Do I need to replace parts after cleaning?
Replace worn O-rings or seals and any cracked components to prevent future leaks.
Buying Guide
The Buying Guide helps compare key factors for sprinkler head maintenance tools and kits. Consider size and compatibility with your system, noise over field use, and energy efficiency of any electric components in the cleaning tools. Look for easy-to-use handles, durable materials, and clear instruction manuals. Assess controls that fit your workflow—manual brush vs. powered cleaning options—and the compatibility with your irrigation head types (sprinkler heads, rotor heads, and nozzles). For placement, ensure you can access heads from normal pathways without heavy lifting or trenching. When choosing a kit, verify it includes a sprinkler head cleaning brush irrigation tool, an irrigation nozzle cleaning kit, and a rotor sprinkler head maintenance wrench, plus replacement O-rings and seals. Compare bundles that cover both spray and rotor heads for a comprehensive approach. Always read user reviews about reliability and customer support to ensure long-term value.
Leave a Reply