How to Clean Out a Vape Pod
Maintaining a clean vape pod helps preserve flavor, extend device life, and prevent buildup that can affect performance. This guide focuses on practical steps you can take using common cleaning tools designed for vape pods in the American market.
By following a routine cleaning process, you can minimize harsh hits, reduce leaking, and keep your vaping experience smooth. The methods below are safe for most standard pod systems and use accessible cleaning supplies that many users already own.
Quick Answer
For a quick clean: remove the pod, disassemble as allowed, dab away visible residue with isopropyl alcohol wipes, rinse lightly with water if allowed by your device, dry completely, and reassemble. Use a vape pod cleaning brush set to reach tight spots and a vape pod cleaning kit with small brush and swabs for detailed cleaning.
What You’ll Need
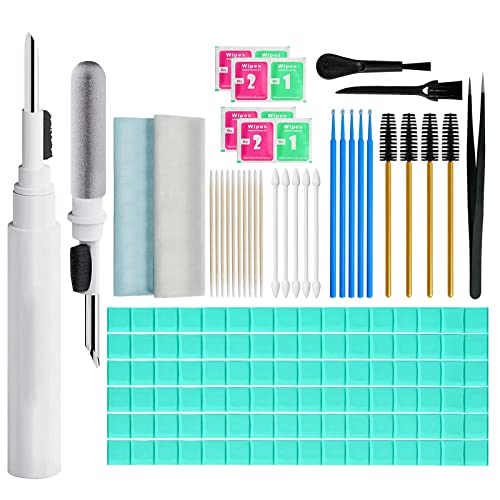
- Vape pod cleaning brush set
- Isopropyl alcohol wipes vape cleaning kit 70%
- Vape pod cleaning kit with small brush and swabs

![The Pharma-C Company -70% Isopropyl Alcohol Wipes [6 pack - 40ct Canisters] - Bulk IPA First Aid Antiseptic Wound Cleaner with Moisture Lock Lid. For minor cuts, scrapes, and burns.](https://m.media-amazon.com/images/I/51kPwmH0BzL._SL500_.jpg)
Before You Start
Read your device’s manual to confirm disassembly steps and water exposure rules. Work in a clean, dry area to prevent dust from entering the pod. Have a timer handy; drying time is essential to avoid short circuits. Never submerge the battery or connectors in liquid, and let all parts dry completely before reassembly. Expect a cleaning session to take 10–20 minutes, depending on buildup.
Step-By-Step: How To Clean Out A Vape Pod
- Power off the device and remove the pod from the battery or mod.
- Inspect the pod for loose coils and overflow; gently detach any removable components per the manual.
- Use the vape pod cleaning brush set to loosen sticky residue around the mouthpiece and coil area.
- Wipe surfaces with a isopropyl alcohol wipes vape cleaning kit 70% to dissolve oils; do not soak the pod if water exposure is restricted.
- For stubborn gunk, apply a small amount of alcohol to a swab and clean the interior corners and airflow paths.
- Rinse the pod (or its components) with a small amount of water if the manual permits; otherwise skip to thorough drying.
- Pat dry with a clean cloth and allow to air-dry completely for at least 30 minutes.
- Reassemble the pod, inspect for any remaining moisture, and perform a test puff without e-liquid to ensure airflow is clear.
- Fill with fresh e-liquid and test at a low wattage; observe for leaks or weak flavor and adjust as needed.
- Store the device in a dry area away from direct sunlight when not in use.
Troubleshooting
| Symptom | Likely Cause | Fix | Prevention |
|---|---|---|---|
| Poor flavor or muted vapor | Residue blocking coil or airflow | Clean with brush set and swabs; wipe with alcohol wipe | Regular cleanings after every few refills |
| Gurgling or leaking | Residual liquid in airflow path | Dry components completely; reassemble tightly | Avoid overfilling and check seal |
| Weak draw or no vapor | Clogged mouthpiece or dirty coil | Brush and swab cleaning; replace coil if necessary | Schedule routine maintenance |
| Dry hits | Coil degraded or dried wick | Replace coil; ensure proper priming | Prime new coils before use |
Common Mistakes
- Using too much water or soaking parts not designed for immersion
- Forgetting to dry components completely before reassembly
- Using harsh cleaners that damage seals or plastics
- Neglecting routine cleaning, leading to persistent buildup
Sticking to gentle cleaning methods preserves both flavor and device longevity.
Tips For Best Results
- Clean on a regular schedule rather than waiting for noticeable issues.
- Keep a dedicated cleaning kit for vape pods to avoid cross-contamination.
- Prime coils after cleaning to restore optimal flavor and vapor production.
- Store devices in a dry, cool place to minimize moisture-related damage.
Call A Professional
Consider professional service if you notice persistent leaks, burned taste after cleaning, or electrical buzzing. Seek help if the pod or battery shows signs of swelling, unusual heat, or display error codes that persist after cleaning.
FAQ
Can I use alcohol on all vape pods?
Most pods tolerate isopropyl alcohol for surface cleaning, but follow the manufacturer’s guidance to avoid damage.
How often should I clean my vape pod?
Clean every 1–2 weeks with regular use; increase frequency if you notice flavor changes or buildup.
Is water safe for cleaning vape pods?
Only if the device manual permits it; otherwise, avoid water to prevent damage.
Should I replace the coil after cleaning?
Yes, if the coil shows signs of wear or degraded performance; cleaning alone may not restore it.
Buying Guide
When choosing cleaning tools for vape pods, consider size, compatibility, and kit contents. Look for a vape pod cleaning brush set that offers precision brushes for tight spaces and soft bristles to avoid scratching surfaces. A vape pod cleaning kit with small brush and swabs helps reach corners and airflow channels. Keep a supply of isopropyl alcohol wipes vape cleaning kit 70% for quick, effective surface cleaning. For best results, pick a kit that includes multiple brush sizes and lint-free swabs to minimize fiber residues.
Key buying factors include the following: drive consistency with compact, portable tools versus bulk home kits; ensure the tools are appropriate for your specific pod system; verify that wipes and brushes are alcohol-safe and non-abrasive; and check that the kit’s swabs are lint-free to prevent fibers from entering the device. A versatile kit can cover routine maintenance and occasional deep cleans, making it easier to keep pods performing well over time.
Would you benefit from a modular approach that lets you expand as your setup evolves? A well-rounded selection can handle daily upkeep and more thorough refreshes, ensuring flavor and vapor stay crisp. Think about your cleaning cadence, storage space, and whether you value a pocketable option for on-the-go maintenance.
Leave a Reply