How to Clean Your Keurig Coffee Maker Effectively
Keeping a Keurig coffee maker clean ensures consistent taste, extends the appliance’s life, and maintains optimal brewer performance. This guide walks through practical steps to sanitize, descale, and maintain your Keurig using common cleaning tools and products.
Quick Answer
For routine cleaning, remove and wash removable parts, rinse the reservoir, and run a few brewing cycles with warm water. For deeper cleaning, use a dedicated cleaning brush kit to clear the needle and a descaling solution to remove mineral buildup. Regular maintenance prevents clogs and improves flavor consistency.
What You’ll Need
- Keurig needle cleaning tool
- Keurig descaling solution for coffee makers
- Keurig coffee maker cleaning brush kit
- Warm water
- Dish soap (mild)
- Soft cloth or sponge
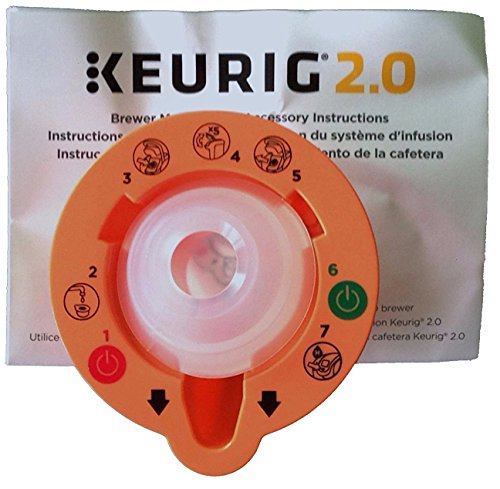


Before You Start
Unplug the machine before any disassembly or cleaning. Empty the water reservoir and remove any K-Cup packets. Use caution around the needle area to prevent injury or damage. Descale every 1–3 months depending on water hardness and usage. The total cleaning time varies by method but typically takes 30–60 minutes for a thorough refresh.
Step-By-Step: How To Clean Your Keurig Coffee Maker
- Unplug the brewer and remove the water reservoir. Wash all removable parts with warm, soapy water and rinse thoroughly.
- Rinse and dry the pod and brew chamber to prevent residue from affecting future brews.
- Inspect the needle using the Keurig needle cleaning tool to remove any clogs or buildup in the entrance and exit holes.
- Run a fresh-water rinse: fill the reservoir with clean water and execute 2–3 empty brew cycles to clear loose debris.
- Prepare the Keurig descaling solution for coffee makers according to the label instructions and fill the reservoir.
- Run multiple descaling cycles with a short water pause between cycles to allow the solution to work on mineral deposits.
- Rinse the reservoir thoroughly with clean water and conduct 2–3 additional empty brews to remove any descaling residue.
- Clean the exterior and touchpoints with a damp cloth; ensure the brew head and needle area are dry before reassembling.
- Reassemble, fill with fresh water, and run a final set of 2–3 clean cycles to finish.
- Test with a cup of water first, then brew a regular coffee to verify flavor and dispenser function.
- If flavors persist or clogs reappear, repeat the descaling process with a fresh batch of solution and check for mineral buildup in the lines.
- Schedule routine cleanings every 1–2 months, adjusting frequency for hard water or high usage.
Troubleshooting
| Symptom | Likely Cause | Fix | Prevention |
|---|---|---|---|
| Brewer won’t start | Electrical issue or clogged needle | Check power, inspect needle with cleaning tool, reseat parts | Regular cleaning and gentle handling of components |
| Weak coffee or no brew | Descale buildup or clogged lines | Run descaling cycles, then rinse thoroughly | Descale as per schedule and use filtered water |
| Strange taste after cleaning | Residue from cleaning steps | Rinse extensively; run multiple empty cycles | Fully rinse after descaling and avoid lingering residues |
| Water leaks around reservoir | Improper seating or damaged seals | Re-seat reservoir, inspect seals and replace if needed | Handle parts gently and keep seals clean |
Common Mistakes
- Using household vinegar for descaling instead of the recommended descaling solution
- Skipping the rinse cycles after descaling, leaving residue
- Ignoring mineral buildup in hard water areas
- Over-tightening parts, which can damage seals
- Cleaning only the exterior while neglecting the needle and brew head
Following best practices helps maintain flavor and extend the life of the Keurig.
Tips For Best Results
- Use filtered or bottled water to reduce mineral buildup and frequency of descaling
- Maintain a regular cleaning schedule aligned with water hardness and usage
- Keep the needle area clean with the dedicated tool to prevent clogs
- Decorate the routine with a quick wipe-down after every few uses to prevent residue
- Record cleaning dates in a small notebook or calendar for consistency
Call A Professional
Contact a technician or Keurig support if you notice persistent leaks, electrical issues, or if the machine fails to function after thorough descaling and needle cleaning. Stop using the device if there are unusual noises, sparks, or overheating concerns. Seek professional help for damaged components or warranty-covered repairs.
FAQ
How often should I descale my Keurig?
Descale every 1–3 months based on water hardness and usage.
Can I use vinegar to descale a Keurig?
Use the manufacturer-recommended descaling solution for best results and warranty compliance.
What if the needle is clogged after cleaning?
Use the Keurig needle cleaning tool to carefully remove buildup; repeat rinsing cycles afterward.
Is it safe to run a cleaning cycle with just water?
Yes, running several water-only cycles helps flush the system after cleaning.
Why does my coffee taste off after cleaning?
Residual cleaning solution or incomplete rinsing can affect flavor; perform thorough rinses and test with water first.
Buying Guide
When selecting accessories to support Keurig cleaning and maintenance, consider how they fit your routine and machine model. Key buying factors include size, noise level, energy efficiency, controls, and placement in the kitchen or office. Compare options like a dedicated cleaning kit, a descaling solution tailored for Keurig, and a cleaning brush set for thorough maintenance. Think about your water hardness, frequency of use, and whether you prefer a compact, portable kit or a comprehensive cleaning package that you can keep near the brewer. Always choose certified tools designed for Keurig machines to ensure compatibility and safety.
Leave a Reply