How to Clean Keurig Elite: Simple Steps, Right Tools, Lasting Freshness
Maintaining a Keurig Elite ensures consistent brew quality and extends the life of the brewer. Regular cleaning removes mineral buildup, old coffee oils, and potential clogs that can affect performance.
This guide provides a clear, step-by-step approach using common tools and descaling products to keep your Keurig Elite running smoothly without guesswork.
Quick Answer
Descale monthly or every 3–6 months depending on water hardness and usage. Use a Keurig descaling solution for coffee makers, run through cycles, then rinse with fresh water. Clean the needle and internal components with a dedicated cleaning kit to prevent clogs and improve flavor.
What You’ll Need
- Keurig descaling solution for coffee maker or a trusted descaler recommended by Keurig
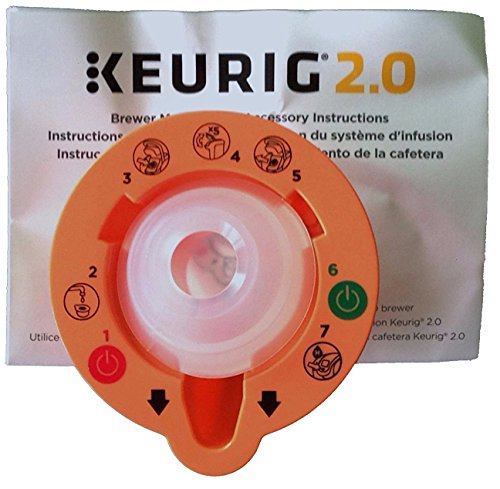
- Keurig cleaning kit descaler brush needle for thorough internal cleaning
- K-Cup brewer needle cleaning tool to clear the inlet and exit needles
<li Clean cloths or paper towels, warm water, and a mild dish soap

Before You Start
Prepare a well-ventilated area and gather the cleaning tools. Empty the removable parts and decaf stays ready for a fresh brew after cleaning. unplug the machine before any disassembly and allow it to cool if recently used. Reserve about 30–60 minutes for the full process, including multiple rinse cycles.
Note: Do not use harsh cleaners or bleach. Do not put the machine in the dishwasher. Always follow manufacturer instructions for maintenance.
Step-By-Step: How To Clean Keurig Elite
- Detach the water reservoir and empty any remaining water. Rinse the reservoir with warm soapy water, then rinse thoroughly.
- Fill the reservoir with fresh water and add the Keurig descaling solution for coffee maker as directed by the product label. Place a mug on the tray to collect effluent.
- Run a series of 3–4 cleansing brew cycles on a medium setting, stopping after each cycle to let the solution sit briefly if recommended. This helps break down mineral buildup.
- Allow the machine to sit for 15–30 minutes with the descaling solution inside, then resume cycles until the reservoir is empty.
- Rinse the reservoir, fill with clean water, and run 3–4 clear water cycles to flush any remaining descaling solution.
- Use the Keurig cleaning kit descaler brush needle to inspect and gently loosen debris around the needle areas. Carefully follow the kit’s instructions to avoid damaging internal parts.
- Insert the K-Cup brewer needle cleaning tool into the needle housings to dislodge coffee oils and mineral deposits. Rinse the tool after each use.
- Wipe down the exterior, run a final cup with just water, and store the brewer dry until next use.
- If taste or flow remains weak, repeat a light rinse cycle and verify no clogs persist in the needle paths.
- Reassemble all parts and return the brewer to normal operation. Brew a test cup with fresh coffee to confirm performance.
Troubleshooting
| Symptom | Likely Cause | Fix | Prevention |
|---|---|---|---|
| Weak flow or no brew | Clogged needles or mineral buildup | Clean needles with the brush needle tool and perform descaling | Descale on schedule and use filtered water |
| Changed or stale taste | Old oils or residue | Comprehensive cleaning and a full rinse cycle | Regularly flush with water between uses |
| Leaking from needle area | Improper seal or residue | Inspect seals and clean needle housing | Follow manufacturer cleaning steps precisely |
| Brewer not turning on | Electrical issue or blockage | Unplug, check power, and clear any obstructions | Keep area dry and vents clear |
Common Mistakes
- Using undiluted cleaners or household chemicals
- Skipping the rinse cycles after descaling
- Over-tightening parts, causing leaks
- Neglecting needle cleaning, leading to clogged brew paths
Tips For Best Results
- Use filtered or bottled water if your tap water is highly mineralized to reduce building deposits.
- Schedule descaling based on water hardness and usage frequency for consistent performance.
- Keep the cleaning tools dedicated to the Keurig to avoid cross-contamination of residues.
- Store the brewer with an open reservoir to promote air drying after cleaning sessions.
Call A Professional
Consider contacting a technician if the brewer shows persistent leaks, electrical odors, or fails to function after thorough cleaning and descaling. Stop using the unit if there are unusual noises, excessive heat, or visible damage to cords or housing.
FAQ
Can I use regular vinegar to descale my Keurig Elite?
Vinegar is not recommended by Keurig for regular descaling due to potential residue and lingering odor. Use a Keurig-approved descaler or a trusted descaling solution designed for coffee makers.
How often should I clean the needle on a Keurig Elite?
Clean the needle at least every 1–3 months, or whenever you notice weak flow or off-flavors, using the dedicated cleaning tool.
Is it necessary to remove the water reservoir during descaling?
Removing the reservoir helps access internal parts and makes it easier to flush thoroughly, but follow manufacturer guidance for your model.
What should I do if the coffee tastes like descaling solution after cleaning?
Rinse the system with multiple clean water cycles until the taste is neutral. If odor lingers, repeat a second round of rinsing.
How can I prevent mineral buildup between cleanings?
Use filtered water and perform light rinses after every few brews to limit residue accumulation.
What if I see leaks after cleaning?
Inspect seals and gaskets; reseat the reservoir and contact support if leaks persist.
Should I run a test brew with coffee during cleaning?
Avoid brewing coffee during the cleaning process. After finishing descaling, run a few plain water brews first, then a test coffee.
Buying Guide
When choosing cleaning and descaling products for a Keurig Elite, consider size, compatibility, and ease of use. Look for descalers labeled safe for Keurig systems and check that cleaning kits include needle tools appropriate for the brewer’s model. A compact kit with clear instructions helps ensure a thorough clean without confusion.
Key factors include:
- <bSize and storage: Compact descaling solutions fit under sinks or in a cabinet.
- <bNoise and ease: Some kits are designed for quick, quiet cleaning cycles; check customer reviews for real-world experience.
- <bEnergy efficiency and usage: Regular cleaning reduces clogs, helping maintain optimal energy efficiency by ensuring smooth operation.
- <bControls and compatibility: Ensure the descaler is compatible with the Keurig Elite and that any brushes or needles fit the model’s needle housing.
- <bPlacement and maintenance: Keep cleaning tools handy near the brewer; designate a dedicated cleaning station to streamline upkeep.
Considering these factors helps ensure reliable performance, a clean taste, and a longer life for the Keurig Elite without interrupting daily routines.
Leave a Reply