How to Clean a Keyboard: Quick Guide and Tips
Keyboards collect dust, oils, and debris from daily use. A clean keyboard not only looks better but can improve performance and hygiene. This guide focuses on practical, safe methods using commonly available cleaning tools for American households.
For many users, a simple routine can keep keyboards functioning well without professional help. The following steps emphasize gentle approaches, safety, and the right tools to avoid damage.
Quick Answer
To clean a standard keyboard efficiently: power down and unplug, use compressed air to dislodge debris, wipe with a microfiber cloth, and finish with a keyboard cleaning gel for electronics to lift residue. For stubborn grime, repeat with short bursts of air and a damp cloth, then dry thoroughly.
What You’ll Need
- Keyboard cleaning gel for electronics
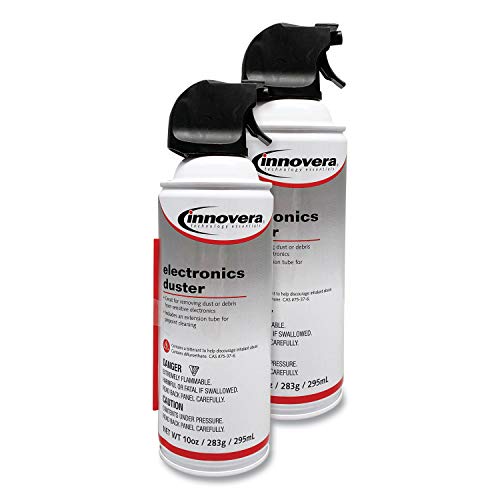
- Compressed air duster for keyboards
- Microfiber anti-static keyboard cleaning cloth


Before You Start
Turn off the device and unplug the keyboard from the computer or power source. If the keyboard is wireless, remove the batteries first. Work in a well-lit area and place a soft mat or towel underneath to catch any debris.
Safety note: Avoid liquids directly on the keyboard chassis and never spray cleaning solutions into gaps. Allow surfaces to dry completely before reconnecting. Depending on usage, plan a cleaning session every 1–3 months.
Step-By-Step: How To Clean A Keyboard
- Power off and unplug the keyboard to prevent any electrical issues.
- Hold the keyboard upside down and gently shake to dislodge loose dust and crumbs.
- Use the compressed air duster for keyboards in short bursts to blow out debris from between keys, moving across rows.
- For stubborn grime, apply a small amount of keyboard cleaning gel for electronics to a finger or light cloth and dab along key surfaces to lift residue.
- Wipe the keycaps and surrounding surfaces with a microfiber anti-static keyboard cleaning cloth, using gentle, even strokes.
- Turn the keyboard over and lightly brush the underside to remove any material that has fallen through.
- Inspect for lingering dust; repeat air bursts and gel applications if needed, focusing on corners and seams.
- Allow any damp areas to dry completely before reconnecting to power or devices.
- Reattach to the computer and test keys to ensure proper function after cleaning.
- Consider a light routine clean every few weeks to prevent buildup and maintain performance.
- Store the cleaning tools in a dry place for quick future maintenance.
- Dispose of any single-use wipes or disposable components according to local guidelines.
Troubleshooting
| Symptom | Likely Cause | Fix | Prevention |
|---|---|---|---|
| Keys stick after cleaning | Residual moisture | Power off, dry thoroughly with air and cloth | Allow longer drying time before use |
| Keys feel unresponsive | Liquid seepage or debris | Inspect switches; clean again with compressed air | Avoid excessive liquids |
| Dust returns quickly | Frequent use in dusty environments | Increase cleaning frequency; use protective keyboard cover | Place keyboard away from fans or vents when possible |
| Streaks on key surfaces | Residue from gel/cloth | Wipe with a dry microfiber cloth | Use minimal product and allow to dry |
Common Mistakes
- Using excessive liquid or spraying directly onto the keyboard
- Ignoring drying time after cleaning
- Rubbing aggressively, which can wear off key labels
- Forgetting to disconnect power before cleaning
Tips For Best Results
- Perform dust removal before any liquid cleaning to minimize moisture spread.
- Use microfiber anti-static keyboard cleaning cloth instead of paper towels to avoid scratching.
- Keep a small, dedicated toolkit for electronics cleaning to avoid cross-contamination with other surfaces.
- Work in short, controlled sessions to prevent accidental damage.
- If you have a mechanical keyboard, consider removing keycaps for a more thorough clean using the same tools.
Call A Professional
Stop and seek professional help if you notice any liquid damage, persistent unresponsive keys after cleaning, or if the keyboard is under warranty and you are unsure about disassembly. Do not attempt internal repairs yourself, as this may void warranties or cause further damage.
FAQ
Can I use water to clean my keyboard?
Water should never be sprayed directly onto the keyboard. A dampened cloth or electronic cleaning gel is safer when used sparingly.
How often should I clean my keyboard?
Cleaning every 1–3 months is a practical guideline for typical use, with more frequent cleaning in dusty environments.
Is it safe to remove keycaps for cleaning?
Most mechanical keyboards allow keycaps removal; use a gentle approach and note key positions for reassembly.
What if liquid gets inside the keyboard?
Unplug immediately and allow to dry completely; seek professional evaluation if the issue persists.
Buying Guide
When choosing cleaning tools for a keyboard, consider size, compatibility, and ease of use. The following factors help ensure effective cleaning without damage.
- Size and design: Select a convenient spray-free air duster with adjustable bursts to target tight gaps.
- Noise level: Some air dusters are quieter; if you work in a shared space, choose a model with a low-noise setting.
- Energy efficiency: Manual air duster cans consume propellant; look for refillable options if available and cost-effective.
- Controls: Simple trigger or button control for steady use helps prevent overuse of force.
- Placement: Store tools near your workspace for quick access and to encourage regular maintenance.
- Material compatibility: A microfiber cloth and electronics gel are safe on most keyboard finishes; test on a small area if unsure.
Having the right combination of tools makes keyboard cleaning straightforward. If you own a laptop or a high-end mechanical keyboard, follow the same principles but adjust based on manufacturer recommendations. Would you like help selecting a specific cleaning kit based on your keyboard type?
Leave a Reply