Leather Jacket Cleaning: A Practical Guide
Leather jackets blend style and durability, but keeping them clean and conditioned requires care. This guide explains a practical, step-by-step approach to removing dirt, reviving the finish, and extending the life of a leather jacket using common supplies.
Readers will find actionable methods suitable for most leather types, with safety notes and when to seek professional help. Specific product kits mentioned below can streamline the process without compromising the leather’s integrity.
Quick Answer
Spot clean gently with a leather cleaning kit, then apply a leather conditioner to restore moisture. For tougher grime, use saddle soap with a soft brush, followed by conditioning. Always test a hidden area first and air dry away from direct heat.
What You’ll Need
- Leather jacket cleaning kit with brush microfiber cloths and conditioner
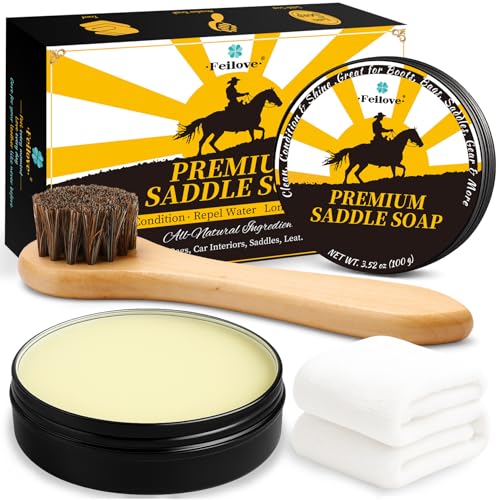
- Leather conditioner kit saddle soap brush for leather jackets
- Microfiber cleaning cloths leather care kit leather jacket


Before You Start
Before cleaning, inspect for loose seams, stains, or odors. Work in a well-ventilated area and lay the jacket on a flat, clean surface. Protect zippers and hardware with a cloth to avoid scratching. Do a spot test on a hidden seam or under the left hem to ensure no color transfer or finish damage.
Cautions: Do not soak leather, avoid harsh household cleaners, and never use abrasive scrubbers. If the jacket is vintage, heavily damaged, or dyed, consult a professional before proceeding. Time estimate: 30–60 minutes for cleaning plus 1–2 hours for conditioning and drying.
Step-By-Step: How To Clean A Leather Jacket
- Prepare the workspace and lay out the jacket on a clean surface with the interior facing up.
- Remove surface dirt with a soft brush or sponge from the leather jacket cleaning kit, brushing in the direction of the grain.
- Apply a mild cleaner from the leather jacket cleaning kit to a microfiber cloth and test on a small area. Wipe in gentle circular motions to lift grime.
- For stubborn spots, use a saddle soap on a damp brush, working slowly. Wipe away residue with a clean microfiber cloth after cleaning.
- Wipe the entire jacket with a clean, dry microfiber cloth to remove excess moisture and residues.
- Allow the jacket to air dry away from direct heat or sunlight until fully dry.
- Apply a leather conditioner using the included cloth or sponge, following the product’s instructions. Distribute evenly in small, circular motions, focusing on seams and high-wear areas.
- Let the conditioner absorb for several hours or overnight, then buff lightly with a dry microfiber cloth to restore the sheen.
- Reattach any hardware and inspect the finish. If needed, repeat conditioning after 24–48 hours for deeper saturation.
- Store the jacket on a wide hanger in a cool, dry place to maintain shape and finish.
- For outdoor or heavy-use jackets, consider applying a protective leather spray once the jacket is fully dry to resist water droplets and stains.
- Document care steps for future cleanings to maintain consistency and longevity.
Troubleshooting
| Symptom | Likely Cause | Fix | Prevention |
|---|---|---|---|
| Dull finish after cleaning | Over-wiping or insufficient conditioning | Reapply conditioner and buff gently with a microfiber cloth | Follow manufacturer time guidelines and avoid over-cleaning |
| Streaks or color transfer | Cleaner too strong or test area skipped | Spot-test first; use milder cleaner and microfiber cloth | Always test on hidden areas |
| Sticky residue | Excess conditioner or cleaner left on surface | Wipe with clean cloth and allow to dry completely | Moderate application, let products absorb |
| Cracking after conditioning | Over-conditioning or poor product compatibility | Use sparingly and switch to a compatible conditioner | Stick to recommended products for your leather type |
Common Mistakes
- Using household soaps or detergents that strip natural oils
- Over-wetting the leather or applying products too aggressively
- Skipping a test patch and applying directly to visible areas
- Conditioning too soon after cleaning, before the jacket is fully dry
Tips For Best Results
- Choose a leather conditioner kit saddle soap brush for leather jackets that matches your jacket type and colorfastness
- Clean and condition in a shade-free area to prevent sun damage during drying
- Consistently brush grain-aligned strokes to preserve the leather’s texture
- Condition every 6–12 months or as needed based on climate and wear
- Store on a padded hanger to avoid shoulder dimples and sagging
Call A Professional
Seek a professional if the jacket shows deep stains, persistent odor, significant color washout, or structural damage like loose seams or torn lining. Also contact a pro if the leather is antique or highly valuable and you are uncertain about cleaning methods.
FAQ
Can I clean a leather jacket at home?
Yes, with a proper leather cleaning kit and careful steps, most everyday dirt and scuffs can be addressed safely.
Is saddle soap safe for all leather types?
Mostly suitable for smooth leather; check product instructions and test a hidden area first.
How often should I condition my leather jacket?
Typically every 6–12 months, or more often in dry climates or with frequent wear.
What if my jacket has water stains?
Gently clean the area, then apply conditioner to restore moisture and help even the finish; professional help may be needed for severe marks.
Buying Guide
When choosing leather care products, consider size, noise level, energy efficiency, controls, and placement for storage. Look for a complete leather jacket cleaning kit that includes a soft brush, microfiber cloths, and a conditioner. Compare kits that combine saddle soap with conditioner if you have a mix of cleaning needs. For sensitive finishes or color-rich jackets, prioritize color-safe formulas and patch-test options. Assess replacement parts or refill availability for your kit to maintain ongoing care without frequent repurchases. Finally, consider the kit’s portability for on-the-road or travel use, ensuring it fits into a compact bag without sacrificing cleaning effectiveness.
Leave a Reply