How to Clean a Car Headliner Safely and Effectively
Cleaning a car headliner without damaging the fabric or backing requires careful technique and suitable products. This guide walks through practical steps to refresh the headliner while preserving its color and integrity, using tools commonly available to American car owners.
Headliners sit directly above passengers and can trap dust, stains, and odors. With the right approach, you can remove stains and dirt without causing sagging, staining, or water intrusion into the roof lining.
Quick Answer
Use a gentle upholstery stain remover spray designed for headliners, apply with a microfiber brush or sponge, blot excess moisture, and air-dry completely. Avoid soaking the fabric; work in small sections and test on an inconspicuous area first.
What You’ll Need
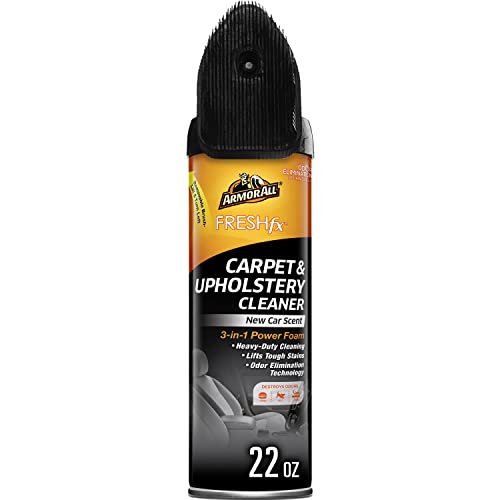
- car headliner fabric cleaner spray for auto interior
- microfiber detailing brush kit for car headliner cleaning
- car interior upholstery stain remover spray for headliner


Before You Start
Inspect the headliner for loose seams, sagging, or visible water damage. If there are signs of extensive sagging or mold, professional help may be required. Protect surrounding interior trim with a microfiber cloth or painter’s tape and ventilate the cabin during cleaning.
Important cautions: avoid over-wetting the fabric, which can cause adhesive damage or staining to underlying panels. Do not use abrasive cleaners or stiff brushes that may fray fibers. Test any cleaner on a small, hidden spot first to confirm colorfastness.
Time estimate: plan 30–60 minutes for typical spots; larger jobs may take longer as the headliner dries. Ensure the vehicle interior is cool and well-ventilated during and after cleaning.
Step-By-Step: How To Clean A Car Headliner
- Remove loose dust from the headliner using a soft brush or a vacuum with a brush attachment, working in gentle, circular motions.
- Prepare a cleaning solution by lightly diluting the car headliner fabric cleaner spray for auto interior according to product instructions.
- Test the cleaner on a hidden area of the headliner to check for colorfastness and adhesive reaction.
- Apply cleaner to a microfiber detailing brush or soft sponge, not directly to the fabric; work in small, discreet sections.
- Gently blot and lift stains, using light, even pressure. Do not scrub aggressively to prevent fiber damage or loosened glue.
- For stubborn stains, reapply in a small area and allow a brief dwell time before blotting again with a clean, dry microfiber cloth.
- Allow the headliner to air-dry completely. Open doors or windows for ventilation and avoid using heat to speed drying, which can warp or shrink materials.
- Inspect the area. If any stains persist, repeat the process on those spots or consider a dedicated upholstery stain remover spray designed for headliners.
Troubleshooting
| Symptom | Likely Cause | Fix | Prevention |
|---|---|---|---|
| Headliner still damp after 6 hours | Insufficient ventilation or over-wetting | Increase airflow, use dehumidifier; reapply cleaner in lighter layers | Avoid soaking; apply in thin layers |
| Color transfer or new stains | Cleaner too strong or test skipped | Test first; use milder solution or dilution | Always test a hidden area first |
| Fibers fraying or glue showing | Over-scrubbing or aggressive brushes | Switch to softer brush; reduce pressure | Use gentle, controlled motions |
| Headliner sags after cleaning | Adhesive damage from moisture | Allow complete dry time; avoid excess moisture | Limit moisture and ensure even drying |
Common Mistakes
- Over-wetting the fabric, which can seep into the backing and cause sagging.
- Using abrasive brushes or harsh cleaners that damage fibers.
- Not testing cleaners on hidden spots, risking color loss or damage.
Tips For Best Results
- Work in a shade-filled area with good ventilation to speed safe drying.
- Use a dedicated microfiber detailing brush kit for precise control on the headliner.
- Check for signs of sagging or delamination and adjust cleaning intensity accordingly.
- Follow product instructions and avoid substituting cleaners with unknown formulations.
Call A Professional
Consider a pro if the headliner shows extensive sagging, water damage, mold, or if stains persist after multiple light cleanings. Stop cleaning and seek professional assessment if you notice persistent odor, bubbling fabric, or adhesive failure.
FAQ
Can I use household cleaners to clean a car headliner?
Stick to cleaners designed for auto interiors or upholstery to avoid damage and discoloration.
Is it safe to spray cleaner directly on the headliner?
Direct spraying can over-wet the fabric; spray onto a cloth or brush and apply gently.
How long does a cleaned headliner take to dry?
Drying times vary, but typically 1–6 hours depending on climate and airflow.
What if the stain returns after drying?
Repeat the cleaning process in small sections and consider a stain remover formulated for headliners.
Buying Guide
When choosing products for headliner cleaning, consider size, material compatibility, and application method. A spray-based cleaner for auto interior fabrics is convenient for spot cleaning, while a dedicated upholstery stain remover spray can aid stubborn spots. A microfiber detailing brush kit helps control cleaning pressure and protects the fabric’s nap. For best results, pair a fabric-safe cleaner with a soft brush and a clean, lint-free cloth.
Key Buying Factors
- Size and coverage: Choose a spray bottle size that matches your maintenance needs, ensuring you have enough product for future cleanings.
- Noise and ease of use: Simple spray bottles with smooth triggers reduce fatigue during larger jobs.
- Energy efficiency: Not directly applicable; focus is on cleaning efficiency and product safety.
- Controls: Even spray distribution and a non-abrasive brush are essential for safe cleaning.
- Placement and storage: Store cleaners away from heat and direct sunlight; keep brushes clean and dry to prevent mold.
Thinking about this task holistically helps maintain the headliner’s appearance without risking damage. Are you ready to refresh your car’s interior with the right products and careful technique?
Leave a Reply