How to Clean Grill Top Effectively for a Sparkling Grill
Maintaining a clean grill top improves flavor, prevents residue from burning, and extends the life of grill components. This guide outlines a practical, step-by-step approach suitable for most American grill setups, focusing on commonly used tools and safe practices.
Quick Answer
Start by heating the grill briefly to loosen debris, then scrub with a dedicated grill brush or scraper, cool, and wipe down with a damp cloth. For stubborn buildup, repeat with targeted cleaners and finish with a light oil coating to prevent sticking.
What You’ll Need
- Stainless steel grill brush with scraper long handle
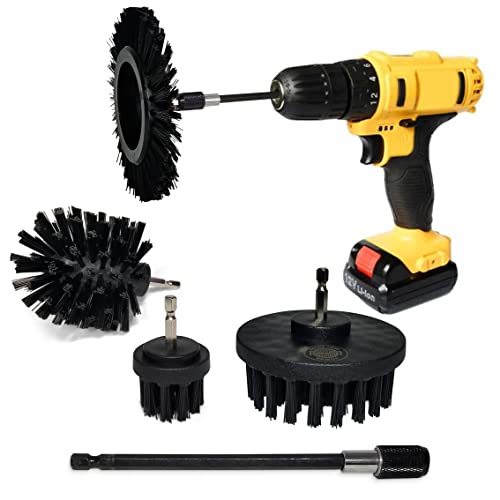
- Cast iron grill grate cleaner brush set
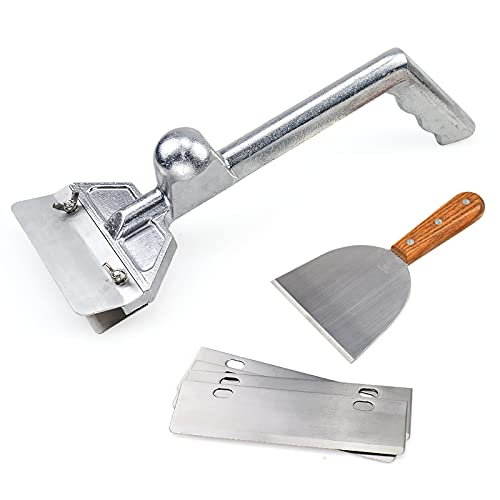
- Grill cleaning scraper tool with aluminum handle

Before You Start
Ensure the grill is off, cool to the touch, and placed on a stable surface. Use gloves and eye protection if needed. Ventilate the area and keep pets and children away. Time estimate: 20–45 minutes depending on grill size and buildup.
Safety cautions: never use water on hot grates as sudden cooling may warp metal; avoid metal bristles on porcelain-coated grates as they can loosen plating; if your grill has a nonstick coating, use gentler tools.
Step-By-Step: How To Clean Grill Top
- Preheat the grill for 5–10 minutes to loosen baked-on grease and debris.
- Turn off and unplug any electric components; disconnect propane tanks or gas lines as needed for safety.
- Remove grates and set them on a stable, heat-resistant surface.
- Brush loose residue with a stainless steel grill brush with scraper long handle or a grill cleaning scraper tool with aluminum handle, working in one direction to lift grime.
- Soak grates if possible in warm, soapy water for 10–15 minutes to loosen stubborn buildup.
- Use a cast iron grill grate cleaner brush set to target stubborn spots on cast iron surfaces; avoid harsh scrubbing that can wear protective seasoning.
- Rinse grates with clean water and dry thoroughly; re-season cast iron grates with a light oil coating to prevent rust.
- Wipe interior surfaces with a damp cloth or sponge; remove any ash or food particles from the lower tray or burners.
- Reassemble grates on the grill and perform a quick heat wipe by closing the lid and heating for 5 minutes to remove moisture.
- Inspect for remaining residue; repeat any steps as needed for particularly sticky areas.
- Store brushes and tools in a dry location and clean after each use to extend tool life.
Troubleshooting
| Symptom | Likely Cause | Fix | Prevention |
|---|---|---|---|
| Residue remains after scrubbing | Grease baked onto grate | Soak longer, use stronger tool | Clean after each use to prevent buildup |
| Streaks or uneven staining | Improper drying or metal reaction | Dry thoroughly and apply light oil | Dry immediately after washing |
| Rust on cast iron | Insufficient seasoning or moisture | Re-season with oil and heat | Keep dry between uses |
| Scraper or brush bristles shedding | Old tool wear | Replace tool to avoid bristle in food | Inspect before each use |
Common Mistakes
- Using metal brushes on porcelain-coated grates, which can scratch coating.
- Washing hot grates with cold water, causing warping or cracking.
- Neglecting to dry and season cast iron after cleaning, leading to rust.
- Over-reliance on chemical cleaners that leave residues affecting flavor.
Tips For Best Results
- Clean grills soon after cooking while residue is soft and easier to remove.
- Keep a dedicated grill brush and scraper within reach of the grill area for quick touch-ups.
- For heavy grease, rehearse a two-step approach: heat loosening, then mechanical scrubbing, followed by a warm rinse.
- Season cast iron grates after cleaning to protect against rust and improve nonstick properties.
- Wipe down the exterior surfaces with a damp cloth to maintain overall cleanliness and extend tool life.
Call A Professional
Consider professional help if you encounter persistent rust, warped grates, broken components, or if the grill’s gas lines show wear. Seek a certified technician when uncertain about safety during maintenance or when gas systems require inspection.
FAQ
What type of brush is best for stainless steel grates?
A stainless steel grill brush with scraper long handle is effective for stainless surfaces, but use gently on coated grates to avoid damage.
Can I clean cast iron grates with a dishwasher?
Dishwashers can strip seasoning; prefer hand cleaning and re-seasoning after washing.
How do I prevent rust on grill grates?
Dry thoroughly after cleaning and apply a light oil coat; store in a dry area.
Is it safe to use chemical cleaners on my grill?
Yes, but rinse thoroughly to remove residue and avoid flavor contamination; prefer mild cleaners and soap with water.
How often should I clean the grill top?
Clean after each use for routine maintenance; deep clean every 1–3 months depending on usage.
Should I oil the grates before cooking after cleaning?
Yes, a thin oil coating helps prevent sticking and improves sear quality.
What if my grill has porcelain-coated grates?
Use non-metallic scrapers and soft brushes to avoid scratching the coating.
Buying Guide
When choosing grill cleaning tools, consider size, material, and compatibility with your grill type. Key buying factors include:
- Durability and material: Stainless steel brushes resist wear, while cast iron-specific sets offer strong scrubbing with proper seasoning.
- Brush head design: Long-handled tools keep hands away from heat; scrapers with integrated scrapers help remove heavy residue.
- Compatibility: Ensure tools fit your grill grate material (stainless steel, cast iron, porcelain-coated).
- Ease of cleaning: Tools that are easy to rinse and dry reduce maintenance effort.
- Storage and safety: A hanging or magnetic tool holder keeps brushes accessible and reduces clutter.
For best results, select a combination of tools from the provided product keywords to cover different surface needs and heavy-duty cleaning tasks. Consider pairing a stainless steel brush with a long handle for quick cleanup and a cast iron grate cleaner set for seasons and tough buildup. If you prefer a single multi-tool, ensure it has a robust scraper and a non-scratch tip for sensitive coatings.
Leave a Reply