How to Clean Filters on Shark Anti Hair Wrap Vacuum
Shark Anti Hair Wrap vacuums rely on clean filters to maintain suction and prolong motor life. Regularly cleaning or replacing filters helps prevent clogging from hair, dust, and debris. This guide explains a practical, step-by-step approach to keep your filters in top condition, using common tools and replacement parts designed for most Shark models.
Quick Answer
Turn off and unplug the unit, remove the dust cup, and take out the filter assembly. Tap or rinse the filter(s) as directed, let them dry completely, and reassemble. If the filter shows wear or heavy staining, replace it with the recommended filter components for optimal performance.
What You’ll Need
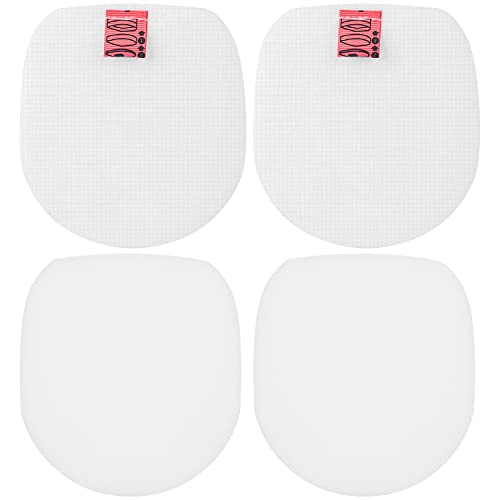
- Shark vacuum replacement pre-motor filter
- Shark vacuum HEPA filter replacement for Anti Hair Wrap
- Shark vacuum filter cleaning brush kit


Before You Start
Unplug the vacuum and empty the dust cup before handling filters. Work on a clean, dry surface to prevent moisture from entering electrical parts. Avoid using hot water unless the manual permits it, as heat can damage some filters. Plan for 30–60 minutes, depending on your model and drying time.
Step-By-Step: How To Clean Filters On Shark Anti Hair Wrap
- Unplug the vacuum and remove the dust cup from the main body.
- Open the filter housing and gently lift out the pre-motor and HEPA filter components.
- Tap the filters over a trash can to release loose debris without grinding dirt into the fibers.
- Use the included filter cleaning brush kit to loosen embedded hair and dust from the filter surfaces.
- Rinse washable filters under cool running water until the water runs clear. Do not use soap unless the manual specifies.
- Shake out excess water and lay the filters flat on a clean surface to air-dry completely, typically 24 hours or longer if humidity is high.
- Inspect the filter frames for cracks or wear. If damaged, replace with a new pre-motor or HEPA filter as needed.
- Reinsert the dry filters into their housing, ensuring correct orientation, then reassemble the vacuum.
- Run the vacuum on a small test area to confirm proper suction and no unusual noises.
- Mark a reminder on your calendar for the next cleaning cycle based on usage and floor types.
- Store spare filters in a dry, accessible place to streamline future maintenance.
Troubleshooting
| Symptom | Likely Cause | Fix | Prevention |
|---|---|---|---|
| Weak suction after cleaning | Clogged filter or debris in housing | Thoroughly clean or replace filters; check for blockages | Regular maintenance schedule |
| Unpleasant odor from vacuum | Dirty filters or mold growth | Wash and dry filters; consider replacing HEPA filter | Keep filters dry and replace per spec |
| Filter not seating properly | Filter orientation wrong or frame damage | Reinstall with correct alignment; replace damaged parts | Check instructions before reassembly |
| Filters dry but still damp after 24 hours | Poor air circulation or high humidity | Move to a warmer, dry area and extend drying time | Avoid blocking airflow during drying |
Common Mistakes
- Using hot water on washable filters unless the manual allows it
- Rushing the drying process, which traps moisture inside
- Forcing filters back into place without correct orientation
- Neglecting to replace worn filters when performance declines
Keeping to the recommended schedule helps prevent performance drops and protects the motor from overwork.
Tips For Best Results
- Label and separate pre-motor and HEPA filters for easy reassembly.
- Schedule a regular filter check after heavy cleaning or pet hair seasons.
- Use the filter cleaning brush kit to remove hair strands without tearing the filter material.
- Store replacement filters in a dry, clean container to prevent contamination.
Call A Professional
Seek professional service if the vacuum loses suction after filter maintenance, the motor overheats, or there is visible damage to the filter housing. Also contact a pro if you notice persistent electrical smells, unusual noises, or any risk of electric shock.
FAQ
How often should I clean the Shark Anti Hair Wrap filters?
Clean washable filters every 1–3 months with regular use; replace when performance declines or damage is visible.
Can I clean the HEPA filter with water?
Most HEPA filters used in these models are not meant to be washed; check the user manual. If washable, rinse gently with cool water and allow to dry completely.
What if the filters look discolored but aren’t torn?
Discoloration can indicate buildup; cleaning or replacing may be necessary to restore airflow.
Are replacement filters interchangeable between models?
Replacement parts vary by model; use the specific Shark replacement filters designed for Anti Hair Wrap vacuums.
Is it necessary to replace both pre-motor and HEPA filters?
Yes, replacing both ensures optimal filtration and suction efficiency.
How long should the filters dry before reassembly?
Allow at least 24 hours in a dry area; longer drying time prevents moisture from damaging the motor.
Will cleaning the filters void the warranty?
Follow the manufacturer’s cleaning instructions; improper maintenance could affect warranty terms.
Buying Guide
When choosing replacement filters or a maintenance kit for Shark Anti Hair Wrap vacuums, consider size compatibility, filter type, and sealing quality. Key buying factors include:
- Size and compatibility: Ensure the filters fit your exact Shark model and are labeled for Anti Hair Wrap varieties.
- Filter type: Pre-motor filters protect the motor; HEPA filters capture fine particles and allergens.
- Efficiency and airflow: High-quality, well-sealing filters maintain suction and reduce clogging.
- Installation ease: Look for filters with clear orientation guides and straightforward replacement steps.
- <bDurability: Reusable or washable options reduce waste; confirm care instructions.
- <bCost and availability: Availability from authorized sellers helps ensure genuine parts and warranty compatibility.
Other considerations include noise level, energy efficiency, and placement within the home. For most users, replacing worn filters on a regular cycle offers the best balance of performance and cost. If you regularly vacuum high-piber surfaces or pets, consider stocking both filter types to minimize downtime.
Leave a Reply