How to Clean a Condensate Pump for HVAC Systems
Maintaining a condensate pump helps prevent water damage, odors, and system shutdowns in air conditioning and dehumidification setups. This guide provides a practical, step-by-step approach using common tools and a focused maintenance mindset. Clear, actionable steps let homeowners and DIY enthusiasts keep the pump running smoothly.
Regular care is essential for reliable operation. The procedures below cover inspection, cleaning, and preventive measures that align with typical residential HVAC installations.
Quick Answer
Quick Method: Unplug the pump, remove the reservoir, check for clogs, rinse with clean water, wipe dry, and reinstall. If buildup is stubborn, use a specialized condensate pump cleaning brush and a condensate pump descaler spray following product directions.
What You’ll Need
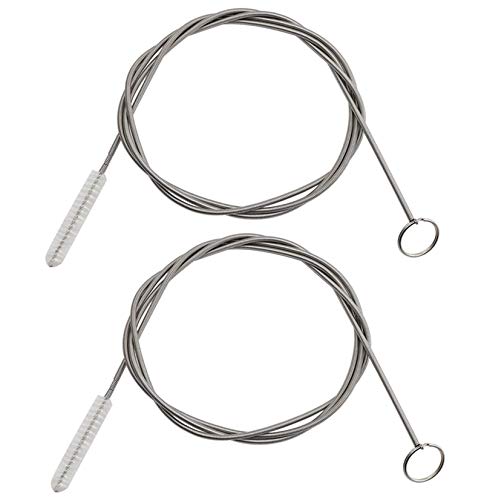
- Condensate pump cleaning brush
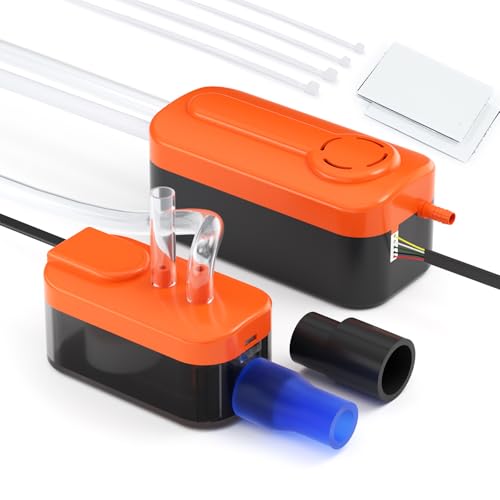
- Condensate pump maintenance kit
- Condensate pump descaler spray
Before You Start
Prepare a clean workspace and have a towel or absorbent mat ready. Disconnect power from the unit to avoid shocks, and ensure the area stays dry during the procedure. Wear protective gloves if you handle chemical descalers. This task typically takes 20–40 minutes, depending on buildup. If the pump is older or shows signs of failure (strange noises, persistent leaks, or frequent tripping breakers), consider professional service.
Step-By-Step: How To Clean The Condensate Pump
- Deyllect the power: Unplug the HVAC unit or switch off the circuit feeding the condensate pump to prevent electric shock.
- Access the pump: Remove the reservoir or access cover to expose the pump and hoses. Note hose connections for correct reassembly.
- Inspect for blockage: Check intake screen and inlet hose for debris, algae, or mineral buildup. Remove loose material by hand or with a damp cloth.
- Clean with simple rinse: Rinse the reservoir and impeller area with warm water. Use a condensate pump cleaning brush to dislodge stubborn deposits without damaging components.
- Target persistent scale: If mineral buildup remains, apply a condensate pump descaler spray according to the product label. Let it dwell briefly, then flush with water.
- Dry and inspect seals: Wipe all parts dry and inspect seals and gaskets for wear or cracks. Replace damaged parts as needed.
- Reassemble: Reconnect hoses in their original configuration, reinstall the reservoir, and ensure there are no kinks or leaks.
- Test the system: Restore power and pour a small amount of water into the reservoir to confirm the pump activates and water is discharged properly.
- Schedule ongoing maintenance: Mark a monthly or quarterly reminder to repeat cleaning, especially in humid seasons.
- Document findings: Note any unusual noises, reduced flow, or leaks to guide future service or professional checks.
- Dispose of waste responsibly: Clean rags and used cleaning solutions should be disposed of per local guidelines.
- Safety check: Confirm there are no tripping hazards or exposed wiring near the unit after reassembly.
Troubleshooting
| Symptom | Likely Cause | Fix | Prevention |
|---|---|---|---|
| Pump not starting | Power disconnected or fuse blown | Check circuit, reset breaker, ensure plug is secure | Use a dedicated circuit and label the switch |
| Slow water discharge | Clogged inlet or impeller | Clean with brush, remove debris | Regular cleaning schedule |
| Leaking around reservoir | Worn seal or loose fittings | Tighten connections or replace seals | Inspect seals during each cleaning |
| Unpleasant odor | stagnant water or algae | Thorough cleaning and descaler spray | Keep reservoir topped with fresh water |
Common Mistakes
- Rushing the cleaning and skipping the descaler step when mineral buildup is heavy
- Using harsh chemicals that damage seals or plastic components
- Forgetting to unplug or accidentally re-connecting hoses incorrectly
- Neglecting to reseal the reservoir, leading to leaks after reassembly
Tips For Best Results
- Establish a simple monthly check to prevent clogs before they cause flow issues
- Label hoses during disassembly to ensure accurate reassembly
- Choose a descaler spray compatible with the pump’s materials and follow label instructions
- Keep a small brush and cloth handy for quick mid-season cleanups
Call A Professional
Consider professional service if you notice persistent leaks, unusual noises, electrical smells, or repeated pump failures despite cleaning. Do not attempt to modify electrical connections or bypass safety features. If the condensate line is shared with other appliances or if the unit is under warranty, consult the manufacturer’s guidelines before performing DIY maintenance.
FAQ
How often should I clean a condensate pump?
Most homes benefit from a cleaning every 3–6 months, with more frequent checks during humid seasons.
Can I use any descaler spray on a condensate pump?
Use only descaler sprays labeled safe for condensate pumps and follow the product instructions to avoid damage.
What tools are essential for maintenance?
A condensate pump cleaning brush, a maintenance kit, and a descaler spray are commonly needed tools.
What signs indicate the pump needs replacement?
Repeated failure to start, persistent leaks, or heavy wear on seals indicate possible replacement rather than repair.
Is it safe to run the pump while cleaning?
No. Always unplug the unit and ensure all components are dry before handling.
Buying Guide
When selecting accessories for condensate pump care, consider size compatibility with your pump model, ease of use, and safety features. Look for kits that include a dedicated condensate pump cleaning brush, a reliable condensate pump maintenance kit, and a compatible descaler spray. For best results, choose products with clear instructions and materials safe for common condensate pump plastics and seals. A well-chosen kit simplifies routine maintenance and prolongs pump life, reducing the risk of clogs and overflows.
Key Buying Factors
Size and compatibility: Ensure tools fit your specific condensate pump model and reservoir dimensions. Some kits are universal, while others are model-specific.
Noise and energy considerations: While cleaning tools don’t directly affect noise, a well-maintained pump operates more quietly and efficiently, preventing surges that stress the system.
Energy efficiency: Regular maintenance helps the pump run smoothly, potentially prolonging the life of the unit and maintaining system efficiency.
Controls and ease of use: Look for simple, clearly labeled components and sprays with straightforward instructions. In DIY contexts, user-friendliness matters.
Placement and accessibility: Consider how easy it is to access the pump for routine cleanings. Proximity to the unit and clearance around the reservoir impact maintenance ease.
Leave a Reply