How to Clean a Canon Lens
Maintaining a clean Canon lens is essential for sharp photos and accurate autofocus. This guide outlines a practical, step-by-step approach using common gear to safely remove dust, smudges, and fingerprints without scratching the glass.
Quick Answer
Use a gentle air method first to remove loose dust, then apply specialized lens cleaning products and microfiber cloths. Always work in a clean, low-dust space, and avoid rubbing when dirt is present on the lens surface.
What You’ll Need
- Canon lens cleaning kit – includes safe cleaners and wipes designed for camera lenses
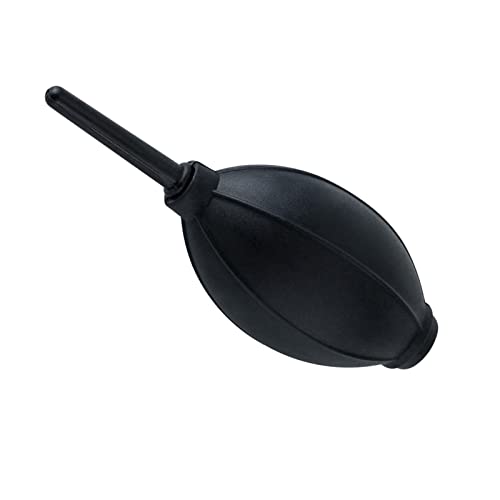
- Camera lens blower dust cleaner – soft, hypoallergenic air for dust removal
- Microfiber lens cleaning cloth for DSLR – lint-free and non-abrasive


Before You Start
Prepare a clean, well-lit work area and wash hands to avoid transferring oils to the lens. Remove the lens from the camera body if comfortable, and place the camera on a soft surface. Never use household tissues, abrasive cloths, or aggressive solvents, as these can scratch or damage coatings. Allow the lens to acclimate if it was recently exposed to temperature changes. Time estimate: 5–15 minutes depending on the level of grime.
Step-By-Step: How To Clean A Canon Lens
- Remove loose dust with the camera lens blower dust cleaner by giving short, gentle puffs from a few inches away.
- Inspect the lens surface for smudges or fingerprints using natural light or a bright lamp.
- Lightly brush away any remaining dust with a clean microfiber cloth, using circular motions from the center outward.
- Apply a small amount of Canon lens cleaning kit solution to a corner of the microfiber cloth, never directly on the lens.
- Wipe the lens in a single, smooth pass with the moistened cloth, still using gentle circular motions from center to edge.
- For stubborn smudges, fold the cloth to expose a clean area and retry with minimal pressure.
- Dry the lens with a dry segment of the microfiber cloth to remove any residual moisture.
- Reattach the lens to the camera body and check the image for clarity; repeat if necessary with a fresh cloth.
Troubleshooting
| Symptom | Likely Cause | Fix | Prevention |
|---|---|---|---|
| Faint streaks after cleaning | Residue from cleaner or moisture | Use a dry microfiber cloth and a tiny amount of cleaner | Only moisten cloth, not the lens directly |
| Dust reappears quickly | Lens not sealed properly or frequent outdoor use | Clean in a controlled area and keep lens cap on when not in use | Keep cases clean and store in a dust-free space |
| Scratches visible in photo | Abrasive cloth or too much pressure | Stop immediately; switch to a fresh cloth and lighter touch | Use only soft microfiber and avoid tapping surfaces |
| Blurry corners or vignetting after cleaning | Coating damage or improper cleaning angle | Seek professional assessment if coating appears damaged | Follow center-to-edge cleaning technique |
Common Mistakes
- Using household cleaners or solvents not designed for optics
- Applying cleaner directly to the lens surface
- Rubbing too hard or using rough fabrics
- Cleaning cameras in dusty environments without protection
Sticking to recommended products and gentle techniques minimizes risk and helps preserve image quality over time.
Tips For Best Results
- Store lenses in a clean, dry cabinet with anti-dust inserts to reduce buildup between shoots
- Develop a routine: quick air blow, light wipe, final dry pass to maintain coatings
- Work in a low-humidity area if possible to reduce moisture films on the glass
- Use a protective filter when shooting in dusty or sandy environments as a sacrificial layer
- Keep your cleaning kit dedicated to optics to prevent cross-contamination with other gear
Call A Professional
Contact a professional if you notice coating damage, deep scratches, persistent fungal growth, or if the lens is not focusing correctly after cleaning. Seek immediate help if moisture has entered the lens or if the autofocus system behaves abnormally after handling.
FAQ
Can I clean the lens while it’s still attached to the camera?
Yes, but remove the lens cap and any filters first, and use gentle blows to clear dust before wiping.
What should I do if liquid cleaner gets inside the lens?
Power off and remove the battery, then seek professional service as soon as possible.
Is it necessary to use a microfiber cloth for every cleaning?
Yes; microfiber cloths minimize scratches and lint transfer compared to ordinary fabrics.
How often should I clean my Canon lens?
Clean as needed after exposure to dust, fingerprints, or moisture, but perform light maintenance after each shooting session to prevent buildup.
Buying Guide
When selecting parts for lens maintenance, consider size, compatibility, and reliability. Key factors include how often you swap lenses, your typical shooting environment, and storage habits. A compact cleaning kit is convenient for everyday carry, while a premium kit may offer extended warranties and higher-quality cloths. Look for kits that include a blower, lens cleaning fluid, and microfiber cloths. Ensure that components are safe for coated optics and designed for DSLR and mirrorless cameras alike. Consider adding a protective lens cap or filter to reduce future cleaning needs.
Additional Buying Considerations
- <bSize and weight: Choose a kit that fits your bag and travel style without adding excessive bulk.
- <bNoise level for blowers: Quieter models reduce disruption when cleaning in quiet studios or indoors.
- <bEnergy efficiency and reliability: Reputable brands offer durable, long-lasting cleaning tools.
- <bControls and ease of use: Simple, wand-like blowers and pre-moistened wipes speed up the process.
- <bPlacement and storage: A dedicated soft pouch protects tools from dust between uses.
Leave a Reply