How to Clean Bird Feeders Safely and Effectively
Maintaining clean bird feeders is essential for attracting birds and preventing the spread of disease. This guide provides a clear, practical approach for American households, using safe tools and non-toxic cleaners. By following these steps, feeders stay inviting to feathered visitors and easy to refill.
Quick Answer
Remove seed trays and perches, wash with warm soapy water, rinse thoroughly, and disinfect with a non-toxic bird feeder cleaner spray. Allow all parts to dry completely before reassembly and refilling. Use a long-handled brush for hard-to-reach areas and inspect for cracks or loose parts after cleaning.
What You’ll Need
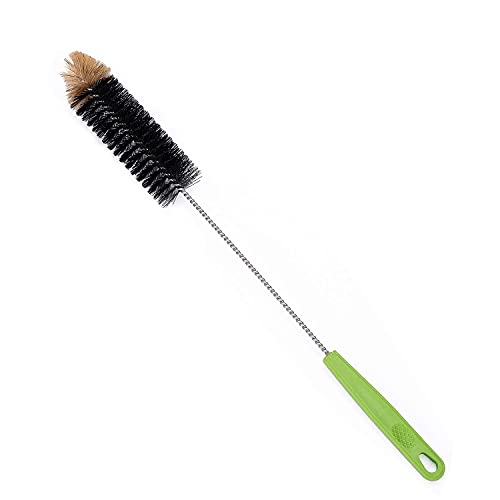
- Long-Handled Bird Feeder Cleaning Brush
- Stiff-Bristle Bird Feeder Brush Kit
- Non-Toxic Bird Feeder Cleaner Disinfectant Spray
- Container or basin for soaking
- Warm water and mild soap or detergent
- Old towels or rags for drying


Before You Start
Pre-cleaning safety: wear gloves and work in a well-ventilated area. Empty all seed from the feeder and remove any saucers, perches, or cages. Check local guidelines for bird-safe cleaning products to avoid harming wildlife. Time estimate: 20–40 minutes per feeder, depending on size and complexity. Important: never use bleach or harsh chemicals near bird feeders; they can leave residues that are harmful to birds.
Step-By-Step: How To Clean Bird Feeders
- Disassemble the feeder and remove all seed
- Rinse components with warm water to loosen debris
- Soak parts in a basin with mild soap and warm water for 5–10 minutes
- Scrub interior surfaces with the Long-Handled Bird Feeder Cleaning Brush to reach stubborn buildup
- Rinse thoroughly, ensuring no soap remains in feeding chambers
- Spray the Non-Toxic Bird Feeder Cleaner Disinfectant Spray on all surfaces according to label directions
- Let parts air dry completely on a clean towel or rack
- Reassemble the feeder and wipe down the exterior to remove any residue
- Refill with fresh seed and check for cracks or loose parts before hanging or placing back outdoors
- Inspect monthly for wear and perform a full clean every 2–4 weeks during peak feeding season
- Store cleaning supplies out of reach of pets and children when not in use
Troubleshooting
| Symptom | Likely Cause | Fix | Prevention |
|---|---|---|---|
| Seed remains moldy after cleaning | Insufficient rinsing or quick drying | Rinse thoroughly; rinse again and allow full drying time | Clean and dry all parts fully before refilling |
| Discolored interior after spray | Residue from cleaner not fully rinsed | Rinse until no residue is detected | Use proper amount of cleaner and rinse thoroughly |
| Feeder leaks or cracks | Wear and tear or brittle plastic | Replace damaged parts or the entire feeder | Inspect regularly and replace at first sign of damage |
| Birds avoid feeder after cleaning | Residue or unfamiliar scent | Rinse well and remove any strong scents | Choose unscented cleaners and allow ample drying time |
Common Mistakes
- Overusing cleaners or leaving residue in feeding areas
- Using strong chemicals that are not labeled as safe for birds
- Not allowing parts to fully dry before refilling
- Neglecting to inspect feeders for damage during cleaning
Tips For Best Results
- Coordinate feeder cleaning with weather; dry, sunny days speed up drying
- Rotate between feeders to reduce disease transmission risk
- Use a dedicated cleaning basin that never touches kitchenware used for food
- Label cleaning spray bottles to avoid cross-contamination
- Keep spare parts on hand, such as extra perches or hardware, to simplify reassembly
Call A Professional
Contact a wildlife or avian health professional if birds show signs of illness near feeders, or if you notice persistent mold growth that you cannot remove. Stop using a feeder immediately if birds exhibit disorientation, coughing, wheezing, or unusual behavior after feeding near the device.
FAQ
How often should I clean bird feeders?
Clean feeders every 2–4 weeks during peak feeding seasons and at least every 1–2 months during off-peak times, adjusting for weather and bird activity.
Can I use household cleaners to sanitize bird feeders?
Avoid household cleaners not labeled as safe for birds; use a specifically formulated Non-Toxic Bird Feeder Cleaner Disinfectant Spray instead.
What’s the best way to dry a cleaned feeder?
Air dry in a clean, sunny area or inside a drying rack until every part is completely dry before refilling.
Should I disinfect the feeder if birds are already visiting?
Yes, but do not spray while birds are present; do cleaning in stages or when birds are away to minimize exposure.
Is it necessary to wash seed trays separately?
Yes, wash seed trays and perches separately from other components to ensure all crevices are cleaned.
What signs indicate I should replace a feeder?
Cracks, mold that won’t budge, or components that no longer latch securely require replacement to protect birds.
Are there natural disinfectants safe for birds?
Only use products labeled as non-toxic and specifically designed for bird feeders; avoid homemade alternatives unless proven safe.
Buying Guide
Choosing the right feeder cleaning setup helps keep birds healthy and maintenance straightforward. Consider size and access: larger feeders may require longer brushes or stiff-bristle kits to reach interior areas. Noise level and energy efficiency are less relevant for cleaning tools but consider how easy and quiet the cleaning process is in a home setting. Look for non-toxic cleaners with clear directions and compatibility with your feeder materials (plastic, metal, or glass). Controls refer to the simplicity of using spray bottles, brushes, and drying racks. For placement, keep cleaning supplies away from heat sources and wildlife habitats, and store tools in a dedicated cleaning station to minimize cross-contamination.
Leave a Reply