How to Get Rid of Water Stains on Walls
Water stains on interior walls can be unsightly and confusing to fix. With the right steps and basic supplies, stains can be removed or concealed while preventing future issues. This guide covers practical methods for common interior walls, including drywall, plaster, and painted surfaces.
Below is a practical, step-by-step approach that emphasizes safety, proper preparation, and durable results. The focus is on restoring a clean, uniform look without compromising wall integrity or indoor air quality.
Quick Answer
Identify the stain type (fresh water stains may indicate ongoing moisture). Treat with stain-blocking primer to seal the substrate. If the wall is damaged, use a drywall repair kit to fix holes or cracks. For surface grime, use a melamine foam sponge wall stain remover before priming. Finish with touch-up paint for a seamless look.
What You’ll Need
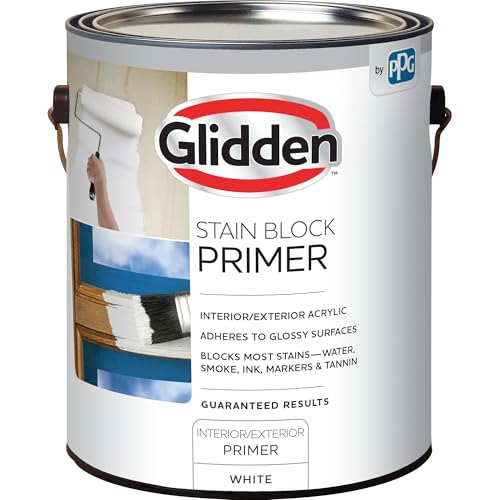
- Water stain blocking primer interior walls 1 gallon
- Drywall repair kit with spackle compound and putty knife
- Melamine foam sponge wall stain remover
- Sandpaper (fine grit)
- Paint and brushes or rollers matching the wall color
- Painter’s tape and drop cloths


Before You Start
Assess the stain and moisture source. If a ceiling or wall leaks, address the leak first to prevent recurrence. Remove loose paint around the stain with a putty knife. Wear a dust mask when sanding to avoid inhaling fine particles. If the stain has turned into a raised, damp patch, allow the area to dry completely before continuing. Avoid sealing fresh moisture with cheap paints, which can trap moisture behind the surface.
Step-By-Step: How To Remove Water Stains On Walls
- Protect the area with a drop cloth and seal adjacent surfaces with painter’s tape.
- Gently wipe the stain with a melamine foam sponge to remove surface grime without roughening the paint.
- Allow the area to dry completely, then lightly sand the stained region to create a smooth working surface.
- Apply the water stain blocking primer interior walls over the stained area. Use multiple thin coats if needed to fully seal the stain.
- Inspect for any remaining discoloration. If necessary, apply a second coat of primer and let it dry fully.
- Repair any wall damage with the drywall repair kit with spackle compound and putty knife, filling holes or gouges and smoothing the surface.
- Sand the patched areas until flush with the wall, then wipe away dust.
- Paint the repaired and primed area with matching interior paint. Feather the edges to blend with surrounding walls.
- Remove tape, re-check for uniform color, and touch up as needed for a seamless finish.
- Allow the paint to cure fully before moving furniture back or exposing the area to humidity.
Troubleshooting
| Symptom | Likely Cause | Fix | Prevention |
|---|---|---|---|
| Stain reappears after painting | Moisture source not addressed | Identify and fix leak; re-prime and repaint | Repair moisture issue first, then seal |
| Paint edges peel after repair | Improper surface prep | Re-sand, clean, and re-prime before painting | Clean surface, dry thoroughly |
| Discolored patch persists after primer | Primer not fully sealing stain | Apply additional coat of stain-blocking primer | Use high-quality stain blocker |
| Wall feels damp to touch | Residual moisture in wall | Air out area, use dehumidifier, and recheck for leaks | Fix moisture source quickly |
Common Mistakes
- Skipping moisture diagnosis and sealing; stains return after painting
- Using low-quality primers that don’t block tannins or water stains
- Rolling paint over damp patches without adequate drying time
- Failing to patch wall damage before priming, which shows through the finish
Tips For Best Results
- Test the stain on a small, inconspicuous area before full treatment.
- Apply primer in thin, even coats and let each coat dry fully for best sealing.
- Use a high-adhesion primer for glossy surfaces or patched areas to improve bond strength.
- Match the final paint sheen to the existing wall for a natural look.
- Maintain consistent humidity levels during drying to reduce surface imperfections.
Call A Professional
Consider contacting a pro if:
- The stain recurs after repeated sealing efforts, suggesting ongoing moisture intrusion.
- There is extensive water damage, mold growth, or structural concerns.
- Doors and windows or roofing leaks require repair and safety concerns arise.
FAQ
What is the first step to remove water stains on walls?
First, identify and fix the moisture source, then wash the surface and proceed with stain-blocking primer.
Can I use regular primer instead of a stain-blocking primer?
Regular primer may not fully seal the stain; use a dedicated water-stain blocking primer for best results.
Do I need to sand before priming?
Light sanding helps create a smooth surface and improves primer adhesion.
How long should primer dry before painting?
Follow the product label, but typically 2–4 hours for standard primers; longer in humid conditions.
Is it necessary to patch holes before priming?
Yes, patching holes ensures a uniform surface and better paint adhesion.
What if the stain spreads beyond the tested area?
Prime and paint a larger surrounding area to achieve uniform color and coverage.
Should I repaint walls after treatment?
Yes. Repainting with matching interior paint restores a seamless appearance after sealing the stain.
Buying Guide
When selecting products for removing water stains on walls, consider size, performance, and compatibility with your wall type. A 1 gallon water stain blocking primer interior walls offers enough coverage for typical rooms and can be used on multiple surfaces if needed. Look for water-based primers to minimize odors and cleanup. A reliable drywall repair kit with spackle compound and putty knife helps address any surface damage before priming. For grime on textured or glossy surfaces, a melamine foam sponge wall stain remover provides a gentle but effective clean. Choose tools that match your wall material (drywall, plaster, or painted surfaces) and the level of staining you face. Consider energy-efficient or low-VOC primers if indoor air quality is a concern. Evaluate the room layout to plan best access and drying times, and ensure you have adequate ventilation during the project. Finally, verify that the color of the final paint matches the surrounding walls for a cohesive look.
Leave a Reply