How to Clean Vomit From Leather Car Seat
Accidents happen, but quick, proper cleaning preserves the look and longevity of leather car seats. This guide walks through a practical, step-by-step approach using common leather care tools and enzyme cleaners designed for car interiors. The goal is to remove odor and residue without damaging the leather or dye.
By following the steps below, drivers can restore their vehicle’s interior with confidence. The process emphasizes blotting, gentle cleaning, and conditioning to keep leather supple and protective coatings intact.
Quick Answer
Blot up excess liquid, rinse with a clean cloth, apply an enzyme-based leather upholstery cleaner spray, gently wipe with microfiber, then condition and dry. For persistent odor, repeat with a leather-safe deodorizer. Always test a hidden area first.
What You’ll Need
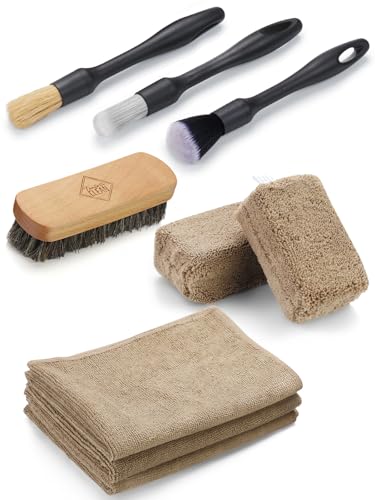
- Leather car seat cleaning kit with brush and microfiber cloths
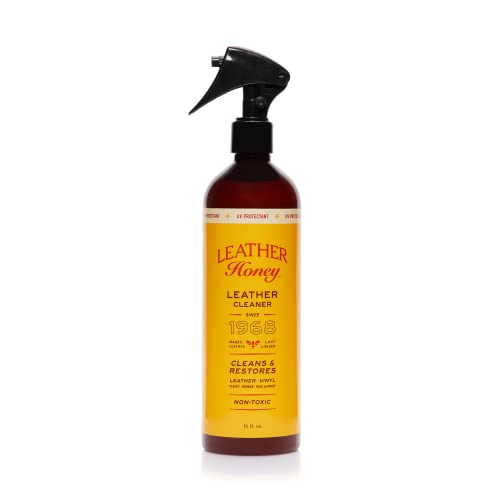
- Enzyme-based leather upholstery cleaner spray for car seats
- Microfiber cleaning cloths for leather car seats and conditioner combo kit
- Optional: leather conditioner and odor neutralizer designed for automotive interiors

Before You Start
Work in a well-ventilated area to minimize odor spread. Begin with the least aggressive method and escalate only as needed. Always test cleaners on a small, inconspicuous area of the seat to verify colorfastness and finish integrity. Time estimates vary, but plan for 20–45 minutes per seat, plus drying time. If the odor lingers after cleaning, consider a professional detail to prevent long-term staining or dye damage.
Step-By-Step: How To Clean Vomit From Leather Car Seat
- Contain the spill: Open doors to vent the cabin and protect surrounding upholstery. Use disposable towels to blot the area gently, absorbing as much liquid as possible without rubbing it deeper into the leather.
- Remove solids: If solids are present, carefully lift them with a plastic tool or tissue. Avoid pressing into the leather surface to prevent embedding debris.
- Rinse lightly: Dampen a clean microfiber cloth with distilled water and blot the area to dilute residues. Do not saturate the leather, which can cause water damage or dye migration.
- Apply enzyme cleaner: Spray a light, even layer of enzyme-based leather upholstery cleaner onto a microfiber cloth rather than directly on the seat. Gently wipe the affected area following the grain of the leather.
- Agitate softly: Use the brush from your cleaning kit to lift residual proteins from the surface. Work in small circular motions, then wipe away any loosened material with a clean microfiber cloth.
- Rinse and blot again: Lightly dampen another microfiber cloth with water and remove cleaner residue. Blot until the cloth comes away mostly dry.
- Condition the leather: Apply a leather conditioner to a clean microfiber cloth and rub into the surface, covering a slightly larger area than the stain. Conditioning helps maintain suppleness and protects against future spills.
- Dry completely: Allow air to circulate and avoid direct sun or heat that could dry or crack the leather. If needed, use a fan to speed drying without focusing intense heat on one spot.
- Check for odor: If any lingering odor remains, apply a leather-safe deodorizer or odor-neutralizing spray designed for automotive interiors, following product directions.
- Final inspection: Re-examine the seat for any staining or color changes. Repeat cleaning and conditioning on stubborn spots if necessary, using a lighter touch to avoid over-wetting.
- Document maintenance: Note the stain location and the products used for future reference. Regular conditioning helps prevent future issues from spills.
Troubleshooting
| Symptom | Likely Cause | Fix | Prevention |
|---|---|---|---|
| Persistent odor after cleaning | Protein-based odor not fully removed | Reapply enzyme cleaner and deodorizer; run a second conditioning step | Address spills promptly; ventilate vehicle |
| Leather tackiness after cleaning | Excess cleaner or moisture | Wipe with a dry microfiber and apply light conditioner | Use minimal cleaner; avoid over-wetting |
| Color fading or blotching | Cleaner contact with dye or improper test | Rinse with distilled water and condition; test future products first | Test in hidden area; choose automotive-grade cleaners |
| Surface stiffness after drying | Insufficient conditioning | Apply conditioner evenly and allow it to absorb fully | Condition after cleaning even small stains |
Common Mistakes
- Using harsh household cleaners not formulated for leather can cause dye loss.
- Over-wetting the seat can lead to water damage or mold growth.
- Scrubbing aggressively can scratch or abrade the leather surface.
- Skipping conditioning after cleaning leaves leather prone to cracking.
Taking a careful, stepwise approach minimizes risk and improves results over time.
Tips For Best Results
- Test any cleaner on a hidden area before full application to confirm compatibility with leather and colorfastness.
- Use enzyme-based cleaners designed for animal proteins; they break down organic residues effectively without harsh solvents.
- Keep a small supply of microfiber cloths and brushes dedicated to interior cleaning to avoid cross-contamination with other surfaces.
- After cleaning, always condition to restore natural oils and preserve the seat’s protective finish.
- Consider keeping a portable stain kit in the car for quick responses to spills.
Call A Professional
Seek professional help if stains are deeply set, if leather has significant drying, cracking, or dye transfer, or if odor persists after multiple cleanings. Do not attempt aggressive sanding or dye removal; these actions can irreversibly damage the seat.
FAQ
Can I use household vinegar to clean vomit from leather car seats?
Vinegar is not ideal for leather interiors and can affect color; use enzyme-based cleaners or leather-specific products instead.
Is it safe to use a steam cleaner on leather car seats?
Steam can force moisture into seams and cause damage. Use only cleaners designed for leather and follow product directions.
How long does it take for a leather seat to dry after cleaning?
Drying times vary; plan 1–6 hours depending on humidity and airflow. Avoid direct heat sources during drying.
Will cleaning remove permanent stains?
Some stains may be permanent. Early intervention with appropriate cleaners increases the chance of removal.
Should I recondition after every spill?
Yes, conditioning after cleaning helps restore gloss and protection. Reapply as needed based on the leather’s condition.
What maintenance schedule helps prevent future stains?
Regular cleaning and conditioning every 3–6 months helps maintain leather integrity and eases future stain removal.
Buying Guide
Choosing the right products for cleaning vomit from leather car seats involves balancing cleaning power, leather safety, and ongoing protection. Consider size and ease of use, noise level of any spray components, energy efficiency of powered tools (where applicable), and the control offered by spray patterns and brush textures. When comparing options, look for enzyme-based cleaners that specify automotive leather compatibility, as well as conditioner and deodorizer formulations designed for cars. Placement considerations include interior space, the likelihood of future spills, and storage space for cleaning kits. A well-rounded kit with a dedicated brush, microfiber cloths, and compatible leather conditioner provides a practical, ready-to-use solution for many in-car messes.
Leave a Reply