How to Clean Heels: A Practical Guide for Clean, Polished Footwear
Heels add style and height, but they also attract dirt, scuffs, and grime. This guide provides practical, step-by-step methods to clean various heel materials, from patent leather to suede, using common household supplies and targeted cleaning kits. The aim is to restore shine, preserve material integrity, and extend the life of dress heels for everyday wear or special occasions.
Quick Answer
Identify the heel material (patent leather, suede, or smooth leather). Use the appropriate cleaner and cloth, brush, or spray, then allow to air dry. For stubborn stains, repeat with a gentle touch and finish with a protective polish or spray. Always test a small area first and avoid saturating delicate fabrics.
What You’ll Need
- Patent leather shoe cleaner kit with microfiber cloth and brush
- Suede nubuck shoe cleaning brush kit
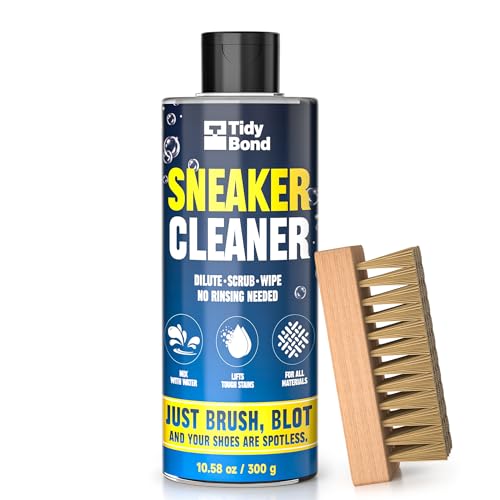
- Leather shoe cleaner spray with microfiber cloth set
- Soft microfiber cloths for drying and buffing
- Water in a spray bottle, mild soap (optional)


Before You Start
Prepare a clean, well-lit workspace. Test any cleaner on a small, inconspicuous area of the heel to avoid discoloration. For suede and nubuck, avoid water saturation; use brush-based cleaning. Caution not to use harsh chemicals on delicate finishes. Allow heels to dry completely before wearing.
Estimated time: 15–30 minutes per cleaning session depending on material and stain severity. If heels are heavily scuffed or cracked, consider professional refurbishment rather than DIY cleaning.
Step-By-Step: How To Clean Heels
- Identify the material: patent leather, suede/nubuck, or smooth leather. Different materials require distinct cleaners and methods.
- For patent leather, remove surface dust with a microfiber cloth. Apply a small amount of patent leather cleaner to the cloth and wipe in gentle circular motions to revive shine.
- For suede or nubuck, use the suede nubuck shoe cleaning brush kit to lift dirt. Gently brush in one direction to raise nap and dislodge soil. Avoid using water on untreated suede.
- For smooth leather, spray the leather shoe cleaner spray with microfiber cloth set onto a cloth (not directly onto the shoe) and wipe the surface evenly. This helps remove oil and dirt without oversaturating the material.
- Target stains: for leather, use a tiny amount of cleaner on a cloth and dab the stained area. For suede, apply a suede eraser or a light brush after drying to restore texture.
- Buff the heel with a dry microfiber cloth to enhance shine or restore the nap. For patent leather, a second pass with a clean cloth helps remove any streaks.
- Dry completely away from direct heat or sunlight. If needed, apply a protector spray suitable for the material after cleaning to reduce future staining.
- Inspect the heel edge and cap. If the heel tip is worn, consider replacement or repair to prevent damage during walking.
- Store cleaned heels in a cool, dry place. Use shoe trees or tissue to maintain shape and prevent creasing.
- Repeat maintenance every few wears to keep heels looking polished and prolong their lifespan.
- For persistent issues (sticky residue, dye transfer, deep scuffs), seek professional care rather than risking further damage.
Troubleshooting
| Symptom | Likely Cause | Fix | Prevention |
|---|---|---|---|
| Streaks on patent leather | Excess cleaner or oily residue | Buff with a clean microfiber cloth until shine returns | Use small amounts of cleaner and test first |
| Stubborn scuffs on patent or leather | Deep surface marks | Reapply cleaner and gently buff; for leather, condition after cleaning | Avoid abrasive tools |
| Faded colors on suede | Over-wetting or harsh cleaners | Turn to dry brushing and nap restoration with suede brush | Use minimal moisture and dedicated suede products |
| White residue after cleaning | Mineral deposits from water or cleaners | Wipe with a damp cloth, then dry thoroughly | Rinse with clean cloth and avoid over-wetting |
| Cracked or peeling finish | Age or improper products | Professional refinishing rather than DIY attempts | Use material-appropriate products and test beforehand |
Common Mistakes
- Using water-heavy methods on suede or nubuck—this damages texture and color.
- Over-saturating leather, causing stiffness or long drying times.
- Using household cleaners not designed for specific materials, leading to dullness or discoloration.
- Skipping a test patch on an inconspicuous area before full cleaning.
Tips For Best Results
- Brush suede and nubuck before any cleaning to lift the nap and reduce stain transfer.
- Work in small sections to maintain uniform appearance across the heel.
- Always finish with a protective product suited to the material—patent, leather, or suede.
- Consider a two-step process for heavily stained heels: dry cleaning first, then a targeted finish.
- Store heels upright and away from humidity to prevent warping or material degradation.
Call A Professional
Stop signs that warrant expert care: deep gouges or cracks in the heel, dye migration that alters color unevenly, or a loose heel cap that could detach during wear. If the shoe’s construction feels compromised, or if the heel needs structural repair, consult a professional cobbler to avoid further damage.
FAQ
Can I use household soap to clean heels?
It is best to use cleaners formulated for the specific material to avoid damage or dulling.
Is it safe to use water on suede?
Water can damage suede; use dry brushing and dedicated suede products instead.
How often should I clean heels?
Light cleaning after every few wears helps maintain appearance; tackle stubborn stains as they appear.
Should I condition leather after cleaning?
Yes, conditioning restores moisture and maintains flexibility after cleaning.
Buying Guide
Choosing the right cleaning approach for heels hinges on material, intensity of wear, and storage. Consider the following factors to select effective products and protect investments:
- Material compatibility: patent leather, smooth leather, and suede each require distinct cleaners or brushes. Use the specific product designed for the material.
- Size and coverage: kits with multiple brushes and microfiber cloths offer greater control for small architectural features like heel caps and seams.
- Noise level and ease of use: spray cleaners and brush kits should be straightforward, with gentle bristles for delicate finishes.
- Energy efficiency: not a key factor for cleaning gear; focus on effectiveness and durability instead.
- Controls and safety: look for non-abrasive cleansers, non-scratch brushes, and clear usage instructions to prevent accidental damage.
- Placement and storage: keep cleaners upright in a cool, dry area away from direct sunlight to maintain product integrity.
- Brand compatibility: any of the listed product keywords are suitable for common heel materials; match to your shoes’ material for best results.
Want a balanced setup? A patent leather cleaner kit, a suede nubuck brush kit, and a leather cleaner spray with microfiber cloth can cover most common heel materials. If you frequently switch between materials, consider buying bundles that clearly label compatibility to simplify maintenance. Do you clean heels seasonally or after every wear? A routine that fits your lifestyle keeps heels looking sharp and extends their lifespan.
Leave a Reply