How to Get Rid of Small Bubbles on a Screen Protector
Applying a screen protector without bubbles is a common DIY task for many smartphone owners. This guide outlines practical steps, using common tools, to achieve a smooth, clear screen. By following a careful process, users can restore a flawless look and maintain touch sensitivity.
The following sections break down the approach into quick answers, required gear, practical steps, and troubleshooting to help users resolve bubble issues efficiently.
Quick Answer
Gently re-wipe the surface with a microfiber cloth, re-lubricate with the squeegee, and re-seat the protector from edge to edge. If bubbles persist, use the bubble remover tool to push them toward the edge, then smooth with the included kit tools. Small, stubborn bubbles often vanish after a few hours as the adhesive settles.
What You’ll Need
- Phone screen protector installation kit with squeegee and microfiber cloth
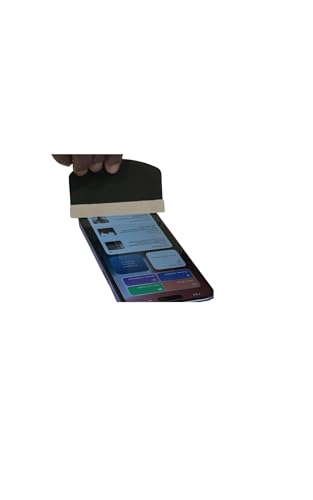
- Screen protector bubble remover tool
- Tempered glass screen protector installation tool kit


Before You Start
Prepare a clean, dust-free workspace. Wash your hands and wipe the phone screen with a microfiber cloth to remove oils. If you’ve dropped the device or touched the adhesive area, re-clean and re-sanitize before reapplying. Time estimates vary from 10 to 30 minutes depending on device model and experience. Important cautions include avoiding lint, keeping the protective film aligned, and not applying excessive force that could crack the screen or misalign the protector.
Step-By-Step: How To Get Rid Of Small Bubbles On A Screen Protector
- Power off the phone and dry the screen completely to prevent moisture from interfering with adhesive.
- Use the installation kit’s cleaning cloth to wipe the screen until it is free of dust and fingerprints.
- Peel back a small portion of the protector’s edge to begin alignment, ensuring the cutouts line up with the phone’s sensors and camera.
- Gently place the protector onto the screen and press from the center outward to start the adhesive.
- Employ the squeegee to push any small air pockets toward the edges, applying steady, even pressure.
- For stubborn bubbles near the edges, use the bubble remover tool to guide them to the perimeter, then re-squeegee.
- If dirt or dust appears during application, lift the protector slightly from the edge closest to the particle, re-clean, and reseat.
- Recheck the screen for any remaining bubbles. If present, repeat the edge-push and center-out technique until the surface looks uniform.
- Let the adhesive cure for the recommended time, typically a few minutes, before using the device to ensure firmness.
- Re-dust the surface with a clean microfiber cloth and inspect under good lighting for clarity and touch responsiveness.
- Store or reuse any protective film over non-contact areas to prevent new bubbles during final adjustments.
Troubleshooting
| Symptom | Likely Cause | Fix | Prevention |
|---|---|---|---|
| Bubble near the center | Dust particle trapped under adhesive | Lift edge closest to bubble, remove dust with microfiber, reapply | Workspace is clean; use dust remover sheets |
| Edge bubbles | Air trapped at edge during seating | Push toward edge with squeegee or bubble remover tool | Maintain consistent pressure and slow movements |
| Adhesive not sticking | Screen or protector contaminated | Re-clean screen, re-align protector | Limit handling after initial cleaning |
| Peeling corners | Poor alignment or pressure | Re-seat from center outward, re-press corners | Follow alignment guides precisely |
| Persistent micro-bubbles | Overly thick adhesive layer | Apply gentle pressure; if unresolved, replace protector | Use the correct kit for your model |
Common Mistakes
- Rushing the alignment and not lining up cutouts before seating
- Touching the adhesive surface with fingers, transferring oils
- Applying excessive force, which can crack tempered glass materials
- Using a dirty towel or cloth that leaves fibers on the screen
Careful, patient steps reduce the chance of new bubbles forming and ensure a clean look around the edges.
Tips For Best Results
- Work in a dust-free room and avoid fans or open windows during installation.
- Warm the tool slightly if the kit allows it; a warm edge can improve flexibility of the protector.
- Slow, deliberate movements beat quick swipes for bubble management.
- Keep the screen hydrated with a light mist if your kit includes a damp cloth designed for residue removal.
- Practice on a dummy screen or an old device to refine technique before applying to a new phone.
Call A Professional
Seek professional help if bubbles persist after multiple attempts or if the screen has scratches, cracks, or curvature that complicates installation. If the device is under warranty and the screen has protective considerations, contact the manufacturer or authorized service provider before attempting a DIY replacement. Stop attempts if you notice Adhesive residue spreading or screen distortion beyond practical repair.
FAQ
Will bubbles disappear on their own after installation?
Many small bubbles wwwill dissipate within 24 hours as the adhesive cures and settles with regular use.
Can I reuse a screen protector if I remove it?
Most protectors are designed for one-time use; reusing can lead to adhesion failure and more bubbles.
What if I can’t remove dust under the protector?
Use a microfiber cloth and dust removal tool to lift the protector slightly, clean the screen, and reseat carefully.
Is tempered glass harder to install than film protectors?
Tempered glass often requires precise alignment, but the included installation tools help achieve a secure, bubble-free result.
Should I apply bubbles with the device turned off or on?
Turn off the device to avoid accidental touches and to see alignment clearly during the process.
Can I apply a new protector over an old one?
It is not recommended; old residues can trap bubbles and reduce touch clarity.
What should I do if the protector won’t lay flat?
Re-clean the screen, ensure the protector is the correct model, and reseat gradually from the center outward.
Buying Guide
When choosing a screen protector and installation kit, consider size compatibility, protection level, and ease of use. Look for kits that include a squeegee, microfiber cloth, and a bubble remover tool to simplify the process. Options with tempered glass provide strong protection, but ensure precise cutouts for sensors and camera lenses. Prioritize anti-fingerprint coatings and touch responsiveness for everyday use. For busy households, a kit with clear, durable instructions reduces the risk of bubbles and misalignment. Think about the device’s size and screen curvature to select a compatible installation toolkit and protector type.
Leave a Reply