How to Get Rid of Scratches on Wood Tables
Wood tables can show wear over time, but most surface scratches are repairable with household tools and a few specialty products. This guide walks American readers through a practical, step-by-step process to minimize or conceal scratches, restore color and luster, and prevent future damage.
Quick Answer
- Assess the scratch type: superficial surface scratches respond to polish and wax; deeper gouges may need filler.
- Use the right products in the right order: clean, fill, tint, and finish.
- Test on a hidden spot first to avoid altering the whole table.
What You’ll Need
- wood furniture scratch repair kit with wax sticks and filler
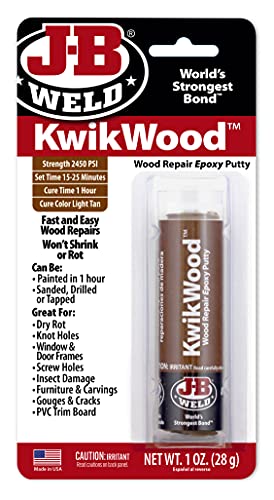
- water-based wood filler for furniture repair 1 oz
- furniture touch-up marker for wood scratches on tables

Before You Start
Prepare a clean, well-lit workspace and protect surrounding surfaces with a drop cloth. Use caution around unfinished wood and glues. Test each product on a hidden area to ensure color compatibility with your table finish. Dry or damp conditions can affect filler adhesion, so aim for a stable, dry environment. A typical repair session lasts 30–90 minutes depending on scratch depth and finish complexity.
Important safety notes: read product labels, wear protective gloves if recommended, and ventilate the room when using solvent-based components even if you start with water-based options. Lightly sand only if the manufacturer permits, and never oversand the finish beyond the scratch area.
Step-By-Step: How To Repair Scratches On Wood Tables
- Wipe the surface with a soft cloth and a mild cleaner to remove dust, oils, and residues. Let dry completely.
- Evaluate scratch depth: surface scuffs respond to wax or markers, while deeper scratches may require filler.
- For light scratches, apply furniture touch-up marker for wood scratches on tables to blend color with the surrounding finish. Wipe away excess and let dry as directed.
- If the scratch is deeper or has gouges, use the water-based wood filler for furniture repair 1 oz. Use a small spatula to press the filler into the scratch, then smooth the surface level with the surrounding wood. Remove any excess and let it cure per the product’s instructions.
- For color matching and additional depth, work in stages using the wood furniture scratch repair kit with wax sticks and filler. Choose a wax shade that closely matches the table’s finish, melt it with the provided tool, and press it into the scratch. Build up gradually for a flush surface.
- After filling, gently sand the area with a fine-grit paper if permitted by the kit instructions. Wipe away dust with a tack cloth, then apply a final coat of clear finishing product or wax to seal the repair.
- buff the repaired area with a soft cloth in circular motions to restore sheen. Compare against the surrounding finish for uniformity, and repeat steps as needed for alignment.
- Consider a glazing technique or thin layer of matching stain if the repair looks lighter or darker than the surrounding wood. Reassess after it dries before applying a final sealant.
- For ongoing protection, use coasters, placemats, and avoid placing hot or blunt objects directly on the table. Regular dusting and periodic polishing help maintain a uniform appearance.
- If multiple scratches exist or the finish is severely damaged, consult a professional refinish option or an experienced woodworker for a matched repair.
Troubleshooting
| Symptom | Likely Cause | Fix | Prevention |
|---|---|---|---|
| Scratch remains visible after repair | Color mismatch or filler not fully blended | Reapply filler, adjust color with marker, or add thin glaze | Test color on hidden area; sand slightly for better blend |
| Patch feels rough to the touch | Excess filler or wax not smoothed | Lightly sand with fine grit; buff with soft cloth | Sweep and wipe between steps; avoid overfilling |
| Finish dulls after repair | Inadequate sealing or wrong product mix | Apply recommended sealant or topcoat; follow cure times | Use compatible products; follow manufacturer directions |
| New scratches appear quickly | Preventive care不足 | Apply surface protectors; avoid abrasive cleaners | Routine care and gentle cleaning only |
Common Mistakes
- Using a filler that’s too thick or a color that doesn’t match the wood tone
- Over-sanding beyond the scratch area, damaging the surrounding finish
- Skipping curing times or sealing steps, leading to patchy results
- Ignoring manufacturer instructions or using incompatible products
Tips For Best Results
- Always test color on a hidden area before full application.
- Work in a well-lit space to ensure color and texture match.
- Choose products specifically designed for wood furniture and avoid household fillers unless approved.
- When repainting, consider a light protective topcoat to prevent future scratches.
Call A Professional
Consider calling a professional if the table has extensive damage, a delicate veneer, or a custom finish that requires precise color matching. Stop-and-go repairs can worsen the appearance if not executed correctly. Seek pro help especially for antique or high-value pieces, or if you are unsure about sanding or refinishing steps.
FAQ
Can I fix scratches on wood tables without refinishing?
Yes, many surface scratches can be repaired with wax, fillers, and touch-up markers without full refinishing.
Will filler change the wood color?
Some fillers tint to match the wood, but color matching is essential for best results.
Is water-based filler safe for all finishes?
Most water-based fillers are safe for many finishes, but check the label for compatibility with your table’s sealant.
How long does the repair last?
Durability varies by product and usage; with proper sealing and care, repairs can last months to years depending on wear.
Should I sand after applying a filler?
Only if the product instructions permit; use the finest grit and a light touch to avoid removing surrounding finish.
What if I don’t have a scratch repair kit?
Try a color-matching marker or crayon designed for wood; for deeper scratches, seek professional guidance.
Is refinishing necessary for deep scratches?
Deep gouges often require filler plus staining and sealing; a spot repair might suffice, but extensive damage may need refinishing.
Buying Guide
When choosing products to repair scratch marks on a wood table, consider size, finish, and compatibility. A combined kit that includes wax sticks and filler provides color-matching flexibility for light to moderate scratches. A small amount of water-based filler is useful for filling deeper grooves without strong fumes. The furniture touch-up marker offers quick color adjustments for minor scuffs. Consider the following factors to select the right approach for your table:
- Size and depth of scratches: Light surface scuffs are often addressed with markers and wax; deeper gouges may require filler.
- Finish compatibility: Ensure the product is compatible with your table’s stain and sealant to avoid blotches.
- Color matching: Choose a shade that closely matches the surrounding wood; some kits offer multiple color options.
- Ease of use: Beginners benefit from ready-to-use kits with clear instructions and tools.
- Drying and curing times: Shorter times speed up the repair but may require more steps for a perfect blend.
- Placement and usage environment: Indoor use, dust-free zones, and stable temperatures support better results.
- Maintenance after repair: Plan for regular cleaning and protective measures to minimize future scratches.
Questions to ask yourself: Do you prefer a quick cosmetic fix, or a durable, color-matched repair? Is veneer damage present, or is the table solid wood? By answering these, you can select the right combination of products and plan a repair workflow that fits your schedule.
Leave a Reply