How to Get Rid of Scratches on Dashboard
The dashboard is a focal point inside any vehicle, and fine scratches can diminish its appearance. This guide explains practical, step-by-step ways to reduce or remove surface scratches using commonly available vinyl and plastic repair products. It covers safe preparation, product choices, and maintenance tips to keep the dashboard looking fresh without harming its finish.
Quick Answer
For shallow scratches, start with a vinyl dashboard scratch remover kit or a vinyl dashboard repair compound polish kit, using a microfiber cloth to apply and buff. For deeper marks, a repair compound followed by a protective polish can improve appearance. Always test in an inconspicuous area first and follow product instructions closely.
What You’ll Need
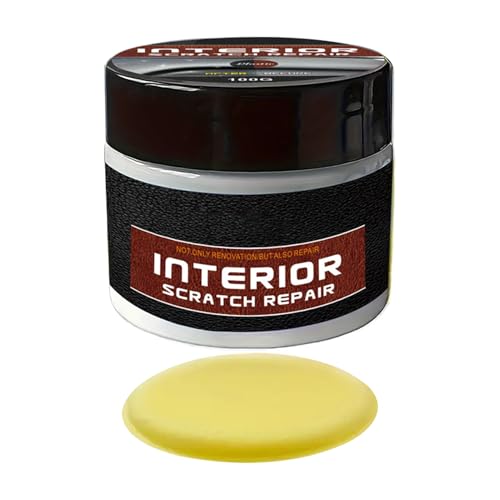
- Car dashboard scratch remover kit vinyl plastic
- Vinyl dashboard repair compound polish kit
- Microfiber polishing cloth set for car interior dashboard


Before You Start
Make sure the surface is cool to the touch and out of direct sun. Clean the area with a gentle cleaner to remove dust and oils, then dry completely. For safety, wear gloves if recommended by the product manufacturer and ventilate the vehicle interior during application. Time estimates vary: plan about 15–45 minutes for a single area, plus curing time if the product requires it. Do not apply heavy fillers to textured patterns without testing; some products can leave a tint or sheen that doesn’t match.
Step-By-Step: How To Remove Scratches From A Dashboard
- Prepare the surface: Wipe the area with a clean microfiber cloth to remove loose debris and dust.
- Choose a product: Select a vinyl dashboard scratch remover kit or a vinyl dashboard repair compound polish kit based on scratch depth and finish.
- Apply a thin layer: Use the applicator included with the kit or a soft cloth to apply a small amount of product over the scratch. Work in the direction of the grain.
- Buff gently: With a clean microfiber cloth, buff the area in small circular motions until the product begins to blend with the surrounding surface.
- Assess coverage: Wipe away any excess product and inspect the area under good lighting. If the scratch remains visible, repeat the application in thin coats.
- Optional sealing: If the kit includes a protective sealant or polish, apply according to instructions to guard against future scratches and UV damage.
- Dry and cure: Allow the area to dry as directed by the product manufacturer. Avoid touching the surface prematurely to prevent smudging.
- Final polish: Use a microfiber cloth to gently buff the area to a uniform sheen that matches the surrounding dashboard.
- Maintenance plan: Regularly dust with a microfiber cloth and reapply protective polish every few months to reduce new scratches from daily use.
- Edge cases: For deep gouges, consider repeating steps with a slightly more robust repair compound, but avoid overfilling which can alter texture or color.
- Test future products: When trying a new restoration product, test on a small, hidden area first to verify color and texture match.
Troubleshooting
| Symptom | Likely Cause | Fix | Prevention |
|---|---|---|---|
| Scratch remains visible after treatment | Depth exceeds surface layer repair | Repeat with a second light coat or consider professional repair | Choose appropriate product for depth; test in a hidden area |
| Discoloration or tint appears | Product color mismatch or over-application | Wipe clean, use correct shade and thin coats | Always test and follow color guidance on the label |
| Sticky residue | Over-application or incompatible combo | Remove with clean cloth and mild cleaner, reapply sparingly | Apply sparingly in thin layers |
| Finish looks dull after polishing | Insufficient buffing or no sealant | Lightly buff and apply protective sealant if available | Use a dedicated dashboard polish |
Common Mistakes
- Applying too much product at once, which can smear or leave residue.
- Using abrasive cleaners that damage vinyl and plastic textures.
- Overlooking test spots, leading to color mismatch on visible areas.
- Skipping protective sealants after repair, increasing future wear.
Tips For Best Results
- Always work in a shaded area with the dashboard cool to the touch to avoid rapid drying.
- Use a high-quality microfiber cloth for application and buffing to minimize lint and scratches.
- Follow a consistent, light touch rather than pressing hard; patience yields better color match.
- Store repair products in a cool, dry place to preserve their efficacy and shelf life.
Call A Professional
Consider professional help if scratch depth is extensive, if the color is severely mismatched, or if a DIY repair does not produce a satisfactory result after multiple attempts. Seek a pro when the dashboard has delicate textures or embedded patterns that require specialized tools and exact color matching.
FAQ
Can I remove scratches from any dashboard material?
Most vinyl and hard plastic dashboards respond to repair compounds, but deeply textured or coated surfaces may require different products or professional restoration.
Will repairing scratches affect the dashboard’s warranty?
Some automotive warranties limit home repairs on interior finishes; check your policy before applying products that could be deemed alterations.
How long does a dashboard scratch repair typically take?
Most quick fixes take 15–45 minutes per area, plus drying time as directed by the product.
Are there eco-friendly dashboard repair options?
Yes, many vendors offer low-VOC formulas and water-based compounds that are gentler on interiors and the environment.
Should I use a color-m Corrector product?
Color matching is important; use products labeled for your dashboard color and test on a hidden spot first.
Is there a permanent solution for deep gouges?
Deep gouges often require professional repair or replacement of the affected panel rather than DIY methods.
Buying Guide
When selecting a kit or products to restore dashboard scratches, consider several factors to ensure lasting results and ease of use. The primary goals are color match, durability, and ease of application. How do you choose the right kit for your dash?
- Size and coverage: Look for kits that cover the typical scratch size on your dash. Larger surfaces may benefit from a multi-pack or refill options.
- Finish compatibility: Ensure the product is designed for vinyl and hard plastic dashboards and matches the existing texture and sheen.
- Application ease: Tools like foam applicators and included cloths simplify process and reduce risk of marring during work.
- Durability: Choose formulations with UV protectants and sealants to resist sun exposure in a vehicle.
- odor and safety: Low-odor, low-VOC options are preferable for enclosed spaces and vehicles used by families.
- Maintenance: Consider a follow-up polish or sealant to maintain the repair and prevent future scratches.
- Brand compatibility: Some dashboard materials respond better to certain brands; verify compatibility in product guides or reviews.
Is the dashboard finish matte or glossy? Match your choice to the existing finish for a seamless look. If unsure, start small with a test area before committing to a full repair. With the right kit and careful application, most shallow to mid-depth scratches can be visibly improved, restoring a cleaner, more uniform interior appearance.
Leave a Reply