How to Remove Oil Stains From Painted Walls
Oil stains on interior walls can be stubborn, especially on painted surfaces. With the right approach and the right products, you can restore a clean, uniform look without damaging the finish. This guide walks through safe, practical steps using common tools and a few targeted cleaners.
Quick Answer
Start with a gentle degreaser and a microfiber sponge, then rinse with clean water. For tougher stains, apply a dedicated grease stain remover spray for painted walls or oil stain remover for interior walls degreaser. Always test a hidden area first and avoid abrasive scrubbing that could dull the paint.
What You’ll Need
- Grease stain remover spray for painted walls
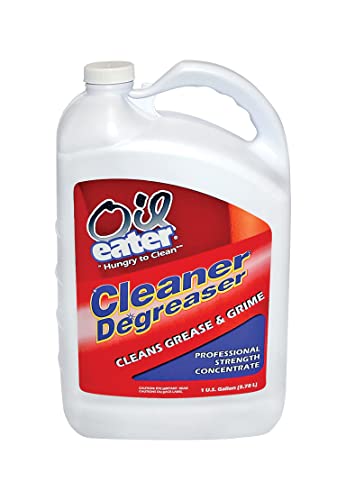
- Oil stain remover for interior walls degreaser
- Wall cleaning kit microfiber sponge oil stain remover
- Soft cloths or towels
- Water in a spray bottle or damp sponge
- Optional: mild dish soap (for initial spot treatment)


Before You Start
Assess the wall finish: matte paints are more prone to showing watermarks, while glossy finishes resist moisture better. Move furniture away from the wall and protect the floor with a drop cloth. Test any cleaner in an inconspicuous area (such as the back of a door) for 24 hours to ensure colorfastness. Time estimate for a typical stain: 15–30 minutes, plus drying time.
Step-By-Step: How To Remove Oil Stains From Painted Walls
- Dip a microfiber sponge in warm water and wring out well. Gently wipe the stained area to remove surface oil.
- If the stain persists, apply a grease stain remover spray for painted walls or a light touch of oil stain remover for interior walls degreaser directly to the spot. Avoid soaking the wall.
- Let the cleaner sit for 1–3 minutes to break down the oil, then gently blot with a clean microfiber cloth. Do not scrub aggressively.
- Rinse the area with a fresh damp sponge to remove cleaner residue. Repeat as needed until the stain fades.
- Dry the area with a soft towel to prevent water marks. Inspect under different lighting to ensure even color balance.
- If the stain remains, repeat the cleaning cycle using less aggressive scrubbing and a smaller area to minimize paint disturbance.
- For persistent stains, consider a targeted touch-up with matching paint and a fine brush after the wall is completely dry.
- Reintroduce furniture and décor once the wall is fully dry and the appearance is uniform.
Troubleshooting
| Symptom | Likely Cause | Fix | Prevention |
|---|---|---|---|
| Stain remains after cleaning | Deep oil seeping into paint | Apply a second cleaning pass with a slightly stronger degreaser | Pre-treat oily spots promptly |
| Paint dulls or lifts | Overly aggressive scrubbing or solvent | Stop scrubbing; use gentler methods and test first | Opt for light, repeated cleanings |
| Water marks appear | Moisture exposure | Dry thoroughly; avoid excess moisture | Use minimal water and dry promptly |
| Color mismatch after cleaning | Solvent residue or uneven drying | Rinse thoroughly and allow full drying time | Test in hidden area before full cleaning |
Common Mistakes
- Using harsh solvents or abrasive pads on painted walls
- Over-wetting the wall, leading to paint swelling or peeling
- Rubbing more than blotting, which spreads the stain
- Poor testing of cleaners before use on visible areas
Tips For Best Results
- Work from the edge of the stain inward to prevent spreading.
- Use a microfiber sponge because it traps oil more effectively without scratching paint.
- Always dry the wall thoroughly to prevent water spots or mold growth.
- Keep a small, dedicated cleaning area for walls to avoid cross-contamination with other surfaces.
- For repeated spots near outlets or trim, consider repainting the affected section for a seamless look.
Call A Professional
Consider a pro if stains cover large areas, the paint shows signs of damage, or stains reappear after multiple cleanings. Stop and seek expert advice if you notice peeling, bubbling, or ongoing discoloration, which may indicate moisture intrusion behind the wall.
FAQ
Can I use regular kitchen degreaser on painted walls?
Yes, but test first in a concealed area and use a mild formulation to avoid affecting the finish.
Is it safe to scrub walls with a sponge?
Light, gentle blotting is safer than heavy scrubbing for most painted surfaces.
What should I do if the stain returns after drying?
Repeat the cleaning cycle with a slightly stronger cleaner and ensure the wall dries completely between attempts.
Are oil stains permanent on painted walls?
Most are removable with proper cleaners and careful technique, though some finishes may require touch-ups or repainting.
Buying Guide
Choosing the right products and setup for removing oil stains on walls involves considering the wall finish, stain size, and ease of use. Key factors to evaluate include the cleaning strength, the type of degreaser, and how the product interacts with painted surfaces.
Size and Formulation
Look for spray formulations or gel cleaners designed for painted walls. A targeted grease stain remover spray for painted walls is convenient for spot treatments, while a degreaser labeled for interior walls works well for broader areas.
Noise Level and Convenience
Spray bottles and microfiber sponges are quiet and easy to use. Consider a wall cleaning kit that bundles a microfiber sponge with a compatible cleaner for a streamlined workflow.
Energy Efficiency and Eco-Friendliness
Prefer water-based formulas that rinse clean with minimal residue. Check for low-VOC or eco-friendly options to reduce indoor air pollutants during cleaning.
Controls and Safety
Choose products with clear safety instructions and low odor. Always perform a patch test and use gloves if you have sensitive skin or if you’re cleaning large areas.
Placement and Storage
Store cleaners in a cool, dry place away from direct sunlight. Keep cleaning tools like microfiber sponges in a designated caddy near the cleaning area for quick access.
Leave a Reply