How to Get Rid of Fungus Gnats
Fungus gnats are a common irritant for indoor gardeners, thriving in moist soil and dim lighting. With a few focused strategies, you can reduce adult sightings, interrupt the life cycle, and keep potted plants thriving. This guide presents practical steps using simple tools and proven methods.
By combining monitoring, targeted traps, and moisture management, homeowners can curb infestations without resorting to harsh chemicals. The approach below emphasizes safe, effective methods suitable for homes with kids and pets.
Quick Answer
Identify and address moist soil, deploy yellow sticky traps near plant saucers, and monitor soil moisture to prevent a breeding ground. Use adhesive traps to capture adults and reduce egg laying, then adjust watering to break the lifecycle.
What You’ll Need
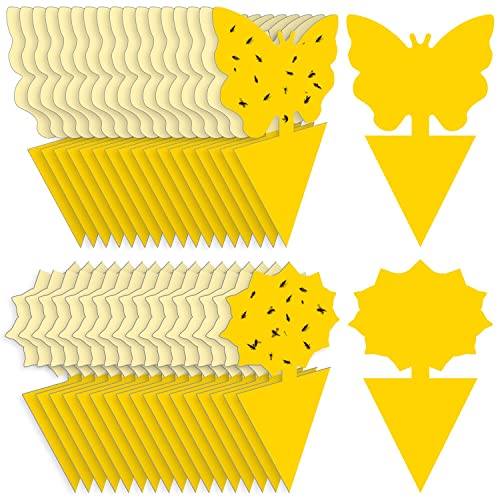
- Yellow sticky traps for fungus gnats indoor plants
- Fungus gnat trap yellow adhesive
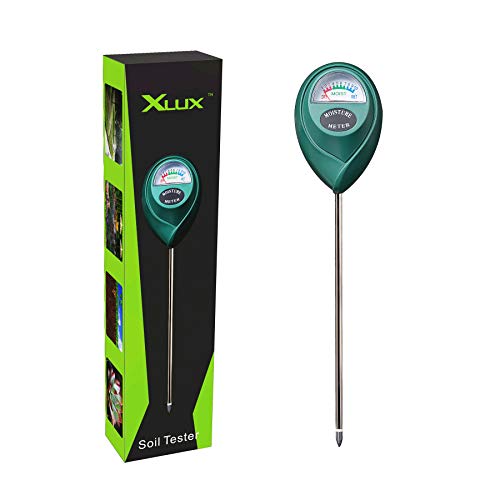
- Soil moisture meter for potted plants
Before You Start
Assess the infestation level by inspecting a few affected pots. Place traps near the plant base and under the pot rim where adults are most seen. Prepare your workspace and have a plan for watering adjustments. Time range for initial impact: a week to a couple of weeks depending on severity. Important: avoid overwatering and ensure good drainage to prevent new gnats from taking hold.
Safety note: if you use any chemical products, follow label directions and keep away from children and pets. For sensitive plants, test any intervention on a small, inconspicuous specimen first.
Step-By-Step: How To Use Traps And Manage Soil Moisture
- Place yellow sticky traps near the top layer of soil and at the soil surface of each affected pot to catch newly emerged adults.
- Position traps a few inches above the soil line and toward the plant’s base where gnats tend to hover.
- Install the yellow adhesive traps that are specifically designed for fungus gnats, ensuring the sticky side faces outward for maximum visibility.
- Use a soil moisture meter for potted plants to accurately gauge moisture at root level, checking multiple pots to spot overly wet zones.
- Limit watering in pots with high moisture readings; wait until the top inch of soil dries before the next watering.
- Replace or reposition traps every 1–2 weeks or as the adhesive loses stickiness, continuing until adult sightings drop significantly.
- Consider a light misting schedule that keeps surfaces from staying overly damp while still meeting plant needs.
- For stubborn pockets, introduce a dry-out period of 3–5 days in the affected pots, then resume normal watering only after soil moisture shows a safe level.
- Clean plant surfaces and saucers to remove any settled eggs or larvae, and check drainage holes for clogs that can trap moisture.
- Rotate plant placements to increase airflow and reduce humidity around the root zone, which helps slow fungal growth and gnat reproduction.
- Track progress by counting visible adults weekly and adjusting trap placements or watering as needed.
- Combine traps with a broader moisture management plan to prevent recurrence once adult populations fall.
Troubleshooting
| Symptom | Likely Cause | Fix | Prevention |
|---|---|---|---|
| Many gnats around several pots | Consistently moist soil across multiple plants | Scale back watering and use soil moisture meter readings to guide schedules | Water only when top inch dries; ensure containers have proper drainage |
| Sticky traps stay empty | Low adult activity or traps placed away from flight paths | reposition traps near plant bases and along paths | Place traps at multiple heights and directions around plants |
| Gnats return after a week | Eggs in soil that survive initial treatments | Incorporate a dry-out period and continue monitoring | Improve soil drying between waterings |
| Soil stays soggy | Poor drainage or overwatering | Check drainage holes, repot if needed, adjust potting mix | Use well-draining soil and appropriate-sized pots |
Common Mistakes
- Relying on traps alone without adjusting watering habits
- Overwatering due to fear of plant stress
- Ignoring drainage issues and root rot risk
- Using broad-spectrum treatments without identifying the pest
Tips For Best Results
- Coordinate trap placement with a consistent watering routine to disrupt the gnats’ life cycle.
- Combine traps with a lightweight soil drying period to deprive larvae of moisture.
- Keep plants spaced to improve air circulation and reduce humidity around soil surfaces.
- Label pots and maintain a simple log of moisture readings to detect patterns.
Call A Professional
Seek professional help if there is extensive plant decline, signs of root rot, or if household pets or children repeatedly ingest soil or traps. Consider a certified pest or horticultural expert for large collections or greenhouse environments with persistent infestations.
FAQ
What causes fungus gnats in indoor plants?
Fungus gnats thrive in moist, organic-rich potting soil where larvae feed on decaying material and roots.
Do yellow sticky traps really work for fungus gnats?
Yes, they capture adults, reducing egg-laying and helping break the life cycle when combined with moisture control.
How often should I replace the traps?
Check weekly and replace when they lose tack or become full of gnats.
Can I reuse potting soil after an infestation?
If soil remains damp or contaminated, consider replacing with fresh, well-draining mix to prevent re-infestation.
Is there a natural approach to manage fungus gnats?
Yes, allow soil to dry between waterings, use beneficial nematodes if appropriate, and avoid introducing new soil with pests.
Buying Guide
When choosing tools to combat fungus gnats, consider a mix of monitoring and moisture-management products. The goal is to reduce adult populations and prevent larvae from thriving. Look for the following factors:
- Size and coverage: Choose traps that fit your plant collection and space, including cluster setups for dense plant areas.
- Noise and maintenance: Most traps are silent; select ones with easy-to-clean surfaces for ongoing use.
- Energy efficiency: Traps require minimal energy; use battery-powered or easily replaceable options where possible.
- Controls: Simple adhesive traps with clear instructions are ideal for quick deployment and replacement.
- Placement: Consider reachability around shelves, desk corners, and under humid zones to maximize trap effectiveness.
For best results, combine yellow sticky traps with a smart moisture-monitoring approach to identify overwatered pots. Would you like a quick checklist to tailor trap placement to your plant layout?
Leave a Reply