How to Get Rid of Bubbles on Android
Bubbles under a screen protector on an Android device can be frustrating and make the display look uneven. This guide provides practical, step-by-step instructions to remove air pockets and achieve a smooth, bubble-free surface. It also highlights the right tools to use and common mistakes to avoid for a clean install.
Following a careful method helps preserve touch sensitivity and screen clarity while extending the life of the protector and device. The steps below are actionable for most smartphones, including popular Android models, and leverage specialized tools designed for bubble-free installs.
Quick Answer
To remove bubbles, gently re-align the protector starting from the center, use a soft card or squeegee edge to push air toward the edges, and re-seat slowly. If a stubborn bubble remains, lift the edge near the bubble a little, re-press, and re-smooth toward the edge. Always use a bubble-free install kit and alignment frame to ensure precise placement.
What You’ll Need
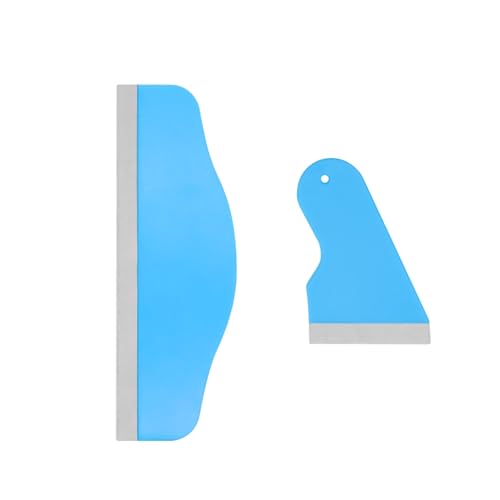
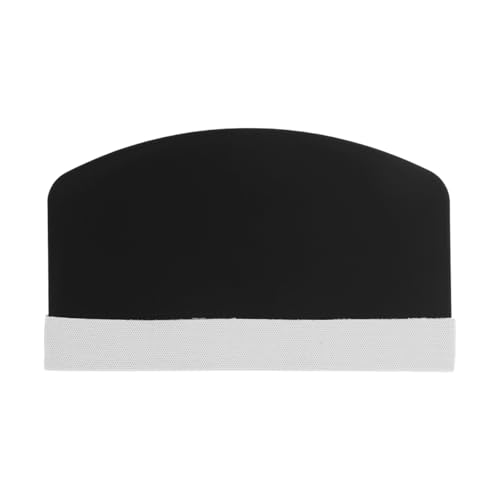
- Phone screen protector installation kit with squeegee bubble remover
- Screen protector alignment frame for smartphones
- Bubble-free screen protector install tool kit smartphone

Before You Start
Prepare a clean, dust-free workspace and wash hands to minimize debris. Power off the Android device and remove any case that could trap air. Work in a well-lit area and keep a microfiber cloth handy to wipe the screen. Time estimate: 15–25 minutes for a proper install. Critical cautions: do not rush the alignment, avoid touching the adhesive side with bare fingers, and ensure the screen is completely dry before starting.
Step-By-Step: How To Get Rid Of Bubbles On Android
- Clean the screen thoroughly with a microfiber cloth and alcohol-free wipe, ensuring no dust or oils remain.
- Place the alignment frame over the device to position the screen protector accurately.
- Peel back a small portion of the protector’s protective layer at the top edge—just enough to set the protector in place without touching the adhesive.
- Gently position the protector using the alignment frame, centering it with the device’s bezels and camera cutouts.
- Starting from the center, press down with the squeegee from the middle outward to push air toward the edges.
- Inspect for any visible bubbles; if found, use the bubble remover edge to coax air out toward the sides.
- If a bubble remains near an edge, slightly lift that edge with a fingernail or tool, re-press, and re-smooth toward the edge.
- Continue working gradually toward all edges, ensuring the protector adheres evenly across the surface.
- Wipe the surface again with the microfiber cloth to remove any moisture or residue from the process.
- Test touch response by lightly tapping the screen to confirm responsive, bubble-free areas.
- If the protector is misaligned, carefully lift the edge near the misalignment and reposition, then reapply the squeegee.
- Finish by sealing the edges with a final light pass to ensure full contact and remove any remaining micro-bubbles.
Troubleshooting
| Symptom | Likely Cause | Fix | Prevention |
|---|---|---|---|
| Bubbles near the center | Dust or debris on the screen or protector | Re-wipe the screen, reapply with alignment frame | Work in a dust-free area and handle the protector only by edges |
| Bubbles along the edges | Adhesive not fully pressed | Use the squeegee to push toward the edge; re-seat if needed | Ensure even pressure during installation |
| Peeling edges | Improper surface prep or frame misalignment | Re-clean, re-align, and re-press from center out | Double-check alignment frame fit before applying |
| Persistent milky appearance | Adhesive moisture or residue | Wipe with dry microfiber cloth and re-squeegee | Dry surface completely before final settling |
Common Mistakes
- Rushing the alignment process and skipping the center-first approach.
- Touching the adhesive side with bare fingers, causing oils transfer.
- Installing in a dusty or poorly lit area, allowing particles to trap under the protector.
- Skipping the use of a dedicated alignment frame and proper tools.
Tips For Best Results
- Always start with a clean, dry screen and a stable, flat surface.
- Use the included tools to guide air toward the edges rather than forcing air out randomly.
- Work slowly; small, deliberate presses yield better adhesion and fewer bubbles.
- Keep a steady hand and minimize finger contact with the adhesive side.
- Store kits in a clean, dry place to preserve the alignment frame and squeegee effectiveness.
Call A Professional
Consider professional installation if the screen has a curved edge, if you are unsure about using the alignment frame, or if the device is under warranty coverage that prohibits self-installation. Stop and consult a technician if you notice adhesive residue on the device or if the protector does not sit flat after repeated attempts.
FAQ
Will bubbles ruin the screen protector?
Most bubbles are cosmetic and can be removed with proper reapplication; premature complete replacement is rarely needed.
Can I reuse a screen protector after lifting and re-seating?
In most cases, reusing is not recommended; adhesive performance diminishes after exposure to air.
What if dust gets trapped during installation?
Gently lift the protector near the trapped dust, clean the screen, and reapply with the alignment frame.
Do I need a special frame for every phone model?
Alignment frames are typically model-specific; choose the frame designed for your device to ensure accurate alignment.
Is a bubble-free kit worth it?
Yes, a dedicated bubble-free kit reduces the risk of air pockets and makes the process easier for most users.
Buying Guide
When selecting screen protector tools for Android devices, consider size compatibility for your device, noise level of the squeegee, ease of use, and build quality. Look for a comprehensive kit that includes an alignment frame, bubble remover, and a reliable squeegee. Energy efficiency is less of a concern here, but durability and reusability matter for long-term value. Controls should be intuitive, with well-documented instructions. Placement options vary by device; choose a kit that supports your phone’s screen shape and edge curvature. For users with large hands, a longer squeegee may improve control. Compare kits that offer protective covers or anti-static features to reduce dust attraction. A well-rounded kit reduces errors, speeds up installation, and helps achieve a flawless, bubble-free result.
Leave a Reply