How to Get Rid of Bubbles in Tint
The presence of bubbles under window tint can ruin visibility and the overall look of a vehicle. This guide walks through practical, car-safe steps to remove bubbles and restore a smooth, professional finish. It covers common methods, necessary tools, and safety tips to help DIY enthusiasts achieve clean results without damaging the window film.
Quick Answer
For small bubbles, use a heat source to soften the film, then press them out with a tint squeegee kit for car window bubble removal. For stubborn bubbles or edge lifting, carefully scrape with a window tint removal razor blade scraper knife after loosening the film with controlled heat. Avoid excessive heat, which can warp the tint or the glass.
What You’ll Need
- Automotive window tint bubble removal heat gun
- Tint squeegee kit for car window bubble removal
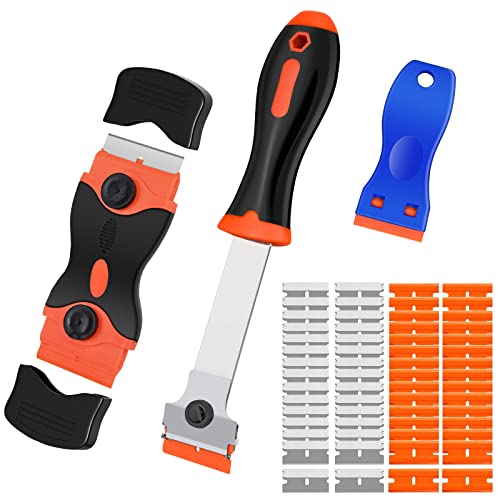
- Window tint removal razor blade scraper knife


Before You Start
Prepare a clean, dry workspace with good lighting. Work slowly to avoid lifting edges or tearing the film. Wear eye protection and gloves to guard against sharp blades and hot surfaces. Keep a spray bottle with soapy water handy to re-wet the film as you work. Plan the process in sections to maintain consistent adhesion and minimize air pockets. Time estimate: 15–45 minutes for minor bubbles; longer if edges need resealing or if the adhesive is old.
Step-By-Step: How To Get Rid Of Bubbles In Tint
- Power off and cool the window area. If the film is overheated, allow it to rest before proceeding.
- Rewet the surface with a light soap solution to reduce friction and help movement of air pockets.
- Gently heat the bubble with the automotive window tint bubble removal heat gun, moving the nozzle in small, circular motions to avoid concentrated heat.
- Place the tint squeegee kit for car window bubble removal against the film with steady pressure and push the bubble toward the edge of the window to expel air.
- For stubborn bubbles near corners or edges, reapply a little moisture and use the squeegee in a controlled diagonal or horizontal stroke to guide air out.
- If a bubble persists, carefully lift the edge of the film with the blunt side of the window tint removal razor blade scraper knife, re-wet, then re-squeegee the area.
- Recheck the surface from different angles to ensure all air has escaped and the film lies flat.
- Seal the edges by patting them with the squeegee and sweeping moisture toward the perimeter to prevent new air pockets from forming.
- Allow the tint to cure undisturbed for the recommended adhesive setting time before driving or rolling windows down.
- Repeat on other windows if necessary, using the same careful technique for consistency.
- Clean up any residue with a damp microfiber cloth and store tools properly to preserve blade sharpness.
Troubleshooting
| Symptom | Likely Cause | Fix | Prevention |
|---|---|---|---|
| Small bubbles near edges | Air trapped during installation | Gently lift edge, re-wet, re-squeegee | Ensure film is properly aligned before bonding |
| Bubbles reappear after drying | Poor initial adhesion or insufficient heat | Reheat area evenly and reseal with squeegee | Follow curing guidelines and use correct moisture level |
| Blistering after washing | Excess moisture or improper curing | Dry completely, reheat lightly, reseal | Avoid high-pressure hose directly on film |
| Edges lifting | Improper edge sealing or edge damage | Carefully re-adhere edges with heat and squeegee | Trim and seal edges as needed |
Common Mistakes
- Using excessive heat that warps the tint or melts adhesive
- Rushing the process and skipping rewetting steps
- Using sharp blades without proper tool control near glass
- Neglecting edge sealing, which invites air infiltration
Taking time to rewet and re-squeegee, and using the correct tools, yields the best long-lasting results.
Tips For Best Results
- Work in a shaded, temperature-controlled area to prevent rapid drying or sweating of the film.
- Always test a small inconspicuous area before applying heat to the entire pane.
- Keep tools clean; debris on the blade or squeegee can reintroduce air pockets.
- Use smooth, even strokes rather than quick scrapes to minimize edge damage.
Call A Professional
Consider a professional if bubbles are widespread, edges are peeling, or the tint was previously damaged. Stop signs include visible air pockets after multiple resealing attempts, corner peeling, or if the film is past its expected lifespan. A pro can re-laminate or replace sections without risking glass damage or poor adhesion.
FAQ
Why do bubbles form under automotive window tint?
Bubbles typically occur when air, moisture, or dust becomes trapped during installation or when the film doesn’t fully adhere to the glass.
Can I use household tools to remove bubbles?
It’s best to use purpose-made tools like a tint squeegee kit and a razor blade scraper knife to avoid damaging the film or glass.
Is heat required for all bubbles?
Heat helps soften the adhesive and allows air to escape, but excessive heat can harm the film—use controlled heat only where needed.
How long does tint need to cure after bubble removal?
Adhesive cure times vary by product; follow the manufacturer’s guidance, typically several hours to a day.
Should I remove the whole tint if bubbles persist?
Extensive bubbling or edge lifting may require partial or full removal and reapplication by a professional.
Can bubbles reappear after successful removal?
Bubbling can recur if edges weren’t properly sealed or if the film was damaged during removal. Reassess and reseal as needed.
Buying Guide
When choosing tools to handle tint bubbles, consider size, noise, and ease of use. A dedicated automotive heat gun should offer adjustable temperature to prevent damage. A tint squeegee kit for car window bubble removal typically includes multiple blades and soft edges to protect film. A window tint removal razor blade scraper knife provides controlled cutting power for edge lifting. Look for corrosion-resistant materials and ergonomic handles to reduce fatigue during longer sessions. If you frequently tint multiple vehicles, a compact, regulated heat source paired with a reliable squeegee kit is worth the investment.
Size and placement matter: smaller vehicles or tight rear windows may need compact tools, while larger panes benefit from longer squeegee handles. Noise levels are usually low, but choose tools with vibration-dampening features for comfort. Energy efficiency is less of a concern for hand tools, but durable, reusable components save money and waste. Consider tool storage and kit completeness to ensure you have the right blade types and squeegee textures for various tint films.
Multiple comparison perspectives help: assess tool compatibility with common tint brands, warranty terms, and replacement blade availability. Always follow safety guidelines and manufacturer instructions for heat and blade use. Ready-to-use kits with clear grip textures help maintain control, reduce slip, and minimize the risk of damage to the film or glass. With the right kit and careful technique, most bubbles can be eliminated cleanly in one session.
Leave a Reply