How to Get Rid of Almost Everything: A Practical Guide
Disposing of clutter efficiently is a common goal for many households. By planning carefully, using the right tools, and following a structured process, most people can reclaim space without unnecessary stress. This guide offers practical steps to reduce, sort, and remove items, while keeping safety and efficiency in mind.
Quick Answer
Start with a clear goal, sort items into keep, donate, recycle, and trash piles, and schedule disposal in stages. Use labeled bins to stay organized, and compress disposal sessions into focused blocks to avoid overwhelm.
What You’ll Need
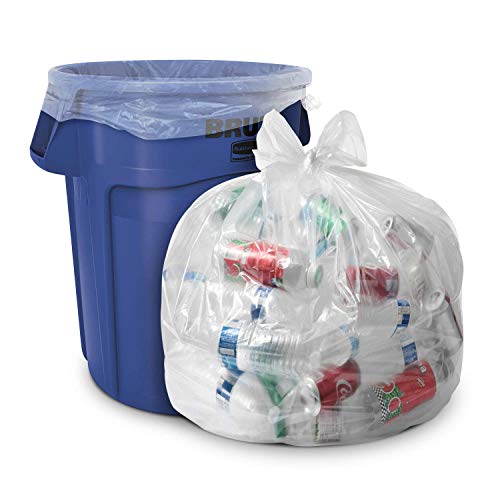
- Heavy duty contractor trash bags 42 gallon 2 mil clear pack
- Clear stackable storage bins 18 gallon with lids
- Handheld label maker with tape for organization


Before You Start
Assess your space and set a realistic timeline. Protect floors and surfaces with drop cloths if needed. Gather donation and recycling bags and locate local drop-off sites or curbside programs. Safety notes include wearing gloves when handling unknown or heavy items and using proper lifting techniques to prevent injury. Time estimates vary by volume but plan for several hours to a full weekend if tackling a full home or a large project.
Step-By-Step: How To Get Rid Of Almost Everything
- Clear a staging area and create four labeled zones: Keep, Donate, Recycle, and Trash.
- Begin with a high-traffic area first (entryway, living room) to gain momentum.
- Sort items quickly into the four zones, avoiding overthinking each object.
- For items to discard, seal them in heavy duty contractor trash bags to simplify transport.
- Immediately place recyclable items in a dedicated bin or bag for curbside pickup or a recycling center.
- For items that have value but aren’t in use, consider donation rather than disposal and prepare them for drop-off.
- Label boxes or bags with a handheld label maker to maintain order and track progress.
- Use 18 gallon clear stackable storage bins with lids for grouping similar items or seasonal belongings.
- Tackle storage areas like closets and garages in 30–60 minute sessions to avoid fatigue.
- When a space is empty, do a quick audit to ensure nothing crucial is being discarded.
- Move to the next area and repeat the sorting process until most items are categorized.
- Review the remaining “Keep” items for potential downsizing or reorganization to improve flow.
Troubleshooting
| Symptom | Likely Cause | Fix | Prevention |
|---|---|---|---|
| Disorganization returns after a week | Deferred sorting or lack of storage solutions | Revisit with a short daily session and re-label | Schedule routine decluttering every 60–90 days |
| Items don’t fit into bags or bins | Underestimating volume | Reassess grouping and split into smaller lots | Measure space and plan storage before sorting |
| Donations are rejected | Non-donation items or condition issues | Set clear criteria for donate vs trash | Pre-check donation guidelines for local centers |
| Overwhelming noise or clutter | Open spaces remain blocked | Finish one room before starting another | Work in short, focused sessions |
Common Mistakes
- Trying to sort everything in one day.
- Holding onto items “just in case” without clear criteria.
- Ignoring local donation or recycling guidelines.
- Failing to label containers, leading to confusion later.
- Neglecting to protect floors and surfaces when moving heavy items.
Tips For Best Results
- Set a countdown timer for each sorting block to maintain focus.
- Use the handheld label maker with tape to tag items by category and destination.
- Sort by space and convenience, not by sentimental value alone.
- Designate a single exit path for items going to trash or donation to speed up disposal.
- Keep a small grab-and-go box for items you might need to return to the space quickly.
Call A Professional
Consider contacting a professional organizer if you face persistent clutter, physical limitations, or a large-scale cleanup project. Stop signs include persistent procrastination, unsafe lifting, or items that require special disposal (hazardous materials, electronics, or medical waste). A pro can provide tailored strategies and ensure compliant disposal practices.
FAQ
What is the first step in decluttering a room?
Set up four zones (Keep, Donate, Recycle, Trash) and begin with the easiest items to decide on.
How can labeling help during decluttering?
Labeling keeps decisions consistent and speeds up the sorting process over time.
What should I do with items I’m unsure about?
Create a temporary “Maybe” bin and revisit it after a set period to reduce decision fatigue.
When should I involve a professional?
If clutter is overwhelming, safety concerns arise, or the project is too large to handle alone.
Are donations always accepted?
No. Check local guidelines and condition requirements before donating items.
How long does a typical decluttering session take?
Smaller rooms may take 1–3 hours, while entire homes can require several sessions over days or weeks.
What’s the best way to store items I plan to keep?
Use clear, stackable bins and label contents to simplify future retrieval and reduce re-cluttering.
Buying Guide
When choosing tools and supplies for decluttering, consider size, durability, and ease of use. Do you prioritize large-capacity bags or clear storage bins to see what’s inside? For Americans seeking a straightforward approach, the right combination of bags, bins, and labeling can streamline the process.
Key buying factors include size and capacity, noise level (if used in shared spaces), energy efficiency of any devices used for disposal, controls for managing sorting, and placement within the home to minimize disruption. For a practical setup, pairing heavy-duty trash bags with clear stackable bins and a handheld label maker helps maintain organization from the start. Always assess space constraints and local disposal rules before purchasing.
Leave a Reply