How to Get Rid of Air in Coolant System
Air trapped in a vehicle’s cooling system can cause overheating, hot spots, and reduced heater performance. This guide explains practical methods to purge air from the coolant system using common automotive tools and safety practices. It covers a straightforward approach for most cars, plus notes when a more thorough flush or professional help might be needed.
Quick Answer
Start by locating the highest point in the cooling system and bleeding the air using a dedicated air bleed kit or a coolant purge tool. If the system feels pressurized or you see continuous air pockets, perform a controlled refill with the engine warm, using a reservoir fill tool to capture returning coolant and prevent air re-entry. For stubborn air pockets, a radiator flush and bleed kit with a reservoir fill tool can simplify the process and improve results.
What You’ll Need
- Automotive radiator air bleed kit
- Coolant system air purge vacuum pump kit
- Radiator flush and bleed kit with reservoir fill tool
- Coolant compatible with the vehicle’s specification
- Clean rags, a catch pan, and protective gloves
- Proper funnel or reservoir fill tool
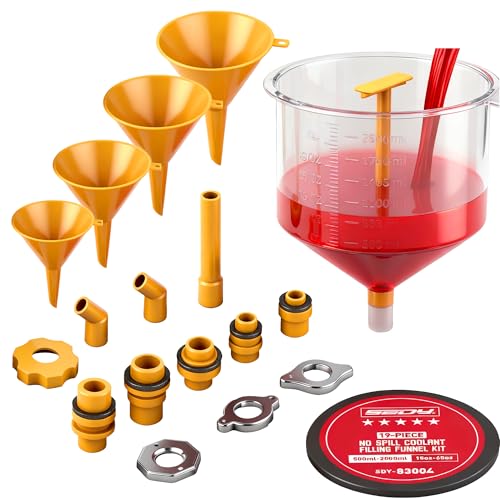
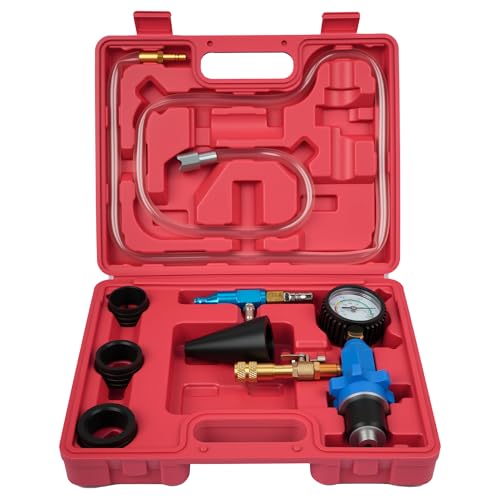

Before You Start
Ensure the engine is cool before opening any cooling system components to avoid scalding hot coolant. Work in a well-ventilated area and use a sturdy support to keep the vehicle level. The procedure may vary by make and model, so consult the owner’s manual for specific bleed points and capacity. Safety first: never open a pressurized radiator cap when the system is hot, and wear eye protection when handling coolant.
Step-By-Step: How To Get Rid Of Air In Coolant System
- Park on a level surface and engage the parking brake. Set the engine cold, then raise the hood and locate the radiator cap, bleed valves, and any dedicated air vents as described in the vehicle manual.
- Prepare the vehicle for bleeding by removing the radiator cap only after the engine cools. Use a rag to protect your hand and a catch pan to collect any coolant that may spill.
- Attach the automotive radiator air bleed kit to the bleed port or valve. If your vehicle lacks a dedicated port, place a compatible bleed adapter at the highest point in the cooling system.
- Start the engine and set the heater to the maximum warm setting. Allow the engine to reach operating temperature; the thermostat will open and coolant will circulate, pushing air toward the bleed points.
- Operate the bleed valve according to the kit’s instructions. If you notice air pockets escaping, tighten the valve gradually while monitoring coolant level in the reservoir.
- Utilize the coolant system air purge vacuum pump kit to draw out remaining air from the system, especially from hard-to-reach lines. Keep an eye on the temperature gauge and do not overheat the engine during purging.
- Top off the coolant with the appropriate mix using the reservoir fill tool. Refill slowly to prevent introducing air, and watch for air bubbles as the system stabilizes.
- With the engine off, recheck the level after a brief cooldown. Refill as needed, then re-tighten all caps and bleed valves.
- Run the engine again to operating temperature. Reassess for any continuing air pockets by inspecting the radiator and bleed points. Repeat the bleed process if necessary until smooth coolant flow is observed.
- Perform a final check after a cooling cycle. Look for leaks around hoses, clamps, and the radiator. If any leaks are found, address them before driving long distances.
- Dispose of any old coolant according to local regulations and clean the work area. Record the coolant type and fill amount for future maintenance reference.
Troubleshooting
| Symptom | Likely Cause | Fix | Prevention |
|---|---|---|---|
| Engine overheats after bleeding | Air still trapped or incorrect coolant mix | Re-bleed at all bleed points; verify coolant concentration | Regularly check levels and bleed after any thermostat or radiator work |
| Continuous air pockets in reservoir | Leaking hose or cap, or faulty water pump | Inspect system for leaks; replace faulty components | Use correct cap and clamps; perform routine system checks |
| Refilled coolant drops quickly | System leak or loose fitting | Tighten clamps and replace damaged hoses | Periodic inspection of hoses and seals |
| Heater not warming adequately | Air in heater core or low coolant | Bleed air, ensure adequate coolant in reservoir | Bleed after any cooling system service |
Common Mistakes
- Bleeding when the engine is hot — ignore the risk of burns and pressure release
- Skipping the reservoir fill step — can trap air and prolong the process
- Using the wrong coolant type or wrong concentration — reduces cooling efficiency
- Overfilling the reservoir — may cause overflow and air entrapment
Tips For Best Results
- Work with a clean system; remove old coolant only if a full flush is necessary
- Coolant color or type can indicate the vehicle’s original specification; match it precisely
- Take it slow when refilling to minimize new air pockets
- Document the bleed locations and process steps for future maintenance
Call A Professional
Consider a professional if the engine continues to overheat after multiple bleed attempts, or if the vehicle shows persistent leaks, corroded components, or a failing water pump. Stop the procedure if you notice steam, a strong coolant odor, or a rapidly rising temperature gauge.
FAQ
What is the purpose of an air bleed kit in a coolant system?
It helps remove trapped air from the cooling system to prevent overheating and ensure steady coolant flow.
Can I bleed air without a dedicated kit?
Yes, some vehicles can be bled using basic tools, but a dedicated kit speeds the process and reduces errors.
How do I know when the air is fully purged?
When coolant flows steadily with minimal air bubbles and the temperature stabilizes without spikes.
Is a radiator flush necessary before bleeding?
A flush can help remove contaminants and improve overall cooling performance, especially in older systems.
How often should I bleed the cooling system?
Bleed when the system has been opened for maintenance or after replacing major components, and if overheating recurs.
Should I replace the thermostat during a purge?
If the thermostat is sticking or slow to respond, replacing it can improve purge results and overall cooling efficiency.
What seals and clamps should I inspect?
Check hose clamps, radiator cap, and bleed valve connections for tightness and integrity.
What does a cooling system air purge vacuum pump kit do?
It helps draw air pockets out of the system more effectively than manual bleeding alone.
Buying Guide
Choosing the right toolset to purge air from a coolant system depends on vehicle type and maintenance habits. Size and compatibility matter; a compact bleed kit is convenient for small engines, while a full radiator flush and bleed kit offers broader capabilities for larger vehicles or frequent maintenance. Noise levels, ease of use, and the availability of reservoir fill tools influence daily practicality. Look for kits that include universal fittings and clear instructions, plus durable construction for repeated use. Energy efficiency is not a primary concern here, but built-in reservoir controls can reduce fill errors and air re-entry. Placement considerations include keeping the kit within reach in the garage and ensuring hoses and fittings match the vehicle’s bleed points.
Key buying factors at a glance:
- Size and compatibility with your vehicle’s cooling system
- Number of bleed ports and ease of access
- Included reservoir fill tools to prevent air re-entry
- Quality of fittings and hoses for a secure seal
- All-in-one kits with radiator flush options for future maintenance
If you’re unsure which kit suits your vehicle, consider starting with a dedicated automotive radiator air bleed kit for straightforward bleeding, and add a coolant system air purge vacuum pump kit or radiator flush and bleed kit with reservoir fill tool if you encounter persistent air pockets or plan a more thorough cooling system refresh.
Leave a Reply