How to Clean a Water Dispenser
Maintaining a clean water dispenser protects hydration quality and extends the life of the unit. Regular cleaning helps prevent mineral buildup, algae, and bacteria, ensuring every glass remains fresh. This guide walks through a practical, step-by-step approach suitable for most residential and office water dispensers, using common tools and a dedicated cleaning kit.
Quick Answer
Do a thorough clean every 1–3 months, depending on usage and water quality. Use a gentle descaler for mineral deposits, followed by a clean water rinse. Empty and dry the reservoir before reinstalling parts. Never mix cleaners directly in the dispenser with drinking water until fully rinsed.
What You’ll Need
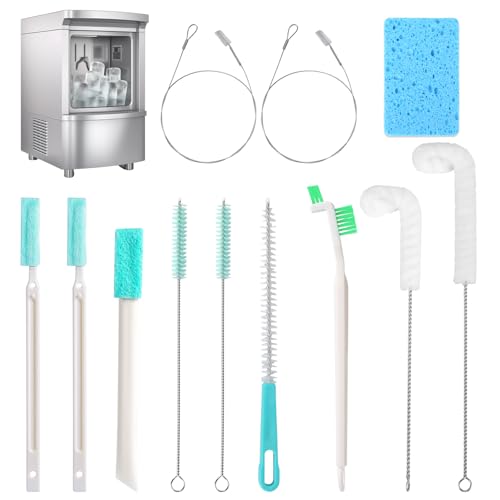
- Water cooler cleaning kit with brush
- Water dispenser descaler tablets
- Spigot cleaning brush for water cooler


Before You Start
unplug the dispenser and disconnect from any power source. Move the unit away from walls to access all sides. If the unit is a dual-dispenser model, remove both reservoirs per the manufacturer’s instructions. Wear gloves to protect hands from cleaning agents, and ensure good ventilation when using descalers. Estimate 30–60 minutes for the full process, depending on unit type and access to all components.
Step-By-Step: How To Clean A Water Dispenser
- Remove all bottles and disconnect the power. Empty the reservoir and drain any remaining water from the lines.
- Prepare a descaling solution using water dispenser descaler tablets according to the product directions. Dissolve fully in warm water to create a safe, non-foaming solution.
- Pour the descaler into the cold or hot reservoir as applicable, then allow it to sit for the recommended contact time to loosen mineral buildup.
- Flush the lines by running clean water through both taps until the solution is expelled and the water runs clear.
- Use the water cooler cleaning kit with brush to scrub the interior surfaces and the drip tray. Focus on corners and areas where residue collects.
- Clean the spigot and taps with the spigot cleaning brush for water cooler. Remove any visible deposits, then rinse with clean water.
- Rinse thoroughly by running several cycles of clean water through the unit until no cleaning solution remains.
- Disinfect if recommended by the manufacturer (use a food-grade sanitizer compatible with water dispensers), then rinse again to remove any sanitizer residue.
- Dry all components completely before reassembling. Reconnect power and reinstall bottles. Run a final water flush to ensure purity.
- Monitor the dispenser after reassembly for any leaks or unusual odors. If detected, power down and inspect seals and gaskets before use.
- Schedule routine cleaning every 1–3 months to maintain performance and hygiene.
Troubleshooting
| Symptom | Likely Cause | Fix | Prevention |
|---|---|---|---|
| Unusual taste or odor | Residual cleaner or mineral buildup | Re-flush with clean water; repeat if needed | Regular cleaning schedule |
| Slow water flow | Clogged spigot or mineral crust | Clean spigot with brush; descale lines | Use pre-filtered water when possible |
| Weak cold water | Cold reservoir coil or line blockage | Inspect coils; flush lines thoroughly | Annual maintenance check |
| Leaks around seals | Worn gaskets or loose fittings | Tighten fittings; replace gaskets | Handle with care during cleaning |
Common Mistakes
- Using overly strong cleaners or mixing cleaners with drinking water
- Skipping thorough rinsing after descaling
- Forgetting to dry components completely before reassembly
- Neglecting the drip tray and external surfaces
To avoid these issues, follow the manufacturer’s directions closely and keep a regular cleaning schedule that matches usage.
Tips For Best Results
- Use a dedicated cleaning kit and spigot brush to target hard-to-reach areas.
- Pre-warm water for descalers if the product allows, which can improve dissolution of mineral deposits.
- Rinse in multiple empty cycles to ensure no cleaning residue remains.
- Keep a cleaning log to track dates and tasks, especially in office settings with multiple users.
Call A Professional
Stop and contact a professional if you notice persistent leaks, corrosion, or persistent foul odors after cleaning. Do not operate a malfunctioning unit; extended use can pose safety risks or damage internal components. If the unit is under warranty, check terms before attempting repairs yourself.
FAQ
Is it safe to use descaler tablets in a home water dispenser?
Yes, when used according to the product directions and then thoroughly rinsed, descaler tablets are designed to remove mineral buildup safely.
How often should I clean my water dispenser?
Most households clean every 1–3 months, depending on water quality and usage. Offices may require more frequent cleaning.
Can I use bleach to clean a water dispenser?
Bleach is generally not recommended; use manufacturer-approved cleaners or descalers to avoid residue and safety concerns.
What should I do if the water has a strange taste after cleaning?
Run several cycles of clean water to flush the system, and check for lingering cleaning agents or mineral buildup.
Are there parts that should be replaced regularly?
Gaskets, filters, and spigot components may wear over time; replace as recommended by the manufacturer.
Buying Guide
When choosing a water dispenser cleaning routine or kit, consider several factors to ensure effective maintenance and safe operation. This guide covers key buying factors to help Americans select suitable products and accessories.
Size and Compatibility
Ensure cleaning tools fit your dispenser model. Some kits are universal, while others are designed for specific brands or dual-spout units. Measure the reservoir access and confirm brush heads or attachments can reach all interior corners.
Descalers and Cleaners
Look for descaler tablets or liquids that are safe for drinking water systems. Check that the product is compatible with your dispenser’s materials (PLA, stainless steel, plastic). Avoid harsh chemicals that could degrade seals.
Spigot and Interior Brushes
A dedicated spigot cleaning brush helps remove mineral crust and residue from taps and channels. Interior brushes of varying diameters should reach tight spaces without scratching surfaces.
Ease Of Use
Consider kits with simple mixing instructions, clear contact times, and visible step-by-step directions. User-friendly packaging and labeled components save time during routine maintenance.
Safety and Certifications
Choose products that have food-grade safety certifications and comply with local guidelines. This reduces the risk of contaminants entering drinking water during cleaning.
Cost And Availability
Balance price with durability and the number of cleaning cycles provided. Availability from major retailers with straightforward return policies helps in case a product doesn’t fit your unit.
Noise, Environment, And Storage
While cleaning, consider the noise level of any power tools involved and the ecological impact of cleaners. Store components in a dry, accessible place to encourage regular use.
Leave a Reply