How to Clean a Washing Machine With Vinegar: A Simple, Effective Guide
Washing machines can harbor detergent residues, mineral buildup, and mildew in hard-to-reach areas. Cleaning with distilled white vinegar is an inexpensive and effective method to refresh the drum, hoses, and seals. This guide walks American users through safe, practical steps to brighten their washer and extend its life.
Note: Vinegar should be used as part of a routine maintenance plan, not as a sole solution for severe mold or mechanical issues. Always consult your appliance’s manual for manufacturer-specific guidance.
Quick Answer
Fast method: Run a hot cycle with a cup (8–12 oz) of distilled white vinegar, then run a second hot cycle with a cup of baking soda (optional) to de-odorize and lift residue. Wipe the door seal, gaskets, and exterior with a microfiber cloth after the cycles finish.
What You’ll Need
- Washing machine tub cleaning brush
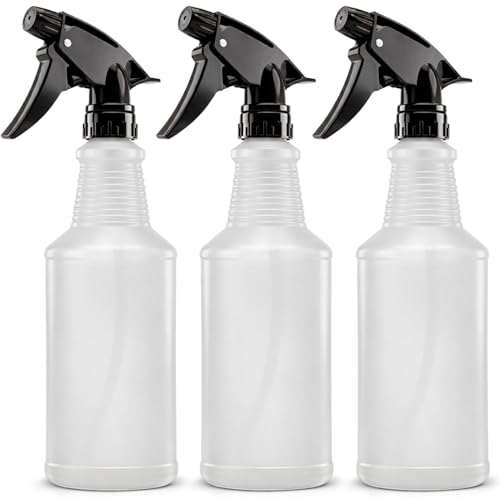
- 24 oz spray bottle for vinegar cleaning
- Microfiber cloth set for appliance cleaning
- Distilled white vinegar (not included in kit)


Before You Start
Prepare the machine by removing laundry and ensuring the drum is empty. Use gloves if sensitive to cleaning fumes and work in a well-ventilated area. For front-loaders, wipe around the door seal to remove any trapped hair or debris. Time estimates for a basic clean run about 30–60 minutes, depending on machine type and accessibility.
Safety cautions: Do not mix vinegar with bleach or hydrogen peroxide, as dangerous fumes can form. Avoid using vinegar on natural stone surfaces or certain metal parts that may be etched by acidity. If your washer has specialized cleaning instructions, defer to the manufacturer’s guidance.
Step-By-Step: How To Clean A Washing Machine With Vinegar
- Empty the drum and wipe the door seal with a microfiber cloth to remove visible grime.
- Fill the 24 oz spray bottle with distilled white vinegar. Spray the door seal, agitator (if applicable), and the rim of the drum to loosen residues.
- Stand back and run a hot wash cycle (or the longest approved cycle) with no laundry inside, using the vinegar as the cleaning agent.
- After the first cycle completes, use the tub cleaning brush to scrub the inside of the drum and any visible buildup around the edges.
- Spray a light mist of vinegar on the interior surfaces again and wipe down with a microfiber cloth to lift additional deposits.
- Optionally, run a second hot cycle with a cup of baking soda added to the drum to deodorize and further loosen residue. Do not mix baking soda and vinegar in the same bottle; use baking soda in the drum only.
- Wipe down the exterior, control panel, and door with a microfiber cloth dampened with vinegar or water. Clean the detergent dispenser, rinsing tray, and any removable parts if applicable.
- Leave the door or lid ajar after cleaning to allow air-drying and prevent mold formation.
- Inspect hoses for signs of wear or leakage. If hoses appear brittle or corroded, consider replacement and consult a professional if needed.
- Run a final rinse cycle with plain water to ensure no vinegar scent lingers on clothes during the next wash.
Troubleshooting
| Symptom | Likely Cause | Fix | Prevention |
|---|---|---|---|
| Persistent odor after cleaning | Residual buildup or trapped moisture | Run an extra hot cycle with vinegar, followed by baking soda in the drum | Regular monthly cleanings |
| Water won’t drain | Clogged filter or hose | Check dispenser and drain hose; remove debris | Clear lint traps and filters during routine cleans |
| Door seal shows mold | Moisture retention in seal | Wipe with vinegar, then dry thoroughly; leave door ajar | Keep area dry after cycles |
| Drum feels gritty | Soap residue buildup | Run an empty hot cycle with vinegar, then rinse | Use recommended detergent amounts |
Common Mistakes
- Using vinegar with bleach or hydrogen peroxide — dangerous fumes can form.
- Overlooking the detergent dispenser and seals — these areas collect grime fast.
- Skipping a final rinse — vinegar residue can transfer to clothes if not removed.
- Using vinegar on non-approved surfaces — some metal parts may be affected by acidity.
Tips For Best Results
- Use distilled white vinegar for consistency; avoid flavored or colored vinegars that may stain any components.
- Consistently clean the gasket and around the drum mouth to prevent mildew buildup.
- Pair vinegar with optional baking soda for a more thorough deodorizing effect, but only in separate steps.
- Schedule monthly maintenance or every 30–60 cycles for heavily used machines or hard water areas.
- Keep the area well-ventilated during and after cleaning to reduce vinegar smell quickly.
Call A Professional
Consult a professional if you notice persistent leaks, unusual noises, or water damage around the washer. Stop using the machine if there are visible electrical issues or a strong, persistent chemical smell that does not dissipate after cleaning. If hoses or fittings appear corroded or aged, a pro should inspect and possibly replace them to prevent future problems.
FAQ
Is vinegar safe for all washing machines?
For most standard residential washers, distilled white vinegar is safe when used in moderation and per the instructions above. Always check the user manual for any cautions about materials and seals.
How often should I clean my washing machine with vinegar?
Most households benefit from a monthly or bi-monthly cleaning routine, especially in areas with hard water or high detergent usage.
Can I use vinegar with hot water in high-efficiency models?
Yes, but follow manufacturer recommendations. Use hot water cycles if allowed and avoid exceeding recommended quantities.
What if vinegar doesn’t remove the odor or buildup?
Consider a second cleaning cycle with baking soda in the drum, ensure seals and dispensers are thoroughly scrubbed, and inspect hoses for clogs or deposits.
Should I always wipe the exterior after a vinegar clean?
Yes, wiping the exterior and control panel helps remove any splashes and keeps the appliance looking fresh.
Are there eco-friendly alternatives to vinegar?
There are commercial appliance cleaners available, but many households rely on vinegar for an affordable, effective cleaning option. Follow product instructions for other cleaners.
Buying Guide
When selecting tools for cleaning a washing machine with vinegar, buyers should prioritize ease of use, safety, and compatibility with standard American laundry setups. Key factors include size, noise level, energy efficiency, controls, and placement considerations.
Size and ergonomics: Choose a compact tub brush and a spray bottle with a comfortable grip and measured spray capability. A microfiber cloth set should include varying textures for scrubbing and buffing.
Noise level: Cleaning cycles are typically quiet, but consider a unit that won’t disrupt a laundry room near bedrooms. Manual brushing and wiping are silent until friction increases, which helps in planning a quieter maintenance session.
Energy efficiency: Vinegar cleaning is a low-energy activity; rely on hot water cycles only if your machine and manual permit. Avoid running extra cycles; instead, use shorter, targeted cycles for spot cleaning.
Controls: Simple cycles and manual settings are ideal for maintenance. Ensure spray bottles and brushes are compatible with your routine and are easy to store near the washer.
Placement: Store tools near the washer for quick access. A small, moisture-resistant caddy helps keep the spray bottle, tub brush, and cloths organized and ready for use.
When comparing options, consider whether a kit includes a tub cleaning brush, a dedicated spray bottle for vinegar cleaning, and a microfiber cloth set, as these items are central to the workflow described above. Look for durable materials and good grip designs to ensure long-term usability. If replacing parts is necessary, prioritize items that fit most front- or top-loading washers and are easy to clean after use.
Leave a Reply