How to Clean Walls After Construction
Construction projects often leave fine dust, smudges, and stubborn patches on walls. A careful, systematic approach helps restore a crisp, clean surface without damaging paint or wallpaper. This guide walks through practical steps, the right tools, and best practices for American homes.
Whether you’re tidying up after a full remodel or a quick drywall touch-up, following proven methods makes the job efficient and safe. The process differs slightly based on wall finish, so adapt the steps to your specific walls and dust level.
Quick Answer
Start with a dry dusting to remove loose debris, then wipe with a damp microfiber cloth or sponge. For stubborn spots, use a wall scraper tool or putty knife gently, followed by a light sanding if needed. Finish with a microfiber dust mop to capture fine dust from ceilings and walls. Always test cleaning on a small, inconspicuous area first.
What You’ll Need
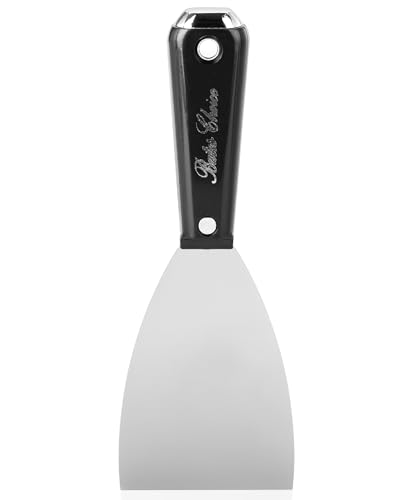
- Wall scraper tool 3-inch blade putty knife drywall scraper
- 6 inch drywall sanding sponge block for dust removal
- Microfiber dust mop with extension wand for walls ceilings


Before You Start
Clear the room or cover furniture and floors with drop cloths. Use a stable ladder or step stool if you need to reach high areas. Protect airways by wearing a mask if dust levels are high. Avoid wetting freshly painted surfaces beyond recommended drying times, as excess moisture can damage paint. Time estimates vary with room size and dust amount, but plan for 1–2 hours for a standard room and more for larger spaces.
Step-By-Step: How To Clean Walls After Construction
- Remove loose dust with a dry microfiber cloth or soft brush attachment.
- Dust ceilings first to prevent downward dust fall during wall cleaning.
- Use a wall scraper tool with a light scraping motion on smudges or dried streaks, taking care not to gouge the finish.
- For stubborn spots, apply a small amount of mild cleaner on a damp sponge and gently rub in a circular motion.
- Rinse the sponge frequently and change cleaning solution as needed to avoid spreading grime.
- Wipe walls with a clean, damp microfiber cloth to remove any cleaner residue.
- For textured or stubborn areas, use a 6 inch drywall sanding sponge block lightly to remove remaining dust and stains, then brush away dust again.
- Finish by running the microfiber dust mop along corners and ceiling edges to capture fine particles.
Troubleshooting
| Symptom | Likely Cause | Fix | Prevention |
|---|---|---|---|
| Streaks appear after cleaning | Residual cleaner or uneven moisture | Wipe with a dry microfiber cloth to remove moisture, then re-wipe with a clean damp cloth | Use a lightly damp cloth and work in sections |
| Paint lifts or peels whenScrubbing | Fresh paint or poor adhesion | Stop cleaning that area; consult a painter for touch‑ups after drying | Test in a hidden spot first |
| Dust resettles quickly | Drying air is too still | Increase ventilation or use a dehumidifier while cleaning | Open windows or turn on exhaust fan |
| Scratches from scraper | Blade pressure too high | Use a lighter touch or switch to a finer blade | Keep blade at a shallow angle |
Common Mistakes
- Using too much moisture on glossy or painted surfaces
- Over-scrubbing delicate finishes or wallpaper
- Avoiding test spots and assuming all walls react the same
- Skipping room-wide dusting before cleaning wall surfaces
Tips For Best Results
- Work from top to bottom to prevent recontamination of cleaned areas.
- Keep cleaning tools clean; wash or replace rags and sponges as they become dirty.
- Choose microfiber tools for their high absorbency and lint-free performance.
- Replace or sharpen blades on scrapers once they dull to avoid gouges.
- Test any cleaner on an inconspicuous area before full use.
Call A Professional
Consider contacting a pro if there are signs of wallpaper issues, extensive stain penetration, or water damage after construction. Stop cleaning and seek expert input if you see bubbling, paint cracking, or persistent odors that suggest moisture intrusion or unfinished drywall work.
FAQ
Can I use household cleaners on all wall types?
Most walls respond well to mild detergents and water, but check paint or wallpaper labels and avoid harsh chemicals on delicate surfaces.
Is it safe to use a scraper on painted walls?
Only with a very light touch and on non-porous areas; excessive scraping can remove paint or damage the surface.
What’s the best order for cleaning walls and ceilings?
Dust ceilings first, then walls, to prevent dust from settling on freshly cleaned surfaces.
When should I repaint after cleaning?
Repaint only after walls are completely dry and any repairs have cured; otherwise, cleaning can interfere with adhesion.
Do I need special equipment for textured walls?
Textured walls can trap more dust; use a soft brush or microfiber tool and consider a light damp wipe followed by dry brushing to avoid damaging texture.
How long does this process typically take?
Small rooms may take 1–2 hours; larger spaces can require several hours, depending on dust and stains.
Buying Guide
When selecting tools and supplies for cleaning walls after construction, consider size, durability, and compatibility with wall finishes. A quick comparison helps identify the right set for most households.
- Wall scraper tool: A 3-inch blade offers precision for small imperfections without damaging paint. Look for a comfortable handle and replaceable blades.
- Drywall sanding sponge block: A 6-inch block provides efficient dust removal on flat surfaces and edges; choose a sponge with a soft, non-damaging abrasive.
- Microfiber dust mop with extension wand: Extends reach to ceilings and high walls; pick a mop with a washable microfiber head and adjustable wand length.
Key buying factors include size, noise level, energy efficiency (for powered tools like vacuums used during cleaning), controls, and placement in storage. Consider room layout, ceiling height, and wall finishes to choose tools that minimize risk while delivering clean, even results. If you frequently tackle post-construction cleanup, investing in quality, durable tools saves time and reduces effort over repeated projects.
Leave a Reply