How to Clean a Tub With Baking Soda and Vinegar
Clean, deodorize, and brighten a bathroom tub using common kitchen ingredients alongside practical tools. This guide outlines a simple, effective method that minimizes harsh chemicals while delivering noticeable results. Readers will learn step-by-step techniques, safety tips, and troubleshooting to keep a tub looking fresh.
Quick Answer
Sprinkle baking soda over wet tub surfaces, spray a solution of vinegar, let fizz for a few minutes, scrub with a long-handled brush, wipe with a melamine sponge, and rinse. Repeat as needed for stubborn stains.
What You’ll Need
- 32 oz spray bottle adjustable nozzle for cleaning
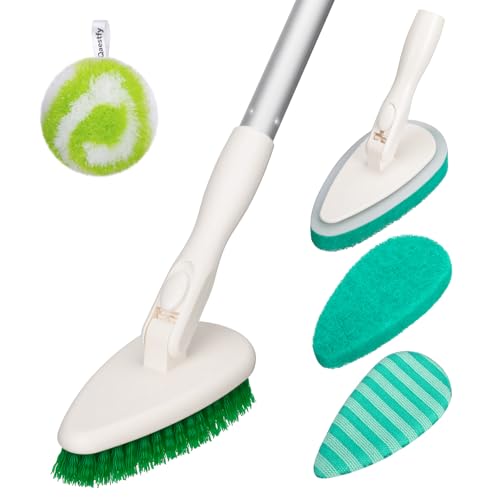
- Bathroom tub scrub brush with long handle stiff bristles
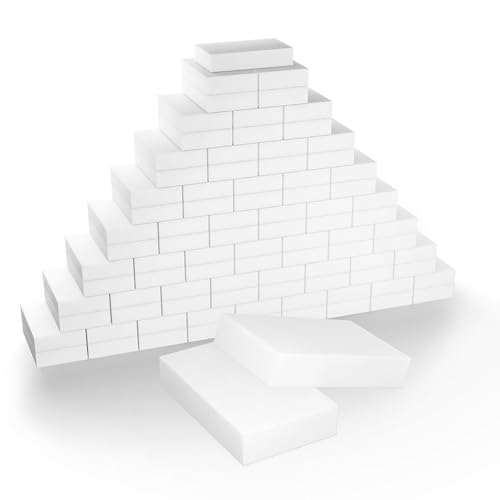
- Melamine sponge magic eraser for bathtub cleaning

Before You Start
Prepare the area by removing personal items and ensuring good ventilation. Mix a simple cleaning plan with natural ingredients to minimize residue. Test a small, inconspicuous patch first to ensure the finish won’t be damaged. Time estimates: about 20–40 minutes for standard tubs; longer for heavy buildup. Avoid applying vinegar on marble or stone surfaces, and never mix vinegar with bleach.
Step-By-Step: How To Clean A Tub With Baking Soda And Vinegar
- Remove all bath toys, bottles, and liners. Wet the tub thoroughly with warm water to help the baking soda stick.
- Sprinkle baking soda generously across all stained or film-prone areas. Focus on corners, drain surrounds, and any discolored patches.
- Fill the spray bottle with equal parts white vinegar and water, or keep pure vinegar in the bottle for a stronger fizz. Spray the vinegar over the baking soda to start the reaction.
- Allow the fizzing action to sit for 5–10 minutes. This helps lift soap scum and mildew biofilm from the surface.
- Use the bathroom tub scrub brush with long handle stiff bristles to scrub the tub in circular motions, paying attention to grout lines and the drain area. Let the bristles reach tight spots that a sponge can’t reach.
- For stubborn stains, reapply a small amount of baking soda, then scrub again. If needed, dampen the scrub brush to maintain grip and reduce scratching.
- Rinse the tub thoroughly with warm water. Use a handheld spray or rinse aids to remove all residue; residual baking soda can leave a powdery film if not rinsed completely.
- Finish with a light wipe using a melamine sponge magic eraser for any remaining scuffs or soap scum on flat surfaces. Rinse again and dry with a clean towel to prevent water spots.
Troubleshooting
| Symptom | Likely Cause | Fix | Prevention |
|---|---|---|---|
| Stubborn yellow/brown stains | Mineral buildup or body oils | Reapply baking soda and scrub twice | Regular cleaning after heavy use |
| Faint odor after cleaning | Soap residue or mildew | Rinse thoroughly; wipe dry | Ventilate during and after cleaning |
| Discoloration on glossy surfaces | Harsh scrubbing or incompatible cleaner | Reduce pressure; switch to gentler scrub | Test area first; avoid metal or abrasive tools |
| Residue left after rinse | Incomplete rinse or thick film | Rinse with hot water longer; wipe with sponge | Rinse in stages, especially corners |
Common Mistakes To Avoid
- Using bleach with vinegar or ammonia-close products—create dangerous fumes.
- Over-scrubbing delicate surfaces—can scratch enamel or acrylic tubs.
- Skipping a final rinse—baking soda residue can dull the surface over time.
- Neglecting ventilation—strong cleaning fumes can irritate eyes and lungs.
Tips For Best Results
- Warm water enhances cleaning action; start with warm water for better soap scum removal.
- Apply baking soda before vinegar to maximize fizz and lift stains.
- Use a long-handled scrub brush to reduce bending and improve reach in the tub’s corners.
- Dry the surface after cleaning to prevent mineral deposits and water spots.
- For additional whitening, consider a paste of baking soda and water on dull areas, let sit briefly, then rinse.
Call A Professional
Consider contacting a professional if the tub has persistent, deep-set staining, extensive hard water damage, or if you notice peeling enamel or structural concerns. Seek an expert when DIY methods fail to remove tough grime or when the tub’s finish appears degraded.
FAQ
Can I use baking soda and vinegar on all tub surfaces?
They work well on porcelain and standard acrylic tubs but avoid marble, granite, or stone surfaces where acidity may etch or dull the finish.
Is this method effective for mildew on the grout?
Yes, especially when combined with a stiff-bristle brush and a thorough rinse. For persistent mildew, a diluted hydrogen peroxide solution can be used with caution.
How often should I clean the tub with this method?
Weekly maintenance keeps buildup manageable; a deeper clean every 1–2 weeks helps maintain a bright finish.
Can I replace vinegar with another cleaner?
Vinegar is a key component for fizz and grease-cutting power. If vinegar is not preferred, a mild dish soap with baking soda can be used, though results may vary.
Buying Guide
When choosing tools for cleaning a tub with baking soda and vinegar, consider size, ergonomics, and durability. A versatile kit makes routine maintenance easier and more enjoyable.
- <bSize and grip: Select a spray bottle with an adjustable nozzle that is easy to grip and operate with one hand. A 32 oz capacity is common for home use and reduces refills.
- <bNozzle control: An adjustable spray pattern helps target corners and drains, saving time during rinsing.
- <bBrush features: A bathroom tub scrub brush with a long handle and stiff bristles reaches high and tight areas while protecting hands from heat and grime.
- <bSurface safety: Use non-abrasive melamine sponges for light scuff removal; reserve tougher scrubbing for areas with heavy buildup.
- <bEfficient setup: Keep the cleaning spray bottle pre-filled with vinegar-and-water for quick touch-ups, and store baking soda in a labeled container nearby.
Performance factors to weigh include noise level during use, energy efficiency in water heating for rinsing, and placement in the cleaning area to minimize spills. For homes with multiple bathrooms, a shared storage caddy keeps tools organized. Do you prefer a compact kit or a full setup with extra brushes? The right combination reduces effort and increases consistency in tub hygiene.
Leave a Reply