How to Clean SLR Mirror: Safe Cleaning Guide
Maintaining a clean SLR mirror is essential for preserving image quality and minimizing nuisance reflections during shoots. This guide explains a careful, step‑by‑step approach to cleaning the mirror without damaging camera internals. It focuses on using proper tools and safe techniques suitable for most DSLR/SLR systems commonly used by amateurs and enthusiasts in the United States.
Readers should approach mirror cleaning with patience and precision. When in doubt, consult the camera manufacturer’s guidelines or seek professional service to avoid unintended damage. The goal is to remove dust and smudges while preserving the mirror’s delicate surface and the surrounding sensor area.
Quick Answer
Best initial step: use a low‑pressure air blower to dislodge loose dust, then proceed with precision cleaning swabs only if smudges persist. Never rub hard or use household cleaners near the mirror. Work in a clean, dust‑free area and handle parts with care.
What You’ll Need
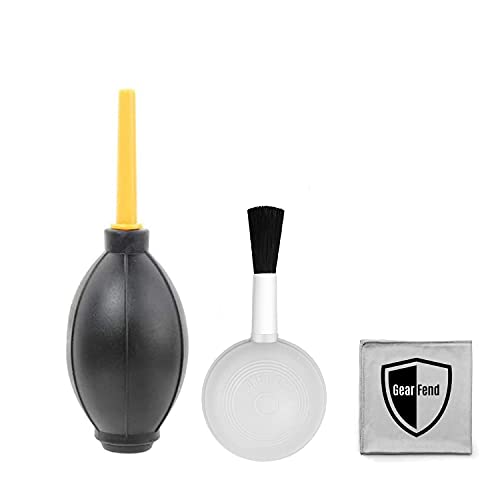
- DSLR/SLR mirror cleaning kit with blower and microfiber swabs
- Camera mirror cleaning swabs 5mm cotton-tipped with isopropyl alcohol
- Air blower for camera lens anti-static cleaning brush microfiber cloth


Before You Start
Prepare a clean, static‑free workspace with good lighting. Turn off the camera and remove the battery to avoid any accidental activation. Use a soft, lint‑free surface for the camera body and avoid touching the mirror with bare hands. Avoid touching the mirror directly with fingers or rough materials, as oils can cause lasting smudges. If the camera has been recently exposed to rain or moisture, allow it to dry completely before attempting any cleaning.
Time estimate: 10–20 minutes for a careful cleaning session. If the mirror shows persistent smudges after initial cleaning, consider professional servicing to prevent damage to the mirror or housing integrity.
Step‑By‑Step: How To Clean SLR Mirror
- Remove the lens and ensure the camera is powered off. Open the mirror box gently only as needed to access the mirror area without forcing components.
- Use the air blower to dislodge loose dust from the mirror housing and adjacent surfaces. Keep the nozzle at a safe distance and avoid direct contact with the mirror itself.
- Inspect the mirror under bright light. If dust remains, switch to a microfiber cleaning swab on a light, even stroke—never scrub vigorously.
- Lightly dampen a 5mm cotton‑tipped swab with isopropyl alcohol as recommended by the product instructions. Avoid over‑saturation, which can run or wick into seams.
- Gently wipe the mirror’s surface with the dampened swab using a single direction. Do not circle or apply heavy pressure that could scratch or dislodge coatings.
- Allow any residual moisture to evaporate completely before closing the mirror box or reassembling the camera. If needed, use a dry microfiber cloth to remove any remaining moisture at the periphery.
- Recheck the mirror with a bright light. If smudges persist, repeat the light, careful wipe with a fresh swab. Avoid multiple passes that may grind residue into the coating.
- Reinstall the lens, reattach the battery, and power on to verify normal operation. Take a test shot of a neutral target to confirm the absence of reflections or smudges in the final image.
Troubleshooting
| Symptom | Likely Cause | Fix | Prevention |
|---|---|---|---|
| Dust reappears after cleaning | Loose particles re‑settling in the mirror box | Re‑blow the area before re‑cleaning | Keep camera closed when not in use; store with cap on |
| Streaks or residue on mirror | Over‑saturated swab or moisture | Use a fresh swab and ensure swab is only lightly damp | Use high‑quality alcohol and minimal liquid |
| No improvement after cleaning | Coatings or sensor issues beyond surface dust | Cease cleaning; seek professional service | Regular maintenance schedule with professional checks |
| Mirror coating appears scratched | Rough cleaning tool or forceful wipe | Stop cleaning immediately; replace tools with gentler options | Use dedicated cleaning materials only |
Common Mistakes
- Using household cleaners or water on the mirror area
- Wiping with a dry, abrasive cloth or paper towels
- Applying too much pressure with swabs or brushes
- Cleaning while the camera is hot or in a humid environment
- Neglecting to power off and remove the battery before cleaning
Tips For Best Results
- Work in a low‑dust room or studio to minimize airborne particles
- Follow a consistent pattern: blower first, then gentle damp wipe if needed
- Keep a dedicated, clean set of cleaning tools for camera care only
- Label or store spare swabs and alcohol properly to avoid contamination
- After cleaning, perform a test shot of a plain gray target to verify image cleanliness
Call A Professional
Consider professional service if:
- The mirror shows persistent smudges despite careful cleaning
- There are signs of coating wear, damage, or unusual image defects
- Moisture or liquid intrusion is suspected inside the camera body
- Uncertainty about the proper cleaning materials or methods remains
When in doubt about the safety of cleaning steps or tool compatibility, contacting an authorized service center is a prudent choice to protect your investment.
FAQ
What is the safest way to remove dust from an SLR mirror?
The safest method starts with a gentle air blower to dislodge particles, followed by a light, dampened cleaning swab if needed.
Can I use regular isopropyl alcohol to clean the mirror?
Use a small amount of isopropyl alcohol as directed by your cleaning kit, and avoid over‑saturation to prevent liquid from seeping into the housing.
Do I need to remove the mirror to clean it?
Most cleaning can be done without fully removing the mirror; follow the camera’s manual and exercise caution near the mirror box.
What if the mirror coatings look damaged after cleaning?
Stop cleaning and consult a professional technician to assess coating integrity and potential corrective action.
Buying Guide
When choosing cleaning supplies for an SLR mirror, consider several factors to match your camera model and maintenance habits:
- Size and compatibility: Ensure cleaning swabs and tools fit your mirror chamber dimensions and are designed for DSLR/SLR systems.
- Noise level: A quiet air blower helps maintain a calm workspace without dispersing dust further.
- Energy efficiency: Manual air blowers and compact cleaning kits consume minimal power; battery‑free operation is common for blowers.
- Controls and usability: Look for ergonomic handles, stable swabs, and clear instructions that reduce the risk of mistakes.
- Placement and storage: Use a clean, dedicated drawer or case to prevent contamination; store alcohol and swabs sealed and away from heat.
For a balanced setup, many photographers opt for a DSLR/SLR mirror cleaning kit with blower and microfiber swabs along with Camera mirror cleaning swabs 5mm cotton-tipped with isopropyl alcohol and an Air blower for camera lens anti-static cleaning brush microfiber cloth to address a range of dust and smudge scenarios. This combination provides a practical, safe baseline for regular maintenance and occasional touch‑ups.
Leave a Reply