How to Clean a Rocket Vacuum Filter
Rocket vacuum cleaners rely on a clean filter to maintain suction and performance. Regular maintenance helps extend the life of the motor and preserves air quality in your home. This guide walks American users through a practical, step-by-step process to clean and replace Rocket vacuum filters safely and effectively.
Quick Answer
Detach the vacuum from power, remove the filter, rinse or replace as directed by your model, let it dry completely, reassemble, and test. Use a dedicated cleaning brush for stubborn debris and replace the filter if it shows tears, persistent odors, or reduced suction after cleaning.
What You’ll Need
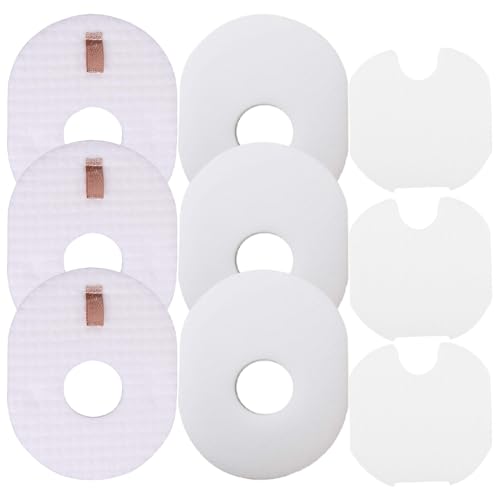
- Rocket vacuum cleaner replacement HEPA filter
- Rocket vacuum cleaner filter cleaning brush
- Rocket vacuum maintenance kit replacement filter


Before You Start
Turn off and unplug the vacuum before any maintenance. Check your model’s user manual for filter type and cleaning instructions, as some Rocket models are designed for wet/dry cleaning or only dry brushing. Wear gloves to protect hands from dust and avoid damp rooms that may promote mold growth if filters are not fully dry. Allow ample time for the filter to dry completely in a well-ventilated area before reassembly. Anticipate a 15–45 minute cycle depending on the filter type and room conditions.
Step-By-Step: How To Clean Rocket Vacuum Filter
- Unplug the vacuum and remove the dust cup or bin to access the filter housing.
- Open the filter cover and carefully extract the filter; note its orientation for reassembly.
- Tap or brush off loose dust with the Rocket filter cleaning brush to avoid grinding debris into the fibers.
- If the filter is paper-like or labeled as washable, rinse it under lukewarm water until clear. Do not use hot water, bleach, or detergents unless specified by the manual.
- For stubborn debris, rinse from the clean side outward, swirling gently. Use the brush again to dislodge any remaining particles.
- Shake out excess water and let the filter air-dry completely in a shade-filled area with good airflow. Do not use heat sources to speed drying.
- Inspect the filter for tears or significant wear; if damaged, replace with a Rocket replacement filter from the maintenance kit.
- Reinsert the dry filter, ensuring it seats properly in its housing according to the orientation marks.
- Reattach the dust cup and secure the housing lid. Plug in and run the vacuum on a low setting to confirm proper airflow.
- Schedule routine maintenance based on usage—high-traffic homes may require monthly checks, while lighter use can be every few months.
- Store spare filters in a cool, dry place to prevent moisture exposure before next use.
- Consider using a filter cleaning brush after every few uses to extend filter life and maintain suction performance.
Troubleshooting
| Symptom | Likely Cause | Fix | Prevention |
|---|---|---|---|
| Loss of suction after cleaning | Clogged or damaged filter | Replace with Rocket replacement filter if torn; ensure filter is fully dry before reuse | Regular inspect and clean; avoid damp storage |
| Strange odor after vacuuming | Dirty or moldy filter | Thoroughly clean or replace; consider additional deodorizing steps | Dry filters completely; replace per maintenance schedule |
| Vacuum over heats | Restricted airflow | Clean or replace the filter; check for blockages in the hose or bin | Routine maintenance to prevent buildup |
| Filter won’t fit back in housing | Wrong orientation or damaged filter | Re-check orientation and seating; replace if warped | Handle filters gently during removal and replacement |
Common Mistakes
- Using hot water or detergents on washable filters unless specified
- Removing filters too aggressively and causing tears
- Not allowing filters to dry completely before reassembly
- Ignoring signs of wear, such as fading colors or holes
By avoiding these missteps, maintenance becomes straightforward and effective, preserving performance and extending filter life.
Tips For Best Results
- Establish a routine: quick monthly checks can prevent major performance drops.
- Label maintenance days on a calendar to stay consistent.
- Keep spare filters on hand to minimize downtime when replacements are needed.
- Store filters in a breathable container to prevent moisture buildup.
- When in doubt, consult the Rocket model-specific guide to determine whether the filter is washable or replaceable.
Call A Professional
Stop and seek professional help if you notice persistent loss of suction despite cleaning, unusual noises, or smoke-like odors. Do not operate a vacuum with a damaged motor or filter system. If you are uncomfortable handling electrical components, contact a certified appliance technician for service and part replacement.
FAQ
How often should I replace the Rocket vacuum filter?
Replacement frequency depends on usage and model; check the manual and inspect for wear or reduced suction as signals to replace.
Can I wash all Rocket filters?
Many filters are washable, but some are disposable. Always follow the model’s instructions to avoid damage.
What should I do if the filter becomes moldy?
Replace it and clean the housing thoroughly. Ensure future drying is complete and consider more frequent maintenance.
Is a replacement filter essential for every cleaning?
Not every cleaning, but regular replacement is recommended when visible wear or reduced performance occurs.
Can I use the filter cleaning brush on the motor vents?
Use the brush only on filters and exterior surfaces as directed; avoid dislodging internal components.
Buying Guide
Choosing the right filter setup for a Rocket vacuum involves a few practical considerations. Start with size and compatibility; verify that the replacement HEPA filter matches your model’s airflow design. Noise level often correlates with airflow and filter condition, so a clean filter may reduce the overall noise during operation. Energy efficiency is linked to consistent suction: keeping filters clean helps the motor run efficiently without overexertion.
Controls and ease of installation also matter: look for filters with simple slide-in designs and clear orientation markers. Placement within the home should consider areas with higher dust, such as living rooms and hallways, and storage should be away from damp spaces. Compare maintenance kits to determine whether you get additional filters, replacement parts, or brushes in one package. Finally, consider how often you use the vacuum: households with pets or high dust levels may benefit from more frequent filter replacements and a robust maintenance kit.
Leave a Reply