How to Clean Resound Hearing Aids: Step-by-Step Guide
Resound hearing aids require regular maintenance to maintain performance and hygiene. This guide provides practical, user-friendly steps to clean and care for Resound devices using common tools and dedicated accessories.
Following proper cleaning routines can extend device life, improve sound quality, and prevent irritation. The process emphasizes simple, repeatable actions you can perform at home with minimal risk.
Quick Answer
Clean daily with a soft brush to remove debris, dry the receiver and microphones, and inspect for wax buildup. Use a dedicated cleaning kit and drying box to prevent moisture, and replace protective domes as needed. Always power off before cleaning and avoid getting moisture inside any electronics.
What You’ll Need
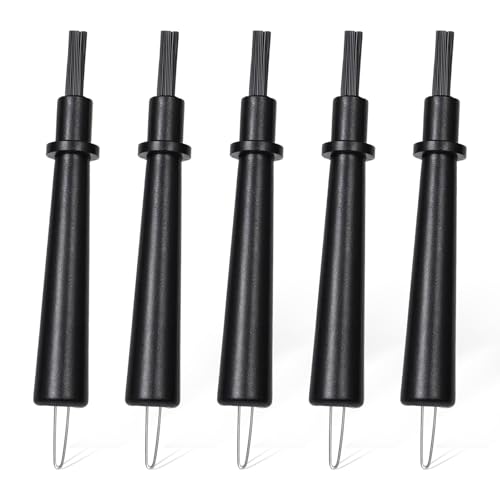
- Hearing aid cleaning kit with brush wax loop and magnet pickup
- Hearing aid drying box dehumidifier silica gel for hearing aids
- Hearing aid wax removal tool and micro brush set


Before You Start
Before cleaning, ensure the hearing aids are turned off and disengaged from any charging accessories. Remove batteries if applicable to reduce risk of short circuits. Work in a well-lit, clean area to prevent losing small parts. Always dry the devices thoroughly after cleaning to prevent moisture buildup inside the delicate components. Typical cleaning sessions take about 5–10 minutes.
Step-By-Step: How To Clean Resound Hearing Aids
- Power off the hearing aids and remove any batteries if they are user-replaceable.
- Gently brush the exterior surfaces with the cleaning kit brush to remove hair, lint, and wax.
- Use the wax loop to carefully extract visible wax from the battery compartment and ear dome opening, moving in a gentle, circular motion.
- Employ the micro brush set to dislodge debris from crevices around the receiver, vents, and micro-mesh areas.
- Wipe the housing with a dry, lint-free cloth to remove moisture and fingerprints.
- Place the hearing aids in the drying box or a dedicated dehumidifier chamber for recommended time to reduce moisture exposure.
- Inspect the microphones and speaker for signs of wax or moisture; repeat cleaning if needed but avoid applying liquids directly to any openings.
- Reinsert batteries or recharge if applicable, and test basic function (volume, program). If performance is reduced, schedule a professional check.
- Store in a protective case or designated drawer when not in use, away from moisture and heat.
- Record your cleaning routine in a simple log to monitor frequency and identify patterns that might indicate an issue.
- Periodically replace cleaning tools as they wear to maintain effectiveness and avoid abrasion of delicate surfaces.
Troubleshooting
| Symptom | Likely Cause | Fix | Prevention |
|---|---|---|---|
| Whistling or weak sound | Wax buildup blocking the sound outlet | Use wax removal tool to clear; inspect dome | Clean daily to prevent accumulation |
| Moisture or fogging | Humidity inside the case | Place in drying box; replace silica gel | Always dry after use and store in ventilated case |
| Feedback or crackling | Debris in microphone or receiver | Carefully brush and use micro brush to remove | Gentle, regular cleaning routine |
| Battery drains quickly | Moisture or damage to battery contacts | Dry thoroughly; replace batteries if poor contact persists | Keep dry and inspect contacts |
Common Mistakes
- Using liquids directly on the hearing aid or near the openings
- Forcing wax removal tools into tight spaces
- Neglecting to dry devices after cleaning
- Ignoring signs of moisture or corrosion on battery contacts
Tips For Best Results
- Clean at the same time each day to form a routine and prevent buildup.
- Use the full cleaning kit including wax loop and micro brushes for precision removal.
- Keep the drying box nearby and use silica gel as directed to reduce humidity exposure.
- Inspect domes and receivers regularly and replace worn parts promptly.
- Store hearing aids in a soft case when traveling to minimize damage.
Call A Professional
Contact a hearing care professional if you notice persistent audio issues, visible corrosion, or unusual battery drain after cleaning. Schedule routine maintenance as recommended by the manufacturer, especially if your devices are older or have continued moisture problems. Seek urgent help if there is any sign of denting, cracking, or severe moisture after attempting at-home cleaning.
FAQ
How often should I clean my Resound hearing aids?
Clean daily or after each use, focusing on the microphone and receiver areas to prevent wax buildup.
Can I use a hair dryer to dry my hearing aids?
Avoid direct heat. Use a dedicated drying box or silica gel from a hearing aid dehumidifier designed for hearing aids.
What should I do if there is persistent moisture?
Place them in the drying box immediately and consult a professional if moisture recurs frequently.
Are cleaning kits universal for all hearing aids?
Most kits are designed for general use; check compatibility with Resound models and follow manufacturer guidance.
Buying Guide
When selecting cleaning and care accessories for Resound hearing aids, consider factors such as size and compatibility with your model, noise level of any device-assisted cleaners, energy efficiency of the drying box, and control simplicity. Look for a kit that includes a brush, wax loop, and micro brushes for thorough cleaning, plus a reliable drying box or dehumidifier with silica gel to minimize moisture exposure. Assess whether tools are designed to prevent damage to delicate components and if replacement parts are readily available. A well-rounded kit supports ongoing maintenance, improves device longevity, and sustains comfort and performance in daily use.
Leave a Reply