How to Clean a Razor Handle
Keeping a razor handle clean is essential for hygiene and performance. Built-up soap scum, hair, and mineral deposits can dull the grip and transfer bacteria. This guide provides clear steps and practical tips to restore and maintain a razor handle using common cleaning tools and dedicated kits.
Quick Answer
Rinse the handle with warm water, use a soft brush or dedicated cleaning kit to remove residues, soak if needed, dry thoroughly, and reassemble. Regular light cleaning after shaving prevents buildup and extends handle life.
What You’ll Need
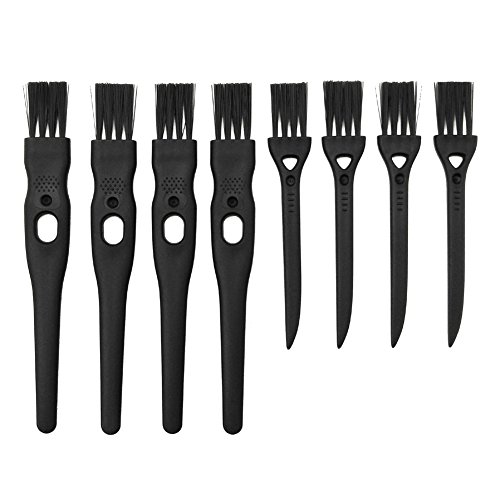
- Razor handle cleaning brush
- Safety razor cleaning kit
- Shaver cleaning brush and stand


Before You Start
Before cleaning, unplug or power down any electronic shavers and remove the blade cartridge where applicable. Work in a well-lit area and place a towel or mat to catch drips. Take care with sharp blades and avoid soaking metal components too long to prevent corrosion. A quick-soak can loosen stubborn deposits, but prolonged exposure to water may affect finish on some handles. Plan for a 5–15 minute cleaning session depending on buildup.
Step-By-Step: How To Clean A Razor Handle
- Detach any removable parts per the manufacturer’s guidance and set blades aside safely.
- Rinse the handle under warm running water to remove loose hair and soap residue.
- Use a razor handle cleaning brush to scrub the surface, paying attention to grooves or knurling where grime collects.
- If mineral buildup is visible, mix a gentle cleaning solution (soap and water) or use the safety razor cleaning kit contents as directed and soak the handle briefly.
- Rinse again to flush out loosened particles, then dry with a clean microfiber cloth to prevent water spots.
- For stubborn stains, apply a small amount of isopropyl alcohol on a cloth and wipe the surface, then rinse and dry thoroughly.
- Reassemble the razor if all parts are completely dry, and place the unit on a shaver cleaning brush and stand to keep it elevated and dry between uses.
- Inspect for any remaining residue. If necessary, repeat the gentle brushing and drying steps until the handle looks clean and feels dry to the touch.
- Store in a dry, ventilated area. Consider a dedicated stand or hook to prevent moisture accumulation and keep the handle accessible for your next shave.
- Schedule regular maintenance, such as a quick weekly wipe-down and monthly thorough cleaning, to preserve finish and grip.
Troubleshooting
| Symptom | Likely Cause | Fix | Prevention |
|---|---|---|---|
| Residue remains after cleaning | Thick soap film or mineral deposits | Soak longer in mild cleaner, then scrub with brush | Rinse after each use; dry thoroughly |
| Rough texture after cleaning | Friction from abrasive residues | Rinse well and wipe with a soft cloth; re-inspect | Use gentle brushes and avoid harsh cleaners |
| Finish fading or staining | Frequent submersion or chemical exposure | Limit exposure; use mild cleaners; dry completely | Store away from moisture; use stand to keep dry |
| Loose parts after cleaning | Improper reassembly or worn threads | Check fit and reseat firmly; replace worn components | Follow manufacturer guidelines for reassembly |
Common Mistakes
- Using abrasive cleaners or scouring pads that scratch the handle finish
- Leaving the handle soaking for long periods, which can damage some metals
- Neglecting to dry the handle completely, leading to rust or corrosion
- Forgetting to remove blades before cleaning, posing a safety risk
Tips For Best Results
- Clean regularly: a quick wipe-down after shaving reduces buildup and simplifies deep cleaning later.
- Choose the right tool: a soft brush designed for razors is gentler on finishes than metal scrubbers.
- Dry thoroughly: moisture breeds corrosion, especially on plated or coated handles.
- Use stands: a dedicated stand improves airflow and prevents water pooling on the handle.
- Label or batch cleanings: keep notes on which cleaning kit or method works best for your handle material.
Call A Professional
Consider professional help if you notice persistent corrosion, loosening parts, or finish damage that affects grip and usability. Seek a professional if the handle develops cracks or if the finish peels, as this can compromise safety and performance.
FAQ
Can I use household cleaners on my razor handle?
Yes, but opt for mild soap and water or a purpose-made cleaning kit to protect finishes and coatings.
Is it safe to soak the handle?
Soaking is acceptable for some materials, but avoid prolonged immersion for metal finishes that may corrode.
How often should I clean my razor handle?
Clean after every few uses with a quick rinse and dry; perform a deeper clean monthly or whenever buildup is visible.
What if the blade and handle are separate?
Clean the handle as described, and clean or replace blades separately according to manufacturer instructions.
Buying Guide
Choosing the right accessories for razor handle maintenance involves several factors. Consider size and weight to match your grip preference and shaving style. Material and finish affect durability and cleaning compatibility, so select a handle with a finish that resists tarnish or corrosion. Look for a cleaning kit that includes the appropriate brushes and cleaners designed for your razor type, whether safety razor, cartridge, or straight razor. A dedicated stand or brush holder helps keep the handle dry and accessible. Evaluate noise level and ease of use if you prefer silent or quick-clean options, and ensure the kit contents align with your storage space and routine. Finally, consider placement: a ventilated, dry area away from water leaks or humidity ensures long-term upkeep and hygiene.
Leave a Reply