How to Clean Plastic Windows: A Practical Step-by-Step Guide
Plastic windows, including PVC casements and acrylic panes, require a careful cleaning approach to maintain clarity and prevent scratches. This guide walks American homeowners through safe, effective methods using common tools and inexpensive supplies.
With the right technique, you can restore shine, remove buildup from fingerprints and pollution, and extend the life of plastic windows without harsh chemicals. The steps focus on gentle scrubbing, proper drying, and routine maintenance to keep windows looking clear year-round.
Quick Answer
Start with a gentle cleaning solution, use a non-scratch microfiber cloth, and finish with a soft squeegee for a streak-free finish. Avoid abrasive pads and ammonia-based cleaners which can dull plastic surfaces. Clean from top to bottom and dry promptly to prevent water spots.
What You’ll Need
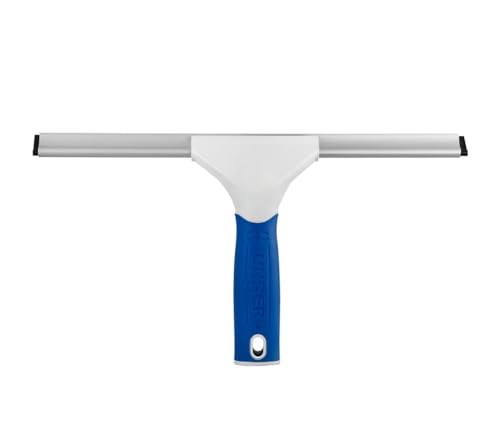
- Extendable window squeegee 12 inch for plastic windows — reaches high or hard-to-reach panes
- Non-scratch microfiber cleaning cloths for plastic windows 12 pack — gentle on surfaces, trap dirt
- Plastic window cleaning kit with squeegee and scrub sponge — all-in-one convenience
- Warm water
- mild liquid dish soap or a dedicated plastic-safe cleaner
- Spray bottle
- Soft sponge or cloth for scrubbing
- Optional: White vinegar for mineral deposits


Before You Start
Clear the area around the window and remove any loose debris from the window tracks. Protect nearby surfaces with a damp cloth to catch drips. Test any cleaner on a small inconspicuous area first to confirm no discoloration. Avoid ammonia, bleach, or abrasive cleaners, as these can damage plastic windows and trims. Plan for a quiet cleaning session, especially on interior windows where occupants are nearby. Time estimate: 15–30 minutes per window depending on size and grime level.
Step-By-Step: How To Clean Plastic Windows
- Prepare your cleaning solution in a spray bottle: mix a few drops of mild dish soap with warm water. For mineral buildup, add a splash of white vinegar.
- Spray the interior and exterior surfaces lightly. Let the solution sit for 30–60 seconds to loosen dirt without drying on the surface.
- Use the non-scratch microfiber cloth to wipe away loosened grime in a circular or vertical motion, starting at the top of the pane and moving down.
- For stubborn spots, use the plastic window cleaning kit scrub sponge with gentle pressure. Avoid scrubbing in a scrubbing pad pattern that could scratch the surface.
- Rinse the cloth or sponge frequently to prevent re-depositing dirt. If using a spray bottle, lightly mist again to rinse the surface.
- Squeegee the window from top to bottom using the Extendable window squeegee 12 inch for plastic windows. Wipe the blade with a clean cloth after each pass to avoid streaks.
- Dry the edges and sill with a microfiber cloth to prevent water spots and mineral deposits. Pay attention to corners where moisture can accumulate.
- Inspect the pane and re-clean any streaked areas. For very glossy plastics, a final wipe with a fresh microfiber cloth often reduces cloudiness.
- Repeat on the other side if both sides are cleanable and accessible. For exterior surfaces, choose a calm, dry day to minimize rapid drying and streaks.
- Store cleaning tools in a dry place after use to extend their life and prevent mildew in the cloths.
- Optional maintenance: once a month, wipe with a vinegar solution (1:1 vinegar to water) to reduce mineral buildup on hard water stained plastic windows.
Troubleshooting
| Symptom | Likely Cause | Fix | Prevention |
|---|---|---|---|
| Streaks after cleaning | Residue left by cleaner or hard water | Switch to a microfiber cloth and a rinse wipe; dry immediately | Use distilled water for rinsing in hard water areas |
| Surface scratches appear | Abrasion from scrub pads or abrasive cleaners | Switch to non-scratch cloths and soft sponges | Avoid abrasive tools and ammonia-based cleaners |
| Cloudy or milky look | Harsh cleaners or old residue | Use mild soap and a thorough rinse | Clean regularly to prevent buildup |
| Stubborn water spots | Minerals from tap water | Wipe with a damp microfiber cloth after drying; wipe again with clean cloth | Dry windows promptly after cleaning |
Common Mistakes
- Using abrasive sponges or scrubbers that scratch plastic surfaces
- Cleaning in direct sunlight, which causes rapid drying and streaks
- Rinsing with hot water that can warp or damage plastic finishes
- Over-wetting cloths, which leads to excessive moisture around frames
Tips For Best Results
- Always work top to bottom to catch drips and prevent re-soiling lower areas
- Keep a dedicated microfiber cloth for each window to avoid cross-contamination of dirt
- If windows are heavily stained, repeat the process in sections rather than over-wetting the entire pane
- Store your extendable squeegee cleaned and dry to prevent rust or mold in joints
- Consider a light daily wipe with a microfiber cloth to maintain clarity between deeper cleanings
Call A Professional
Contact a professional if you notice deep pitting, cracks, or warping in the plastic panes, or if you have double-pane windows with sealed units that show fogging. Do not attempt to disassemble sealed units yourself. Seek expert help for persistent mold, to address structural issues, or if routine cleaning fails to improve visibility.
FAQ
Can I use vinegar on plastic windows?
Yes, a diluted vinegar solution can help remove mineral deposits and soap scum. Use sparingly and rinse well to prevent any residue buildup.
Is it safe to use a squeegee on plastic windows?
Yes, a soft, clean squeegee is safe for most plastic windows when used with light pressure and proper technique.
What cleaners are best for plastic windows?
Plain mild dish soap mixed with warm water or a dedicated plastic-safe cleaner works well. Avoid ammonia-based products and abrasive formulas.
How often should I clean plastic windows?
Clean interior and exterior surfaces every 1–3 months, or more often in dusty or polluted environments.
Should I dry windows after cleaning?
Yes, drying with a microfiber cloth prevents water spots and streaks and protects framing from moisture buildup.
What should I do if there are persistent streaks?
Re-wipe with a fresh microfiber cloth after a light re-wetting, ensuring you rinse away any remaining cleaner residue.
Buying Guide
Choosing the right tools for cleaning plastic windows ensures efficient results and protects the surface. Consider the following factors when shopping for window cleaning gear.
- <bSize and reach: A Extendable window squeegee 12 inch for plastic windows helps access high or wide panes without ladders. Choose a comfortable grip and a blade designed for plastic surfaces.
- <bCleaning cloths: Use Non-scratch microfiber cleaning cloths for plastic windows 12 pack to avoid scratching while lifting grime. A pack ensures you always have a clean cloth handy.
- <bComplete kits: A Plastic window cleaning kit with squeegee and scrub sponge provides integrated tools for scrubbing, rinsing, and drying, streamlining the process.
- <bSolvent-free cleaners: Opt for mild, plastic-safe cleaners to protect the finish and trim over time.
- <bWater quality: In hard-water areas, distilled water or a vinegar-based rinse can reduce mineral deposits and streaks.
- <bEase of storage: Look for compact kits and microfiber cloths that dry quickly to reduce mildew. A dedicated storage bag can keep tools organized.
- <bNoise and effort: Consider manual tools with smooth operation; extendable handles minimize bending and improve efficiency without motorized options.
When comparing options, evaluate how each product delivers on surface protection, ease of use, and cleaning effectiveness. If you have multiple windows of different sizes, a versatile kit combined with high-quality microfiber cloths often offers the best value for a clean, streak-free finish.
Leave a Reply