How to Clean Plaster Walls Before Painting: Practical Guide
Preparing plaster walls before painting ensures better adhesion and a crisper, longer-lasting finish. This guide provides a straightforward, practical approach for American homes, covering surfaces, tools, safety, and step-by-step methods to remove dust, grease, and flaking material without damaging the plaster.
Quick Answer
Start with a light dusting using a soft brush, then wash with a sponge and mild detergent. For stubborn grime, use a plaster wall scraper to lift loose material and a spackle knife for small repairs. Finish with a thorough rinse and let the surface dry completely before priming.
What You’ll Need
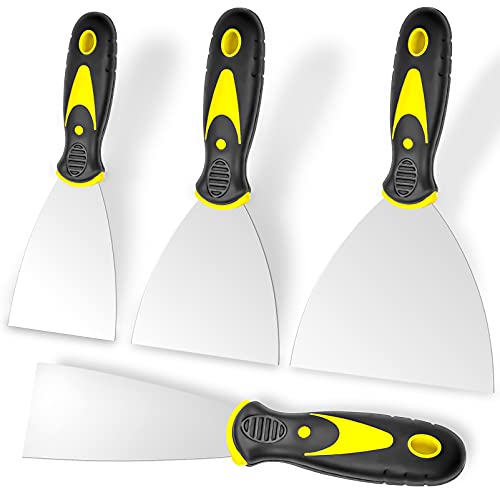
- Plaster wall scraper
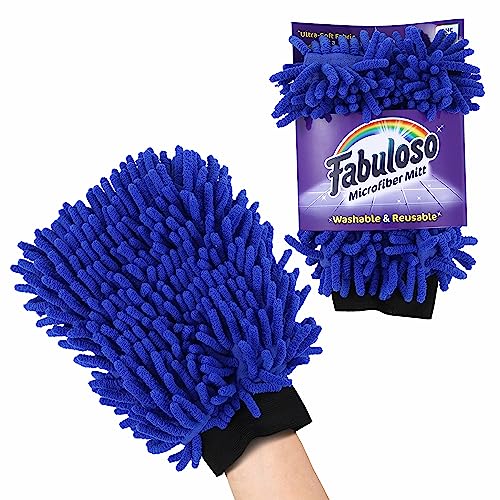
- Microfiber wall cleaning mitt
- Spackle knife for plaster repair
- Soft-bristle brush or microfiber dust cloth
- Mild detergent (non-abrasive)
- Bucket of warm water
- Section brushes for corners
- Painter’s tape and drop cloths
Before You Start
Assess the plaster for cracks, peeling, or hollow spots. Repair major cracks with appropriate plaster or patching compound before cleaning: cleaning won’t fix underlying damage. Protect floors and furniture with drop cloths and remove electrical outlet covers if necessary. Work in a well-ventilated area and test a small, inconspicuous spot with a mild cleaner to ensure no discoloration. Plan for drying time; plaster can take 24–72 hours to dry fully after cleaning or repairs.
Step-By-Step: How To Clean Plaster Walls Before Painting
- Remove loose dust with a soft-bristle brush or microfiber mitt, sweeping in a consistent direction to avoid embedding grit into the surface.
- Inspect for flaking areas. Use a plaster wall scraper to gently lift loose material and a spackle knife for plaster repair to smooth edges, creating a uniform surface.
- Mix a gentle cleaning solution: a few drops of mild detergent per gallon of warm water. Avoid harsh chemicals that can degrade plaster.
- Dip a clean sponge or microfiber mitt into the solution, wring out excess water, and wipe the wall in overlapping sections. Rinse the sponge frequently to prevent spreading grime.
- For stubborn stains, lightly scrub with a microfiber wall cleaning mitt or a soft-bristle brush, using small circular motions. Do not scrub aggressively on damaged areas.
- Rinse each section with a clean sponge dampened with plain water to remove soap residue. Allow the surface to dry completely before proceeding.
- Inspect for remaining imperfections. Refill and sand any repaired areas with a thin layer of patching compound, then re-clean the patched spots.
- Dust and wipe again to ensure a clean, dry surface. Remove any remaining moisture with a dry towel or allow extra drying time in humid environments.
- Apply a stain-blocking primer if the wall has water stains, smoke, or other adhesives. This improves adhesion and prevents future bleed-through.
- Mask surrounding areas with painter’s tape and lay down drop cloths. Ensure the wall is evenly dry and ready for paint.
- Proceed with your chosen primer and paint coat after the wall is fully dry, following manufacturer instructions.
- Clean tools promptly after use to prevent soap buildup on brushes and scrapers, prolonging their life.
Troubleshooting
| Symptom | Likely Cause | Fix | Prevention |
|---|---|---|---|
| Peeling paint after cleaning | Residual moisture or damaged plaster | Ensure complete drying; repair plaster before painting | Test dryness in several spots; use dehumidifier if needed |
| Stains bleed through primer | Water damage or grease | Use stain-blocking primer, repeat cleaning | Address source of moisture; use appropriate primer |
| Breakage or gouges when scraping | Too-aggressive scraping | Light pressure; avoid scraping beyond sound plaster | Repair first; test soft spots gently |
| Soap residue on walls after rinse | Too much soap or insufficient rinse | Rinse with clean water; repeat rinse cycle | Use minimal detergent |
Common Mistakes
- Using harsh cleaners that can corrode plaster
- Over-wetting the wall, causing puffing or flaking
- Skipping repairs before cleaning, leading to future paint failure
- Rushing drying time, especially in humid spaces
- Neglecting corners and edges where grime hides
Addressing these issues helps ensure a uniform finish and long-lasting results without rework.
Tips For Best Results
- Work in small sections to maintain control over cleaning and drying.
- Use microfiber tools to minimize scratching and dust release
- Test cleaners on a hidden area to confirm compatibility with plaster
- Keep a consistent cleaning routine to prevent new grime from settling
- Repair cracks and holes before painting for a smoother final surface
Call A Professional
Consult a pro if plaster shows widespread cracking, hollow sounds under the wall, or repeated flaking after cleaning. Stop work and seek expert evaluation if there is significant structural movement, dampness from leaks, or persistent efflorescence. A licensed contractor can assess subsurface issues and advise appropriate repairs before finishing the project.
FAQ
Is it necessary to remove all dust before painting plaster walls?
Yes. A thorough dust removal helps primer and paint adhere more evenly and reduces texture issues.
Can I use water to clean heavily soiled plaster walls?
Water alone is often insufficient; add a mild detergent and rinse well to prevent residue.
How long should plaster walls dry after cleaning?
Drying time varies, but expect 24–72 hours depending on humidity and ventilation.
Do I need a special primer after cleaning plaster?
A stain-blocking or bonding primer is recommended, especially on repaired or stained surfaces.
Buying Guide
When choosing cleaning tools for plaster walls, consider size, stiffness, and surface sensitivity. For example, a plaster wall scraper should have a comfortable handle and a flexible blade to lift loose plaster without gouging. A microfiber wall cleaning mitt offers gentle scrubbing and effective dust capture, ideal for delicate textures. A spackle knife for plaster repair helps smooth patches before painting. Look for multi-pack options to cover corners and larger sections efficiently. Pair tools with a quality mild detergent and clean water for consistent results.
Leave a Reply