How to Clean Paver Patio Safely and Effectively
Cleaning a paver patio restores its near-new appearance and extends the life of the surface. This guide outlines practical steps using common power washing tools and dedicated patio accessories to remove dirt, algae, and stains without damaging the pavers.
With the right equipment and technique, homeowners can achieve professional-level results at home. The emphasis is on thorough rinsing, careful chemical use, and methodical brushing to prevent moisture intrusion or surface wear.
Quick Answer
For most paver patios, a gas pressure washer around 2600 psi with a surface cleaner is ideal for fast, even cleaning. Pair a paver patio surface cleaner attachment with a stiff nylon brush for stubborn spots, then finish with a gentle rinse and precise re-sealing if needed.
A Quick Look At The Necessary Tools
What you’ll need aligns with common paver cleaning accessories and power washing gear. The following list highlights the core items that should cover most jobs:
- Gas pressure washer 2600 psi surface cleaner for pavers
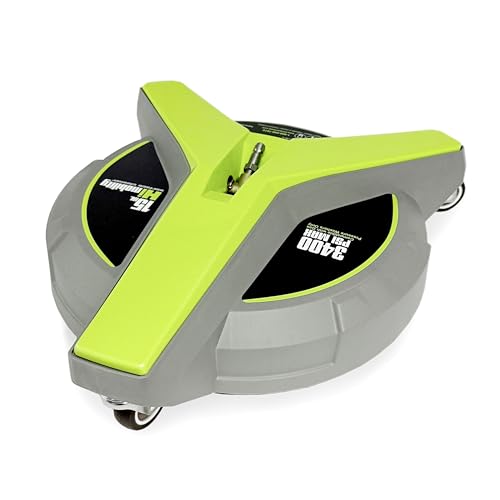
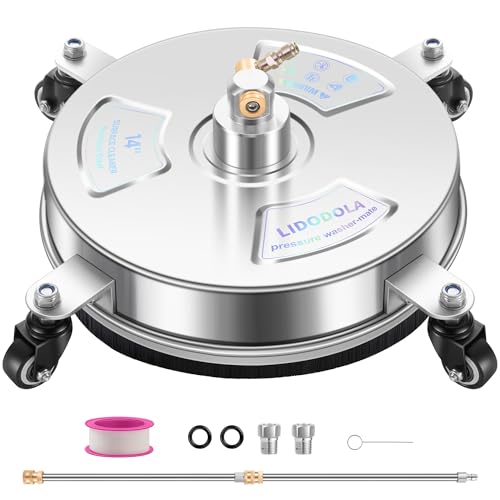
- Paver patio surface cleaner attachment for pressure washer
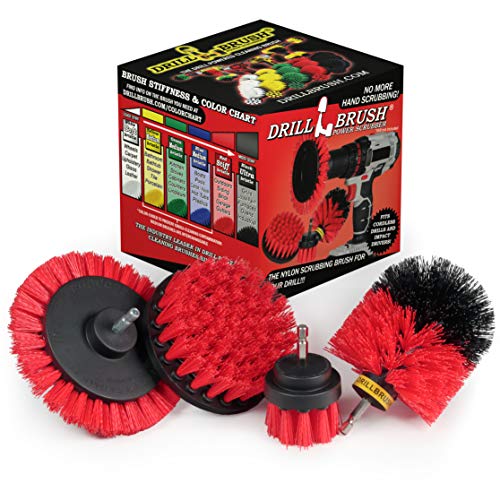
- Stiff nylon patio cleaning brush for pavers
Before You Start
Prepare the area by removing furniture, planters, and decor. Sweep away loose debris and scramble any weeds near the joints. Check your local regulations regarding the use of cleaning solutions and rinse water discharge. Wear eye protection and gloves, and ensure pets and children are kept away from the work zone. Time estimates vary with patio size and stain severity, typically 1–4 hours for a standard 200–400 square foot area, including setup and cleanup.
Important cautions include avoiding high-pressure contact with loose joint sand or delicate edges, which can loosen paver sand and create future settling issues. Use the lowest effective nozzle and maintain a consistent distance from the surface to minimize etching or discoloration.
Step-By-Step: How To Clean Paver Patio
- Inspect the patio for loose joints and reseal if needed before cleaning to prevent dirt infiltration beneath pavers.
- Seal off adjacent landscaping and cover any nearby plants that may be harmed by cleaning solutions or runoff.
- Attach the surface cleaner to the gas pressure washer and connect appropriate hoses. Ensure the machine is on a flat, dry surface before starting.
- Begin with a test area on a small section to gauge cleaning intensity and verify that joints aren’t being damaged.
- Use the surface cleaner to remove surface grime in overlapping, steady passes. Maintain a consistent distance as recommended by the tool’s manufacturer, typically several inches above the paver surface.
- Switch to the stiff nylon patio cleaning brush for stubborn stains or for brushing between pavers after initial cleaning. Reiterate with the surface cleaner if necessary.
- Rinse thoroughly with the pressure washer, directing runoff away from delicate features and toward a suitable drainage area.
- If staining persists, apply a diluted paver-safe cleaner following label instructions, then rinse completely. Avoid harsh bleach or acid-based cleaners on untreated joints unless clearly approved by the manufacturer.
- Allow the surface to dry completely. Inspect for loose sand in the joints and re-sand if needed to restore joint stability.
- Consider applying a compatible paver sealer after cleaning and fully drying to protect against future staining and weathering.
- Clean up tools and store away power equipment safely; wash the surface cleaner and brushes to remove debris for next use.
Troubleshooting
| Symptom | Likely Cause | Fix | Prevention |
|---|---|---|---|
| Pavers look etched or discolored | Too much pressure or contact with delicate edges | Dial down pressure and keep surface cleaner at recommended distance | Test area first; avoid aggressive passes on same spot |
| Gaps between pavers loosen | Jet stream near joints damaged sand | Use gentler passes; re-sand joints after drying | Use proper nozzle and distance |
| Stubborn stains persist after cleaning | Deep-set stains or organic growth | Apply a paver-safe cleaner per label and rinse | Pre-wet area and work in sections |
| Runoff contains debris or soil | Patio slope or inadequate drainage | Adjust cleaning angle to direct runoff away from plants | Plan cleanup with drainage in mind |
Common Mistakes To Avoid
- Overusing pressure at close range, which can erode joints or chip pavers.
- Using acidic cleaners on cementitious pavers or unsealed surfaces.
- Neglecting to rinse thoroughly, leaving residues that attract new dirt.
- Cleaning when the surface is wet or damp, which can lead to uneven results.
Tips For Best Results
- Work in shaded areas to prevent rapid drying and water spotting during cleaning.
- Always test a small area first and adjust the technique based on paver type and stain intensity.
- Follow up with proper joint sand re-filling and a sealer compatible with your paver material for longer-lasting cleanliness.
- Maintain your tools by flushing and cleaning attachments after use to extend their life.
Call A Professional
Stop and call a pro if the pavers are badly cracked, if large areas require stripping sealant, or if the staining involves efflorescence that seems embedded. Signs to seek professional help include persistent algae growth that resists cleaning, or if you notice significant joint instability or paver shifting after pressure washing. A contractor can assess drainage, re-sand joints, and reseal with the correct products and methods.
FAQ
Can I use household bleach to clean pavers?
Bleach can damage sealers and some paver materials. Use a label-approved cleaner designed for pavers and follow safety guidelines.
Is a surface cleaner necessary for paver cleaning?
A surface cleaner improves uniform cleaning and reduces streaks, especially on larger patios. It is optional but highly recommended for efficiency and results.
How soon can I reseal after cleaning?
Wait until the pavers are completely dry, typically 24–48 hours, and verify there is no residual moisture before sealing.
Should I remove old sand before cleaning?
It’s best to inspect joints after cleaning and re-sand if needed. Removing old sand beforehand isn’t usually necessary, but it can help if joints are deeply eroded.
How long does sealing typically last?
Sealer longevity varies by product and climate. Reapplication every 2–5 years is common, depending on wear and exposure.
Buying Guide
Choosing the right cleaning setup for a paver patio involves several factors. Size matters for determining cleaning time and equipment reach. Noise level and energy efficiency are considerations for weekly maintenance, especially in shared spaces. Controls should be straightforward and durable, with easy-start features and clear safety shutoffs. Placement considerations include proximity to vegetation and drainage paths to avoid runoff harming plants or staining surfaces. For the tools listed, evaluate:
- Size and PSI compatibility: A gas pressure washer around 2600 psi is a solid middle-ground for most paver cleaning tasks without risking damage.
- Surface cleaner compatibility: Ensure the attachment is designed for paver surfaces and fits your model securely.
- Brush type and stiffness: A stiff nylon brush complements the surface cleaner by handling ingrained grime between pavers.
- Diet of maintenance: Plan for periodic re-sanding and sealing in addition to cleaning to preserve the look and integrity of the patio.
Thinking about the right combination of tools? For many homeowners, pairing a gas pressure washer 2600 psi surface cleaner for pavers with a paver patio surface cleaner attachment for pressure washer and a stiff nylon patio cleaning brush for pavers provides a balanced, effective kit. This setup allows quick cleaning of broad surfaces, targeted scrubbing for stubborn spots, and careful protection of joints and edges. Consider your patio size, stain severity, and climate when finalizing purchase decisions, and always follow manufacturer guidelines for each tool.
Leave a Reply