How to Clean an OXO Coffee Grinder for Peak Flavor
Regular maintenance is essential to keep the OXO coffee grinder performing at its best. Proper cleaning removes old coffee oils and residue that can affect flavor and grind consistency. This guide provides practical steps, safety tips, and recommended tools to keep an OXO burr grinder clean and efficient.
Quick Answer
Remove the hopper and burr components, brush out loose grounds, and run a cleaning tablet or dry burr brush routine as directed by the manufacturer. Wipe all parts, reassemble, and grind a small amount of plain coffee to verify consistency.
A Quick Look At What You’ll Need
Before you start, gather the tools below. They are chosen to work well with OXO models and to minimize downtime during cleaning.
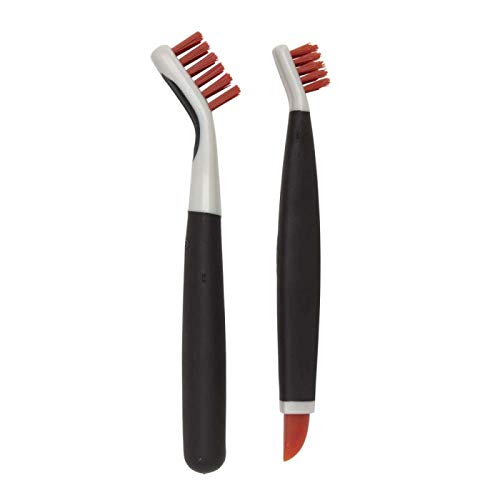
- Oxo coffee grinder cleaning brush – for quick, precise ground removal
- coffee grinder cleaning tablets for Oxo – for internal oil and residue management
- Oxo Burr grinder maintenance kit – comprehensive set for routine upkeep


Before You Start
Read the user manual for model-specific instructions and recommendations. Clear a clean workspace, unplug the grinder, and remove all detachable parts like the hopper and catch tray. Allow cooling if you’ve just finished grinding. Never immerse electrical components in water; wipe with a damp cloth. Set aside time: most cleanings take 15–30 minutes. If you notice inconsistent grind size or unusual noises, stop and recheck parts for wear.
Step-By-Step: How To Clean Oxo Coffee Grinder
- Unplug the grinder and remove the hopper, lid, and bean container.
- Use the Oxo coffee grinder cleaning brush to sweep loose grounds from the burrs and grinding chamber.
- Inspect burrs for oil buildup or clumps; gently brush away any excess with a soft brush.
- Insert a cleaning tablet if recommended by the manufacturer for your model; run the grinder as directed to dissolve residue.
- Discard the cleaning tablet residue and wipe the interior with a dry or slightly damp cloth, avoiding the motor housing.
- Clean the hopper, lid, and catching tray with warm, soapy water; dry completely before reassembly.
- Reassemble the grinder and run a small batch of plain beans to test grind consistency and purge any remaining residue.
- Inspect the grind settings and adjust if needed to restore uniform particle size.
- Perform a final wipe of the exterior and any exposed surfaces to remove fingerprints and dust.
- Document when you last cleaned and schedule the next maintenance interval based on usage.
- Store components in a dry place and ensure all parts are fully dry before use.
Troubleshooting
| Symptom | Likely Cause | Fix | Prevention |
|---|---|---|---|
| Grind size inconsistent | Burrs coated with oils | Clean thoroughly; re-check burr alignment | Clean regularly; avoid grinding oily beans |
| Grinder won’t start | Electrical issue or jam | Unplug, inspect for jams, reseat parts | Keep areas clear of debris; don’t overload |
| Excessive noise | Burrs touching or misalignment | Disassemble, check burrs, reassemble per manual | Gentle brushing; avoid forced grinding |
| Residual smell | Oil buildup inside chamber | Use cleaning tablets or dry run with coffee | Clean after heavy use |
Common Mistakes To Avoid
- Forgetting to unplug the grinder before cleaning
- Using too much water on non-waterproof parts
- Skipping the brushing step and relying solely on wipes
- Ignoring burr alignment after reassembly
- Using regular household cleaners that leave residues
Tips For Best Results
- Schedule a monthly clean for high-usage grinders and quarterly for light use.
- Pair cleaning tablets with a plain-bean purge to reset flavor profiles.
- Keep spare brushes and a small microfiber cloth on hand for quick touch-ups.
- Store components away from moisture and direct sunlight to preserve plastic components.
- Maintain a consistent cleaning routine to extend burr life and flavor fidelity.
Call A Professional
Consider professional service if the grinder shows persistent grinding issues after cleaning, if burrs appear damaged, or if the unit has electrical problems. Stop use and consult an authorized repair center when you notice unusual smells, smoking, or heat buildup during operation.
FAQ
How often should I clean my Oxo grinder?
Clean the grinder every 1–2 weeks during heavy use or monthly for moderate use to maintain flavor and grind consistency.
Can I use water to clean the burrs?
Avoid soaking or submerging the burrs in water; wipe with a damp cloth and dry thoroughly.
Do I need to remove the burrs for cleaning?
Yes, removing burrs as part of a deep clean helps remove oil buildup and maintain accuracy.
What should I do if the grinder still smells after cleaning?
Run a batch of unflavored bulk beans through after cleaning to purge residual scents.
Are cleaning tablets necessary for all Oxo models?
Follow the user manual; some models may rely on dry brushing and periodic maintenance without tablets.
Is it safe to use the maintenance kit for any Oxo model?
Use only the recommended kit for your model to avoid compatibility issues and potential damage.
Buying Guide
When selecting accessories or considering replacements for an OXO grinder, factor in size, noise, energy efficiency, controls, and placement. Size influences whether you need compact models for small kitchens or larger configurations for busy homes. Noise level matters in shared living spaces or early-morning routines. Energy efficiency can reduce running costs during frequent use. Controls such as precise grind settings and programmable intervals improve consistency. Finally, plan placement near a stable counter, away from heat sources and moisture, with easy access to cleaning supplies.
Leave a Reply