How to Clean an Oven Vent Hood Effectively
Cleaning an oven vent hood is essential for maintaining kitchen air quality and ensuring the appliance operates efficiently. Regular maintenance helps prevent grease buildup that can affect ventilation and odor control. This guide presents practical steps using common tools and a degreaser spray that’s suited for vent hoods.
Readers will find a concise, actionable plan that covers preparation, safe methods, and common issues. The focus is on straightforward methods that can be completed without professional help in most homes.
Quick Answer
To clean an oven vent hood efficiently, start by removing the filters and soaking them in warm, soapy water. Apply a kitchen degreaser spray for vent hood to grease-coated surfaces, scrub with either an oven vent hood cleaning brush or an extendable vent hood cleaning brush, rinse, and dry. Reinstall filters and run the fan to circulate air and verify airflow.
What You’ll Need
- Kitchen degreaser spray for vent hood
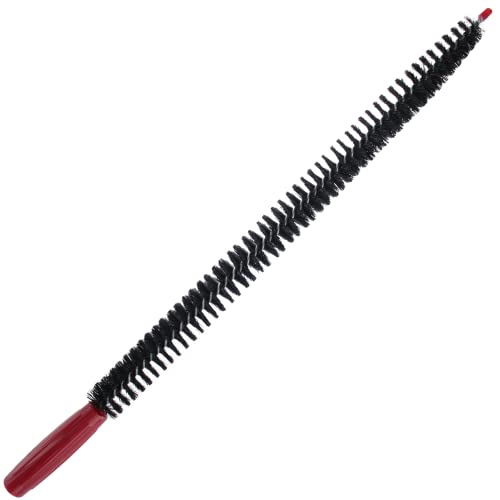
- Oven vent hood cleaning brush
- Extendable vent hood cleaning brush
- Warm water and mild dish soap
- Non-scratch scrub pads or microfiber cloths
- Gloves and safety goggles
- Old towels or drop cloths to protect the area


Before You Start
Safety first: turn off the range and unplug it if accessible. Allow the hood to cool completely before handling. Check the vent hood’s manual for any cleaning restrictions or warranty implications. Protect the surrounding countertop and backsplash with towels to catch drips. Plan for a 30–60 minute cleaning session, depending on grease buildup. Avoid harsh abrasives or metal brushes, which can scratch surfaces or damage filters.
Step-By-Step: How To Clean An Oven Vent Hood
- Remove and soak filters: Take out the grease filters and soak them in warm, soapy water for 10–15 minutes to loosen buildup.
- Prepare cleaning solution: Mix a mild dish soap with warm water or use the kitchen degreaser spray for vent hood as directed by the label for stronger grease.
- Wipe exterior surfaces: Dampen a microfiber cloth and wipe the exterior, focusing on the Grease-prone areas around the fan housing and control panel.
- Scrub with brushes: Use an oven vent hood cleaning brush or an extendable vent hood cleaning brush to scrub crevices, seams, and the underside where grease collects.
- Rinse and dry: Wipe away residue with a clean damp cloth, then dry with a towel to prevent streaks and water spots.
- Clean the filters: After soaking, scrub the filters with a non-scratch pad, rinse thoroughly, and let them air dry completely before reinstalling.
- Reassemble and test: Reinstall the filters, plug in or restore power, and run the hood on high for a few minutes to ensure proper airflow and to dry any remaining moisture.
- Spot-check for streaks: Inspect the exterior and wipe any remaining marks with a dry cloth or a small amount of degreaser spray as needed.
- Establish a routine: Schedule a quick clean every 1–2 weeks during heavy cooking or monthly for lighter use to prevent heavy buildup.
Troubleshooting
| Symptom | Likely Cause | Fix | Prevention |
|---|---|---|---|
| Grease remains after cleaning | Insufficient soaking or abrasive scrubbing | Soak filters longer; use a non-scratch brush; repeat cleaning | Clean regularly to prevent stubborn buildup |
| Streaks on exterior | Residue left from degreaser | Wipe with a damp cloth, then dry; use lighter polish on metal if allowed | Rinse cloth frequently during cleaning |
| Filters not drying | Heavy grease or humid environment | Increase air-drying time; remove and dry in a warm area | Dry filters thoroughly before reinstalling |
| Unusual odors after cleaning | Unrinsed cleaner or damp environment | Rinse surfaces thoroughly; run hood to dry | Ventilate kitchen during and after cleaning |
Common Mistakes
- Using abrasive cleaners or steel wool on painted or coated surfaces
- Neglecting the interior surfaces and ducts where grease can accumulate
- Not allowing filters to dry fully before reinstallation
- Ignoring safety precautions, especially around electrical components
Being mindful of these missteps helps protect the hood’s appearance and performance over time.
Tips For Best Results
- Schedule a quick wipe-down after heavy cooking to prevent grease buildup
- Use warm water and a gentle degreaser for best removal of heavy grease
- Keep an extra set of replacement filters if available for busy kitchens
- Test degreaser impact on a small inconspicuous area first if unsure about finishes
Call A Professional
Consider contacting a professional if you notice persistent grease inside the fan housing, loud fan operation, or a decrease in ventilation efficiency that persists after cleaning. Seek help if you find damaged filters, wiring exposure, or unusual electrical smells. Signs of mold or heavy corrosion also warrant expert assessment.
FAQ
How often should I clean my oven vent hood?
Generally, clean the exterior weekly with light maintenance and the internal filters monthly. Increase frequency during periods of heavy cooking.
Can I use bleach on vent hood surfaces?
Avoid bleach on most finishes; use a degreaser designed for kitchen use and follow the product label.
What’s the best tool for tight corners?
An extendable vent hood cleaning brush helps reach hard-to-clean corners and under the hood.
Is it safe to wash the filters in a dishwasher?
Check the manufacturer’s guidelines; many filters are dishwasher-safe, but some may warp or lose efficiency.
How do I know when the vent isn’t working correctly?
Unusual noises, reduced airflow, or visible grease buildup beyond routine cleaning indicate a potential issue needing inspection.
Should I seal or repaint the hood after cleaning?
Sealant or repainting is typically unnecessary and should be done only by professionals if there is surface damage.
Buying Guide
When choosing tools and products for cleaning an oven vent hood, consider several factors to balance effectiveness and ease of use.
- Size and reach: An extendable vent hood cleaning brush increases reach to difficult areas, especially for large hoods.
- Cleaning power: A dedicated kitchen degreaser spray for vent hood should cut stubborn grease without leaving residue. Opt for product compatibility with aluminum and painted surfaces.
- Materials: Use non-scratch brushes and microfiber cloths to avoid surface damage while removing grime.
- Ease of maintenance: Removable filters that are dishwasher-safe or easy to hand-wake up reduce downtime and effort.
- Noise and energy: If a hood is loud after cleaning, consider checking the fan bearings or scheduling professional maintenance.
- Placement considerations: Corner or island hoods may require longer, extendable tools and careful surface protection during cleaning.
In practice, combining a flexible cleaning brush with a purpose-made degreaser spray yields reliable results for most home kitchens. The goal is to maintain clear airflow and minimize grease buildup without harming finishes or seals. If the hood shows signs of intense buildup or damage, a professional assessment is wise to preserve performance and safety.
Leave a Reply