How to Clean Old Wood Furniture Naturally
Natural cleaning methods preserve the character of antique and vintage wood pieces while avoiding harsh chemicals. This guide focuses on gentle, effective techniques that lift dirt, restore luster, and protect wood finishes without compromising value or patina.
Careful cleaning can extend the life of heirloom furniture. By using readily available natural products and simple tools, you can achieve a refreshed look with minimal risk to delicate surfaces.
Quick Answer
To clean old wood furniture naturally, start with a soft, dry dusting, followed by a dampened microfiber cloth with a citrus-based wood cleaner for stubborn grime. Finish with a beeswax polish to nourish the wood and restore a protective sheen. Avoid over-wetting and test any product in a hidden area first.
What You’ll Need
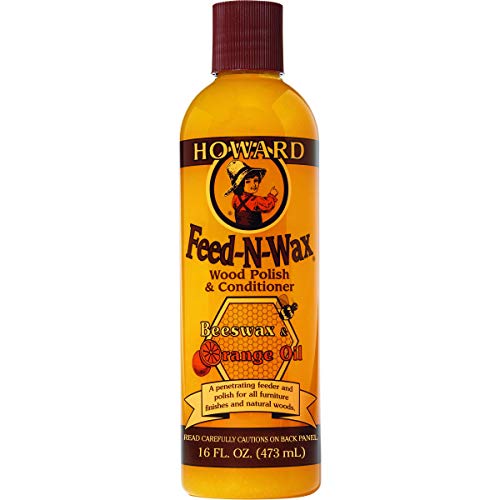
- Natural wood furniture cleaner beeswax polish antique furniture 16oz
- Citrus-based wood cleaner spray for antique wood furniture
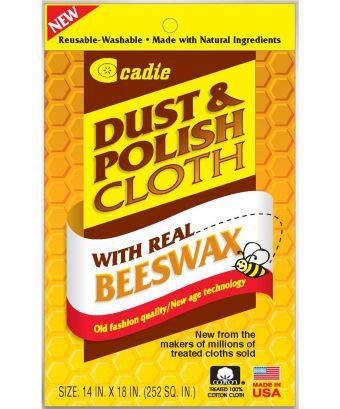
- Microfiber cleaning and polishing cloths set for wood furniture beeswax polish

Before You Start
Survey the piece for loose veneer, cracks, or flaking finish. Work in a well-ventilated area and place a soft, lint-free cloth beneath the furniture if you’re cleaning on a delicate surface. Protect surrounding surfaces with a drop cloth or old sheet. Plan for a short cleaning session rather than attempting a full restoration in one sitting. Test any cleaner in a small, inconspicuous spot first to confirm it does not alter the color or texture of the wood. Time estimate: 30–60 minutes for routine cleaning; longer for heavily soiled finishes.
Step-By-Step: How To Clean Old Wood Furniture Naturally
- Remove dust with a dry microfiber cloth, working with the grain to avoid scratching.
- Inspect the finish for signs of wear, water rings, or darkening; note areas that may need extra care.
- Lightly dampen a microfiber cloth with the citrus-based wood cleaner spray for antique wood furniture, then wipe in smooth, even motions.
- For stubborn grime, re-dampen the cloth slightly and repeat, avoiding saturated wood. Change to a clean section of the cloth as needed.
- Dry the surface promptly with another dry microfiber cloth to prevent moisture from penetrating joints or pores.
- Apply a thin coat of natural beeswax polish where the finish looks dull or dry, rubbing in circular motions with the cloth until the wax is evenly distributed.
- Let the wax set for a few minutes, then buff with a clean cloth until a soft sheen appears.
- Address detailed areas, such as inlays or carved edges, with a smaller brush or corner of the cloth to reach crevices without oversaturation.
- Revisit heavily used surfaces (tops, armrests) every few months with a light cleaning followed by wax to maintain protection.
- Store cleaners out of direct sunlight and away from heat sources to preserve the wood’s natural color and finish.
- Periodically assess the piece for signs of finish wear and consider professional refinishing if damage becomes extensive.
- Maintain a routine by dusting weekly and cleaning every few months to keep the natural glow without buildup.
Troubleshooting
| Symptom | Likely Cause | Fix | Prevention |
|---|---|---|---|
| Dull, streaky finish after cleaning | Over-wetting or insufficient drying | Wipe with a dry cloth; apply wax in thin layers | Use minimal moisture and dry thoroughly |
| Sticky residue after wax | Wax applied too thick | Buff with a clean, dry cloth until smooth | Apply wax sparingly and in a thin coat |
| Water spots or white rings | Moisture seepage | Gently buff and re-apply wax to restore barrier | Keep surfaces dry, wipe spills promptly |
| Finishes lift or crack after cleaning | Hard, incompatible cleaners | Stop using that product; switch to a milder cleaner and wax | Test cleaners first; use only recommended products |
| Unpleasant odor from cleaning | Poor ventilation or old finish smelling | Ventilate area and repeat cleansing with milder products | Clean in a well-ventilated space |
Common Mistakes
- Using harsh chemical cleaners on antique finishes
- Over-wetting wood or letting moisture linger
- Skipping a patch test before full application
- Avoiding wax altogether when the surface appears thirsty
Tips For Best Results
- Dust regularly with a dry microfiber cloth to minimize buildup and the need for deeper cleans.
- Choose a citrus-based cleaner that is labeled safe for finished wood and avoid ammonia or silicone-heavy formulas.
- Work in small sections and maintain a consistent technique to avoid uneven finishes.
- Opt for a beeswax polish that matches the wood’s tone and age to protect patina.
- Test any product in a hidden area before broad application to guard against color changes.
Call A Professional
Consider a professional conservator or furniture restorer if the piece shows signs of structural damage, veneer lifting, or finish loss beyond routine cleaning. Stop cleaning and seek expert help if you notice: deep cracks, warping, loose joints, or finish that rubs off with normal cleaning. For antique pieces with high value or sentimental significance, professional maintenance can preserve integrity and market value.
FAQ
Can I use lemon oil on antique wood furniture?
It can be used sparingly, but some existing finishes may react differently. Always test in a small area first and follow with a light wax if the finish looks dry.
Is citrus cleaner safe on all woods?
Citrus cleaners are generally safe for finished wood, but always test and avoid porous or painted surfaces that may be affected.
How often should I wax antique furniture?
Typically every 6–12 months, depending on use and climate. Reapply wax when surfaces look dry or dull.
What should I avoid when cleaning vintage wood?
Avoid soaking the wood, harsh solvents, ammonia-based cleaners, and abrasive pads that can scratch the finish.
Can I reverse water damage with natural cleaners?
Natural cleaners won’t reverse deep water damage; seek professional assessment for veneer lifting or structural concerns.
How do I maintain patina while cleaning?
Use gentle cleaners and light wax to preserve patina while keeping the surface nourished and protected.
Buying Guide
Choosing the right products supports safe, effective cleaning without harming aged finishes. Consider the following factors:
- Size and coverage: Look for bottles that fit your cleaning schedule; larger bottles reduce frequent repurchases.
- Noise level: Not applicable to cleaning products; this factor mainly applies to electric tools used during refinishing.
- Energy efficiency: Not applicable for manual cleaners; effective formulas reduce repeat cleanings and time.
- Controls: Favor spray cleaners with simple, labeled directions and clear test steps.
- Placement: Store cleaners in a cool, dry place away from sunlight to preserve product integrity.
- Finish compatibility: Ensure cleaners and wax are labeled safe for antique or finished wood to avoid finish damage.
- Material compatibility: Check that the product is suitable for the wood type (oak, teak, mahogany, etc.) and for veneers.
- Environmental considerations: Choose biodegradable, low-VOC formulas when possible for safer indoor use.
With the right natural products and careful technique, old wood furniture can regain its gentle glow while preserving its character. Does your piece deserve a careful, chemical-free refresh? Start with a simple dusting, test a citrus cleaner, and finish with a beeswax polish for lasting beauty.
Leave a Reply