How to Clean New Tile Before Sealing
Sealing new tile helps protect its appearance and longevity, but proper cleaning is essential before applying any sealant. This guide provides a practical, step-by-step approach tailored for American homes, using common tools and a pH-neutral cleaner to avoid damaging the tile and grout.
Quick Answer
Start with a thorough dry dusting, then wash surfaces with a pH-neutral tile and grout cleaner using a microfiber mop pad tile cleaning pad nonabrasive. Remove any stubborn residue with a tile scraper 4 inch handheld grout removal if needed, rinse, dry, and ensure surfaces are completely clean and dry before sealing.
What You’ll Need
- pH-neutral tile and grout cleaner 1 gallon
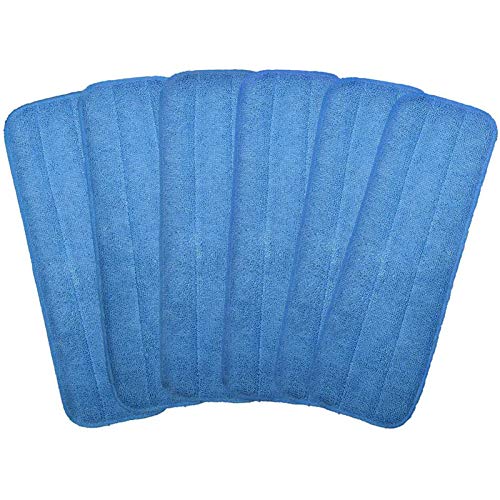
- microfiber mop pad tile cleaning pad nonabrasive 12×6 inches
- tile scraper 4 inch handheld grout removal for prep before sealing


Before You Start
Prepare the area by removing furniture and rugs. Ventilate the space and wear protective gloves. Check the tile manufacturer’s guidance regarding sealant compatibility. Plan for enough time to allow full drying between cleaning and sealing, typically 24–48 hours depending on airflow and humidity. Avoid using acidic or abrasive cleaners on natural stone or unglazed surfaces, which can etch or dull finishes.
Step-By-Step: How To Clean Tile Before Sealing
- Clear the area and sweep or vacuum the floor to remove loose dust and debris.
- Fill a bucket with warm water and apply a small amount of pH-neutral tile and grout cleaner according to the label.
- Dip your microfiber mop pad tile cleaning pad nonabrasive and wring out excess moisture. Mop the floor in sections, starting at the farthest corner and moving toward the exit.
- Rinse the mop pad frequently to avoid redistributing dirt. If pets or heavy foot traffic exist, repeat mopping and lightly scrub grout lines in a back-and-forth motion to dislodge embedded grime.
- For stubborn grout or tile residue, use a tile scraper 4 inch handheld grout removal to gently lift away residues from grout joints without scratching the tile surface.
- Rinse the surface with clean water to remove any cleaner residue. Use a damp cloth or mop with plain water and go over the entire area again.
- Dry the floor completely with a clean, dry microfiber cloth or allow air circulation to avoid trapped moisture under sealant.
- Inspect for haze or streaks. If present, repeat the cleaning step with fresh solution and ensure the surface is fully dry before applying sealant.
- Proceed to seal only after the tiles and grout are entirely clean and dry, following the sealant manufacturer’s instructions for cure time.
- Test a small inconspicuous area with the sealer first to confirm compatibility before full application.
Troubleshooting
| Symptom | Likely Cause | Fix | Prevention |
|---|---|---|---|
| Sticky or hazy film after cleaning | Cleaner residue or moisture trapped | Rinse thoroughly; dry completely | Use fresh water and allow ample drying time |
| Streaks on tile | Water spots or improper drying | Dry with a clean microfiber cloth | Wipe in the direction of grout lines |
| Grout still dirty after cleaning | Embedded grime in porous grout | Agitate grout with a soft scraper and re-clean | Regular maintenance cleaning after sealing |
| Sealant not adhering | Tile or grout not fully clean or dry | Re-clean, ensure complete drying | Allow full cure time before sealing |
Common Mistakes
- Using harsh or acidic cleaners on tile or grout, which can damage finishes.
- Not thoroughly drying the surface before applying sealer, leading to poor adhesion.
- Over-wetting porous grout, causing swelling or prolonged moisture.
- Skipping a test area for sealer compatibility.
Tips For Best Results
- Work in small sections to maintain a consistent cleaning routine and drying timeline.
- Use a fresh, clean microfiber pad for each pass to avoid reintroducing dirt.
- Consider mild grout brushes for stubborn joints, but avoid metal or stiff brushes that can scratch.
- Store cleaner and sealant in a cool, shaded area to preserve effectiveness.
Call A Professional
contact a professional if you notice cracked or damaged grout that may need regrouting, or if the tile shows signs of sealant failure after initial cleaning. Stop work and consult a pro if moisture appears trapped behind the grout or if you are unsure about product compatibility with your tile type.
FAQ
What is the best cleaner for new tile before sealing?
A pH-neutral tile and grout cleaner is ideal because it removes dirt without dulling or etching the tile or grout.
How long after cleaning should I seal tile?
Allow the surface to dry completely, typically 24–48 hours, depending on humidity and airflow.
Can I seal grout without cleaning it first?
No. Thorough cleaning ensures proper adhesion and prevents sealant failure.
What if I notice haze after sealing?
Wipe with a clean cloth and ensure the surface is fully dry before reapplying or contacting the sealer’s manufacturer for guidance.
Buying Guide
When choosing products for cleaning and sealing new tile, consider size, ease of use, and compatibility with your tile type. For the kit above, the included items cover the essential steps: a pH-neutral cleaner for safe cleaning, a microfiber mop pad for gentle yet effective cleaning, and a tile scraper for preparing grout joints. Look for a cleaner labeled safe for both tile and grout, and ensure the scraper is non-abrasive to protect tile surfaces. If the space is large or high-traffic, invest in a larger refill for the cleaner and a second mop pad to maintain performance. Noise considerations for electric cleaners are typically minimal, but consider a quiet pad system if the area is near bedrooms or offices. Placement of the cleaning station should keep cleaners away from children and pets, with proper ventilation. Finally, assess the sealant’s compatibility with your tile and grout material, and choose a product with the preferred durability and appearance benefits.
Leave a Reply